Yes. You read that right! You can install Windows 10, 8 0r 7 in your Mac computer. If you’ve hear about all the great features on Windows 10 but all you have is your Mac computer, today you’ll learn how to install Windows 10 on that Mac.
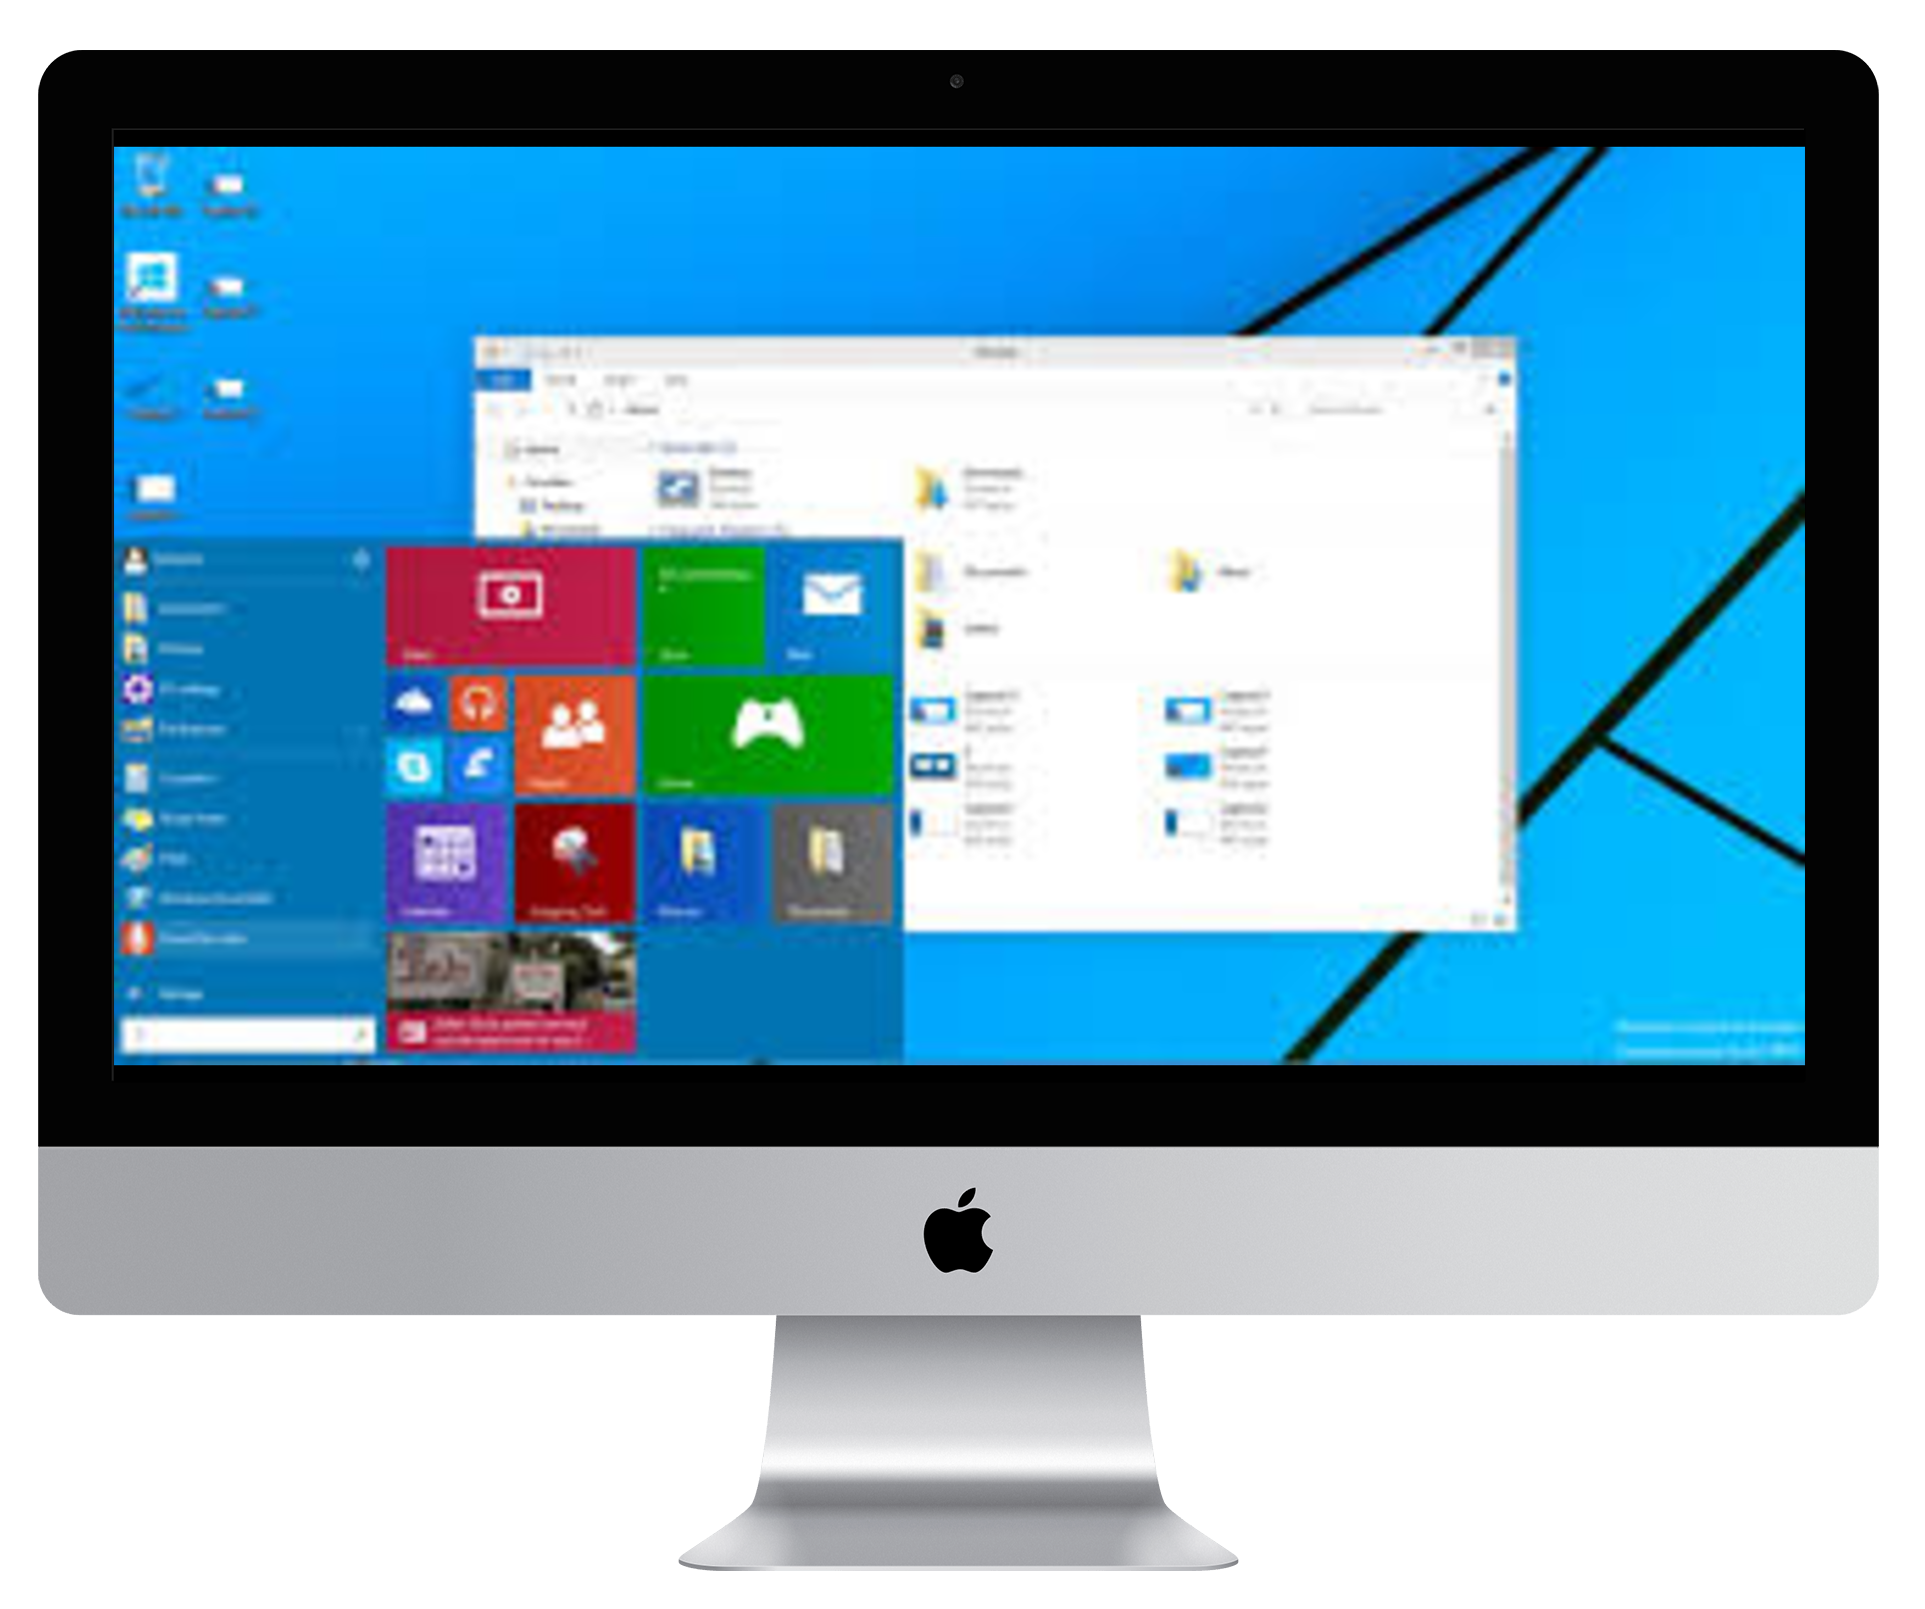
This started being possible when Mac computers started using Intel processors which are highly compatible with the Windows operating system structure. The Mac OS X also has a built in utility that facilitates this installation.
If you just want to test one or two Windows apps on your Mac, then you don’t really need to install Windows physically. You can use simulators like VirtualBox or VMware Fusion to run the software.
But if you want the whole Windows experience in your Mac, then you’ll need to do the install. The good thing about it is, Windows will get installed side by side to Mac OS so you can choose at start up which OS you want to boot. The Windows installation will
Requirements:
- A mac computer
- A windows operating system media;an ISO file. You can get one from Microsoft’s media creation tool. Save it somewhere in your Mac.
- A USB drive
Preparation:
- Prepare the USB flash and back up all it’s contents.
- Prepare your Mac and ensure you have enough disk space. At least 15 GB. Back up all important data elsewhere as a precaution.
- Plug in your Mac into a power source.
How To Install Windows on Mac
Power up your Mac and plug in the USB drive. Launch the Bootcamp assistant utility. Press Command + Space. then type Bootcamp and hit Enter. This will open the Bootcamp assistant application on your Mac. Make sure the two options in this window are checked.
‘Create a windows 7 or later version Install disk’ will create an a usb bootable disk from the Windows ISO file.
Click ‘Continue’. In the next screen, point the utility to where you have the ISO image and the destination to the USB drive.
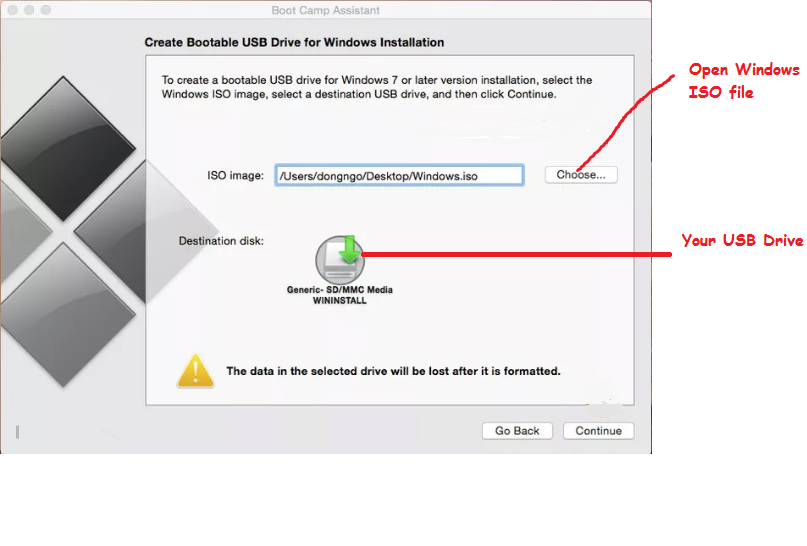
Click continue and Bootcamp will start creating a bootable USB drive. The screen will read: ‘copying windows files’. Give it time.
After this process, Bootcamp will automatically open the partitioner. I already mentioned that Windows will be installed on a separate partition. Choose the partition size you want for Windows using Bootcamp. You can partition equally if you want to. If you have more than one hard drives on your Mac, you can dedicate one to Windows.
After selecting the desired partition for Windows, click ‘Install‘ in the bottom right. Bootcamp will partition the hard drive and restart your Mac. When it restarts, it will boot from the USB containing Windows.
The Windows installation process is similar to the normal installation you would do on a Windows computer. Select the partition carefully and continue with the installation. The partition you created for Windows will have the name ‘BOOTCAMP’.
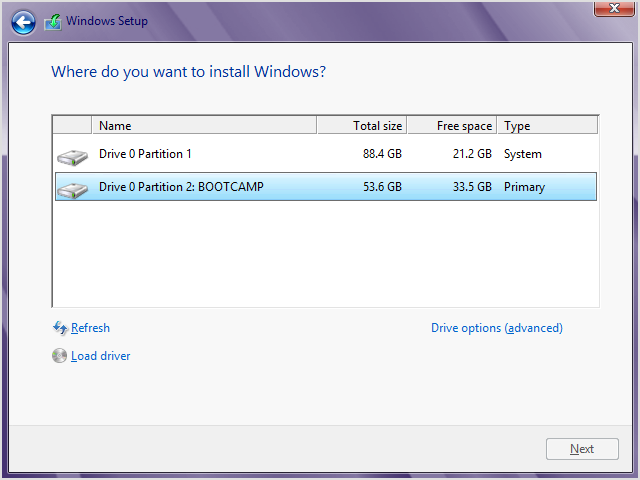
Continue with the setup process as usual. When the set up completes, you can remove your USB drive. Windows will look just normal on your Mac. every time you boot your Mac, you’ll have the option to choose whether you’ll load Windows or Mac OS.
In Windows on Mac you can install all the Windows applications you want and enjoy all the Window prviledges you want. In the system tray, there’s a Bootcamp control panel that allows you to choose the default operating system that loads when you don’t choose which one to load.
How To Remove Windows From Mac:
If you’re tired of having Windows operating system on your Mac, the removal process is much simpler. Before you start the removal process, backup any files you might have saved while using windows.
Boot your Mac into Mac OS and launch the Bootcamp assistant again. When launched, you’ll see the option to ‘Remove windows 7 or later version’.
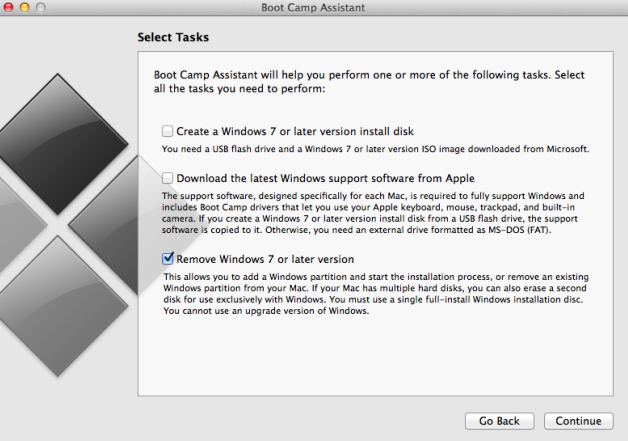
Select the option and continue. Follow the on screen instructions to remove Windows. Windows will be removed completely and the partition reclaimed automatically.
