To ensure your Gmail remains confidential and secure, you can lock the Gmail app on your iPhone with a Face ID & Passcode. In the digital era, our smartphones have become the gateway to our personal and professional lives, carrying a treasure trove of sensitive information, including emails.
With the increasing need for privacy and security, it’s crucial to take proactive steps to protect our email accounts from unauthorized access. One effective way to achieve this is by locking the Gmail app on your iPhone.
Locking your Gmail app adds an extra layer of protection, ensuring that even if someone gains physical access to your iPhone, they won’t be able to access your emails without the designated authentication method. Whether you’re concerned about sensitive work emails or personal conversations, this security measure provides peace of mind.
Read: How To Get The New Twitter Logo
Shortcuts App On iPhone
While there are obviously some apps that support Face ID & Passcode natively, like: WhatsApp, Dropbox, Notes, Amazon and PayPal – there are some that do not. These include Gmail, Photos and Messages. In an ideal world, you’d probably want them to.
Follow these simple steps to lock any app on your iPhone without the need for third-party apps or complex settings. We are simply going to go for a workaround using the Shortcuts app that comes pre-installed on your iPhone.
Lock Gmail App On iPhone
First, find and open the Shortcuts app on your iPhone (it comes pre-installed on your iPhone). Tap on the Automation tab and either tap on + if you have other automations there already. If not, select the New Automation option.
Under Personal Automation, scroll down and look for App. This is the option you want to choose.
In the next page, set the parameters for the app, under the When option. For the App section, tap on Choose and from the list, select Gmail, because it is the one you want to lock with Face ID & Passcode. Once you select Gmail, tap on Done. This will take you back to the parameters page.
In the parameters page, you should also see two options under the App section: Is Opened and Is Closed. Make sure that Is Opened is the option that is checked.
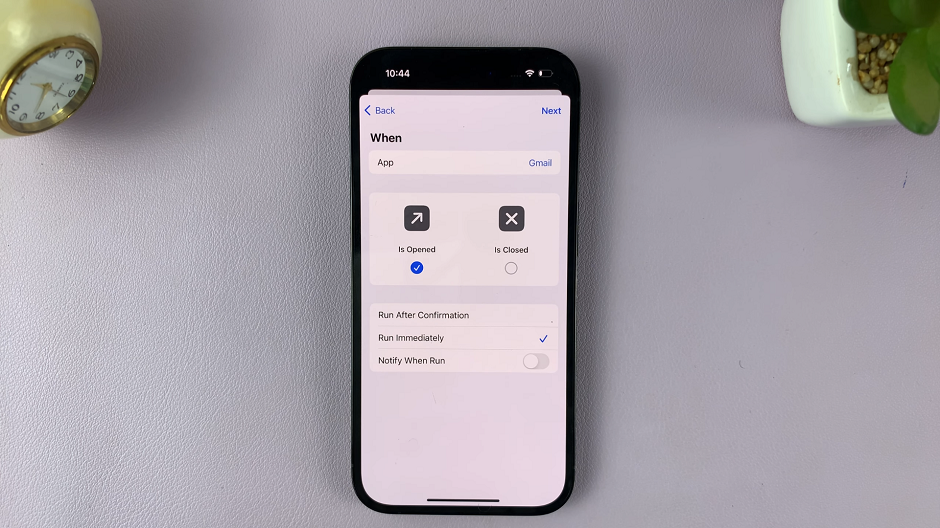
You should also see the Run After Confirmation and Run Immediately options. Select Run Immediately and consequently ensure that the Notify When Run option is toggled off.
In the page labeled When Gmail is opened, tap on New Blank Automation.
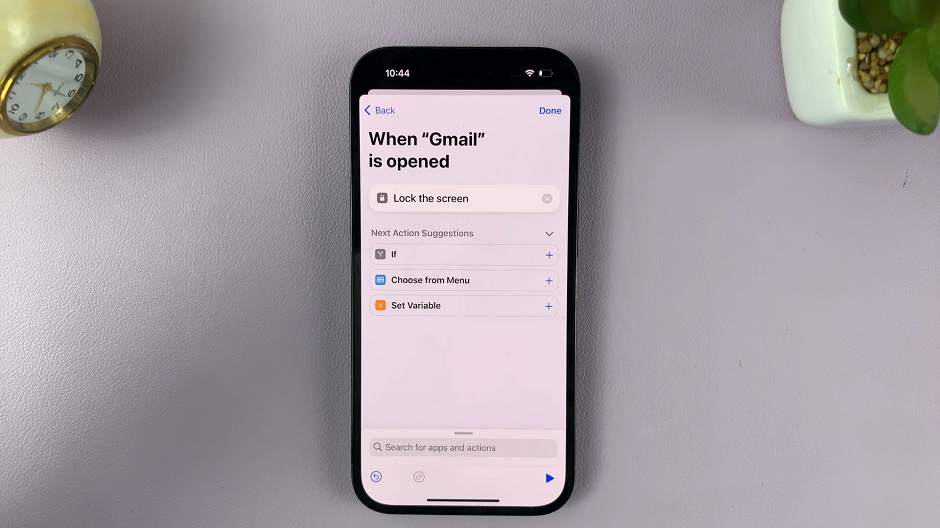
Then, select the Add Action option and choose or search for Lock Screen. You can set the other options for If, Choose from Menu and Set Variable, but this should be sufficient.
Tap on Done to save the automation.
Under the Automation page, you should now see the one you have set if it is one or among a list of others. The automation should read When Gmail is opened. Lock Screen.
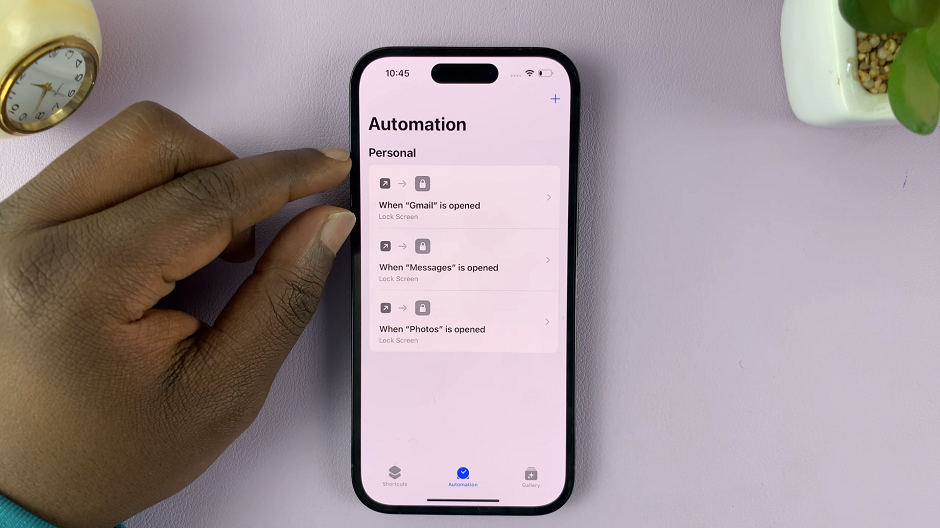
The Gmail app will now lock every time you open them, and you’ll be prompted to enter your Face ID or Passcode to unlock them. Test this with the Gmail app, to see if the automation works. It should.
Delete Gmail Lock Screen Shortcut
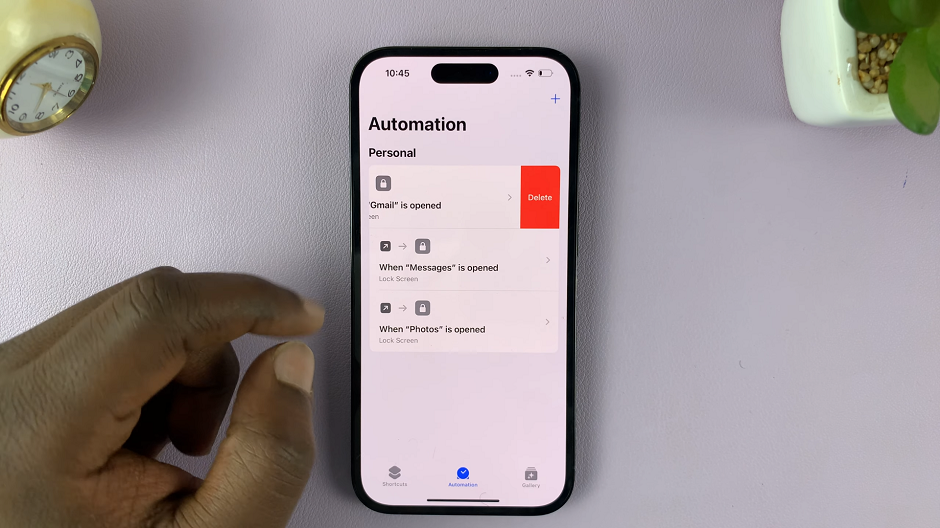
If you no longer want to lock the Gmail app, you need to delete the shortcut. Simply go to the Shortcuts app and find the lock screen shortcut for Gmail under Automations tab.
It should be labelled When Gmail is opened. Lock Screen. Swipe left to reveal the Delete option. Tap on Delete and Gmail will no longer require a Face ID or Passcode to open.
Tips for Enhanced Security
Regularly Update: Keep your iPhone, Gmail app, and other apps updated to ensure you have the latest security patches.
Two-Factor Authentication (2FA): Enable 2FA for your Gmail account for an added layer of security during the login process.
Auto-Lock Timer: Adjust your iPhone’s auto-lock timer to lock the device when not in use, reducing the risk of unauthorized access.
Avoid Public Wi-Fi: Be cautious when accessing your Gmail app on public Wi-Fi networks, as they can be vulnerable to hacking.
Locking the Gmail app on your iPhone is a proactive step to safeguard your email communication from prying eyes. Whether you choose biometric authentication or a passcode, customizing your Gmail app’s security settings empowers you to take control of your digital privacy.
By following these step-by-step instructions and implementing the provided tips, you’ll fortify your Gmail app against potential threats and enjoy the confidence that your emails are safe and confidential in the palm of your hand.
Also Watch: How To Lock Any App On iPhone
