In the ever-evolving landscape of smartphone customization, Android users often seek ways to enhance their device’s functionality and user experience.
One such desire is the ability to make the lock screen auto rotate, allowing for a seamless transition between portrait and landscape orientations.
In this guide, we’ll walk you through the comprehensive step-by-step process on how to make your Android lock screen auto rotate.
Also Read: How To Turn OFF Spotify Dark Mode
How To Make Android Lock Screen Auto Rotate
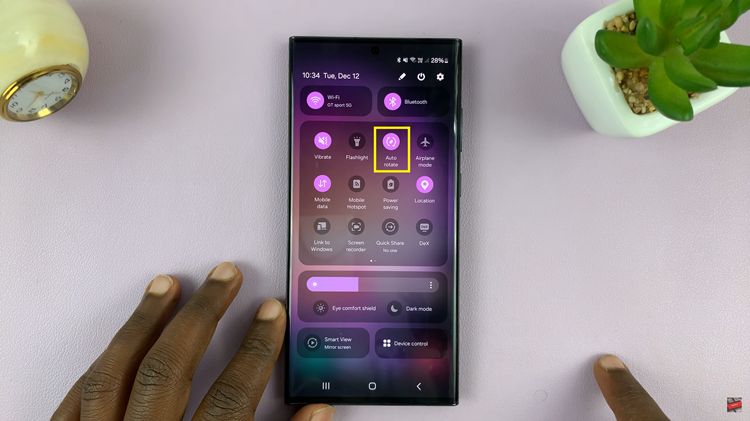
To initiate the process, begin on your Android device’s home screen. Swipe down to reveal the Quick Settings menu, usually located at the top of the screen. In this menu, look for the auto rotate icon, which is typically represented by a circular arrow. Once you’ve located it, perform a long press on the auto rotate icon.

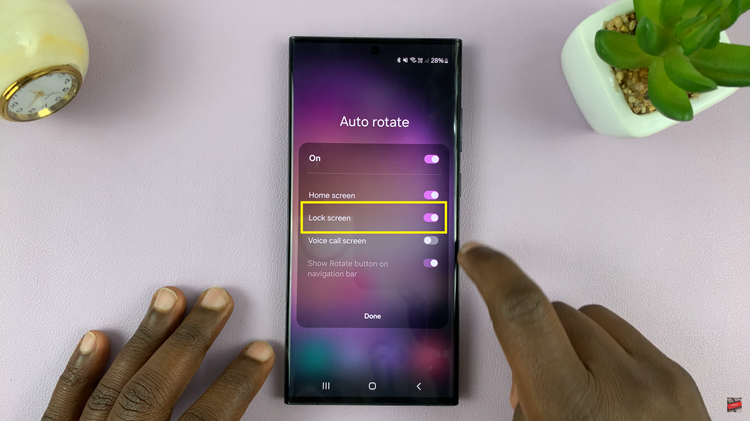
Upon long-pressing the auto rotate icon, a menu will appear with various options related to screen rotation. Look for the option labeled “Lock Screen” within this menu. Tap on the toggle switch next to it to enable lock screen auto rotation. After making this selection, find and tap the “Done” button to confirm your choice.

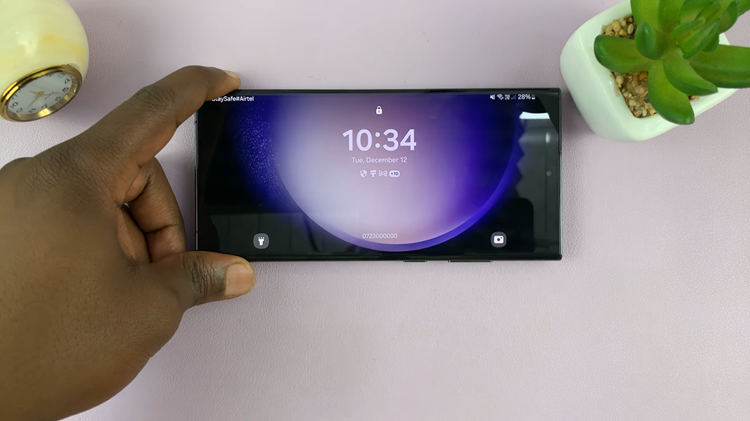
Now that you’ve enabled lock screen auto rotation, it’s time to test the feature. Navigate to your lock screen and turn your device into landscape view. You should immediately notice the lock screen adapting to the landscape orientation, demonstrating that the auto rotation feature is now active for the lock screen.

By following these simple steps, you’ve successfully provided your self with a more dynamic and versatile user experience. Whether you’re watching videos, playing games, or simply prefer using your device in landscape mode, this customization option adds a new dimension to how you interact with your Android device.

