Connecting your Android phone to a Wi-Fi network is an essential step for seamless internet access. Automating this process can save time and effort, especially if you regularly connect to the same networks.
Android devices offer various options to automatically connect to Wi-Fi networks, making your internet experience smoother.
Here’s a guide on how to make your Android automatically connect to WiFi networks.
Watch: How To Free Up Storage Space On Android Phone
To Make Android Phone Automatically Connect To WiFi
Firstly, navigate to the “Settings” menu on your Android device. Once in Settings, tap on the “Wi-Fi” or “Connections” option to proceed.
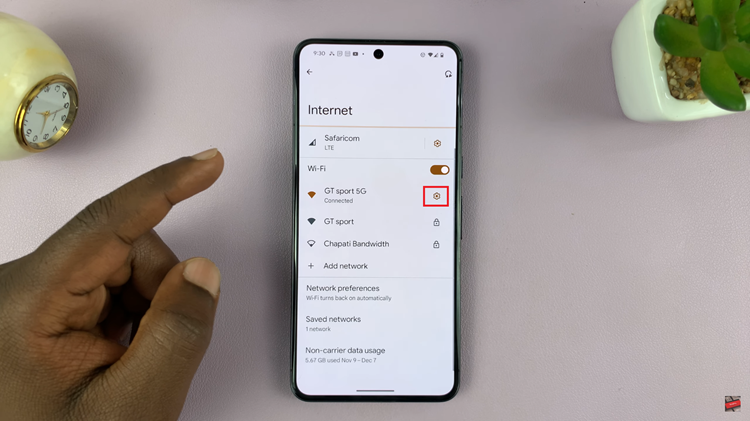
Scroll through the list of available networks and select the one you want to modify. At this point, tap on the “Settings” icon next to the WiFi network or select the WiFi to view the network details.

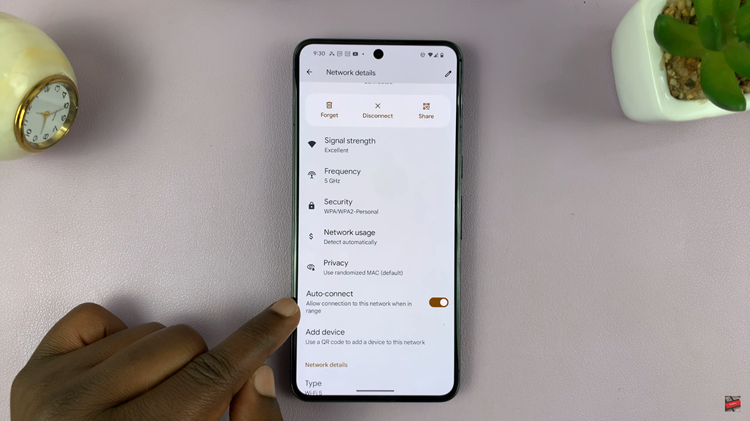
Within the network details, scroll down and find the “Auto Connect” option. Following this, toggle on the “Auto connect” option to allow automatic connection in the future.

In conclusion, automating Wi-Fi connections on your Android phone can significantly enhance your user experience by effortlessly connecting you to preferred networks. Let us know in the comment section below if you have any questions or suggestions.

