Microsoft paint is a default program in your windows operating system that you can use to manipulate images and do some painting if you want. It’s obviously not advanced as Photoshop and other photo editors but it can get you out of a sticky situation quickly.
Before you start, you need to understand what kind of picture resizing you want to do. If you want to only use a portion of a picture, then you need to crop out the parts you’re not interested in.
How To Crop an Image
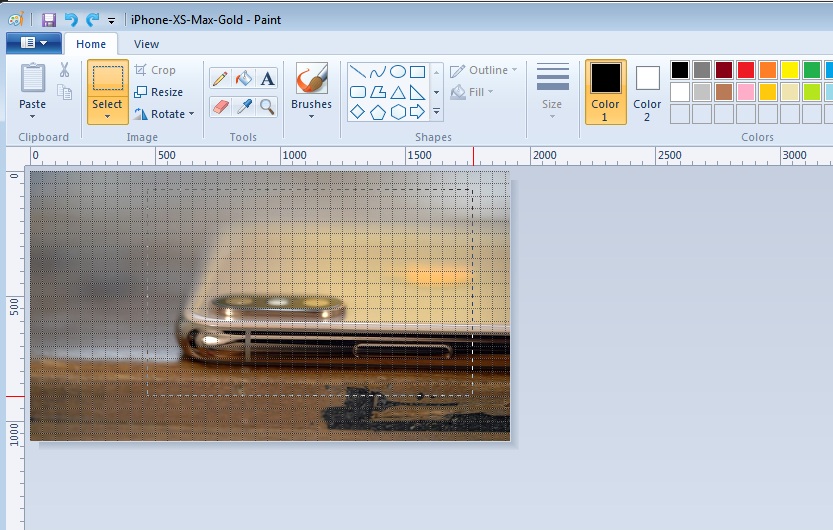
Cropping a picture in Paint is a very straight forward process. Right click on the photo and select ‘Open With -> Paint‘. Once the image is open inside paint, identify the section of the photo you’re interested in. Click on ‘Select‘ in the menu bar at the top.

Then drag your mouse with the left mouse button held down across the image to draw a rectangle over the area you’re interested in. Then click on ‘Crop‘ and the area that’s not selected will be removed. You can now click on ‘Save‘.
How To Resize an Image
Resizing is different from cropping because all the contents of the image are maintained but they are made to fit in a smaller area. The same way you would resize a window on your computer to see what’s behind it.
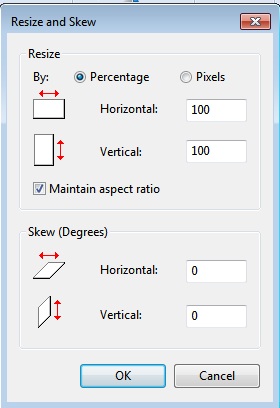
To do this in paint, click on the ‘resize’ button in the menu bar and this will open a pop up Window with the resize options for you to choose.

In the dialogue box, you can choose to either reduce the image size by a percentage of the original or you can define the exact number of pixels.

With the ‘Aspect ratio‘ check box checked, the image will maintain it’s shape when you resize either the horizontal or vertical size. If you’d like to be in complete control of the dimensions on either side (if maybe you want to turn a rectangular image into a square), then you can un-check the aspect ratio checkbox.
You also have some skew settings for your troubles. Anyway, remember to save changes when you’re finished. Okay Desmond?
Also Read: How To Quickly Resize Images Without Losing Quality

