Steam users can now choose who gets to access their profile and information, like hours spent on a game, friends list, and games they own. If a Steam account is private, you cant be able to see the games, and friends they have on their profile.
But once you set your account to private, no one will be able to view your information unless you grant them access to it. You can have exceptions whereby you can only allow friends or close friends to view your information. In the guide below, learn how to make your Steam profile public or private.
Watch: How To Add Funds To Steam Wallet
How To Make Steam Profile Private or Public
First, launch the Steam application and sign in to your account.
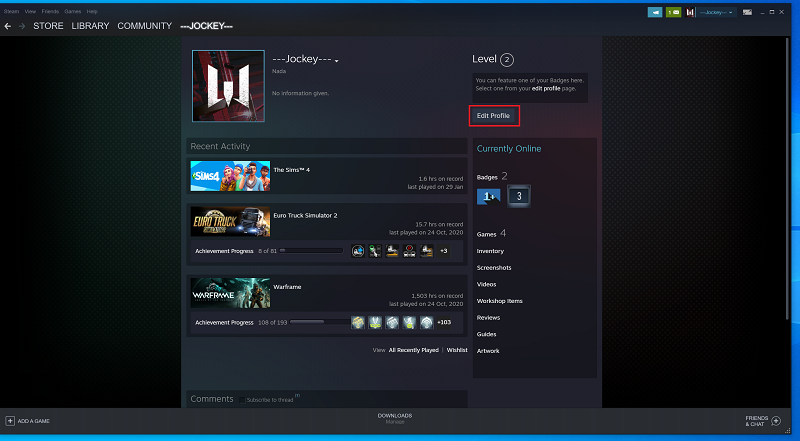
Next, click on your Steam name on the top right of the screen and select View my Profile on the drop-down menu that appears.

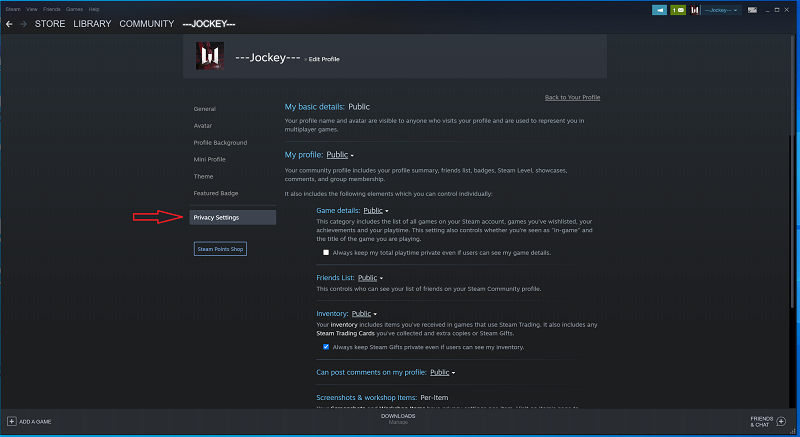
Next, click on Edit Profile, then select Privacy Settings from the left-hand side menu. This will show you the status of your account. By default, all Steam accounts are public.


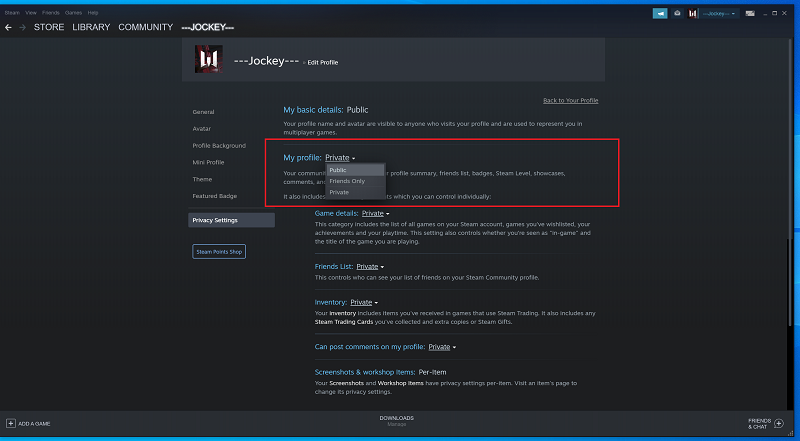
Click on Public, located beside My profile, and select Private from the drop-down menu that appears. Once you choose private, the other settings such as Game Details, Friends List, and Inventory will automatically become private.

Finally, if you want to switch back to public, follow the above steps and select Public. Hope this helps. In case of questions and suggestions, please let me know in the comment section below.
Also read: How To Install Steam On Mac

