In this article, we will guide you through the process of making your YouTube subscriptions public, allowing you to expand your reach and connect with like-minded individuals.
YouTube has become a hub of creative content and a platform where people connect, share, and discover new channels. As a viewer, you might have come across some amazing content creators and wish to showcase your favorite channels to the world. That’s where making your YouTube subscriptions public comes into play.
By making your subscriptions public, you can share your interests, engage with other viewers, and foster a sense of community within your channel.
Watch: How To Make Your YouTube Subscriptions Private – Hide YouTube Subscriptions
Make YouTube Subscriptions Public
First, ensure you are logged in to your YouTube account using your preferred web browser.
Then, click on your profile picture in the top right corner of the YouTube homepage. A dropdown menu will appear; select My channel from the list.
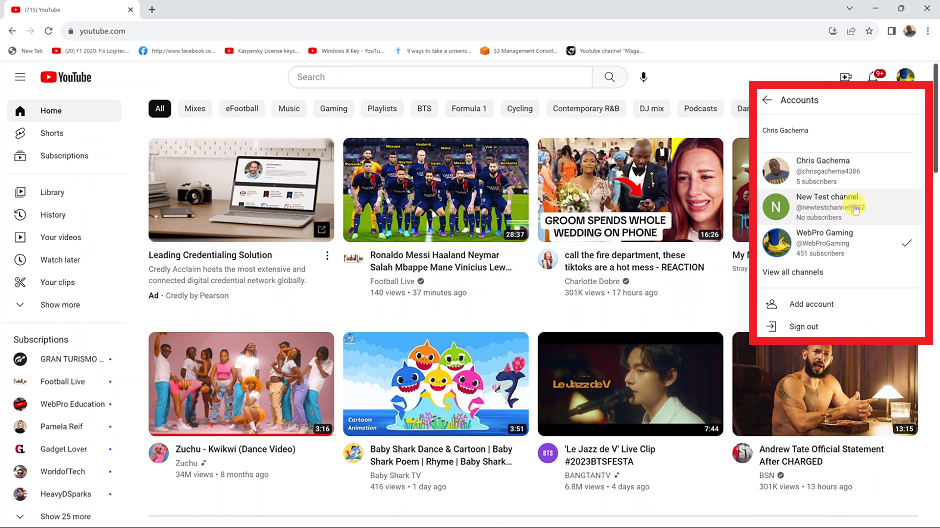
Equally important,If you have logged into multiple channels and the channel you want is not selected, click on Switch account and select the one you want.

Next, from the profile menu, click on the Settings button. This will direct you to the Settings page of your YouTube.
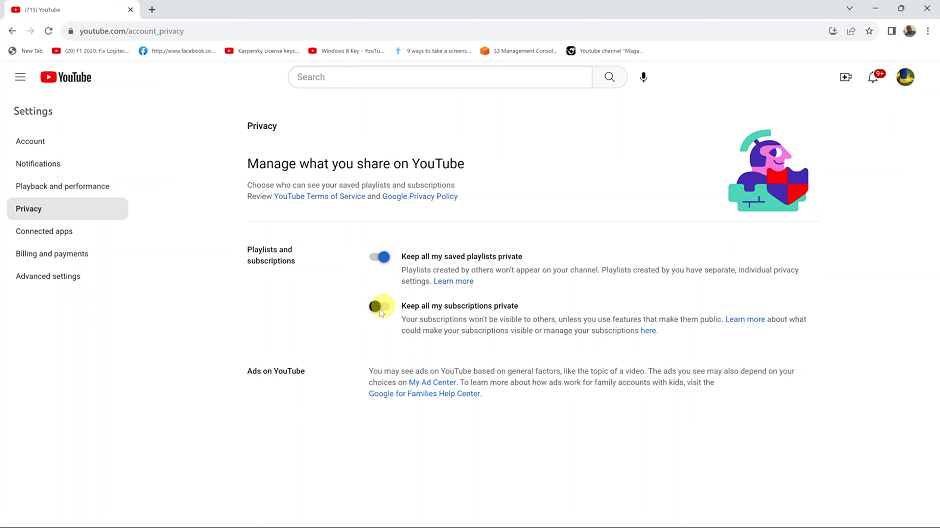
On the left-hand side of the settings page, select Privacy from the panel. Under Playlists and subscriptions, you’ll see an option labeled Keep all my subscriptions private.

Finally, click on the toggle button for this option to turn it off. This will make your subscriptions public once again.
Once you’ve disabled the Keep all my subscriptions private option, your subscriptions will be visible to others. Your channel visitors will be able to see the channels you’re subscribed to.
Read: How To Prevent WhatsApp Group Members Sending Messages

