In this tech-savvy era, wireless audio accessories have become indispensable companions for many individuals. Oraimo FreePods 4, with their advanced features and sleek design, stand out as a popular choice among users.
If you’ve recently acquired a pair of these cutting-edge earbuds and wish to pair them with your Windows PC for seamless audio streaming, fret not, we’ve got you covered.
In this guide, we’ll walk you through the comprehensive step-by-step process on how to pair 7 connect Oraimo FreePods 4 to Windows PC.
Also Read: How To Pair & Set Up Oraimo FreePods 4 With Android Phone
How To Pair & Connect Oraimo FreePods 4 To Windows PC
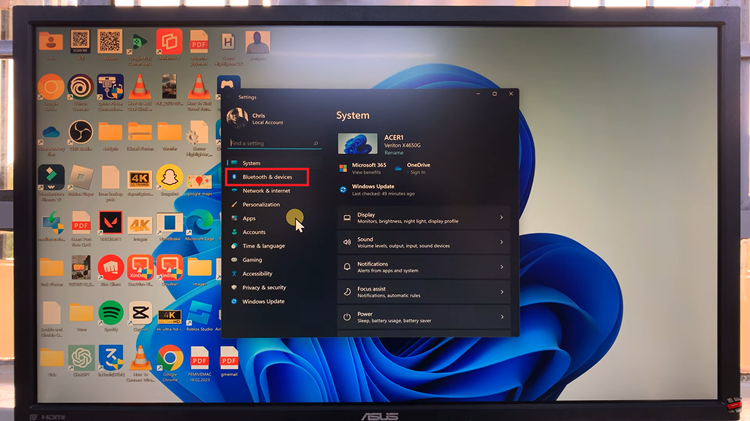
Before commencing, ensure that your FreePods 4 are charged, then place them in pairing mode. Navigate to the Bluetooth settings on your Windows PC. This can be done by clicking on the Bluetooth icon in the system tray or by accessing the Bluetooth settings through the Settings menu.

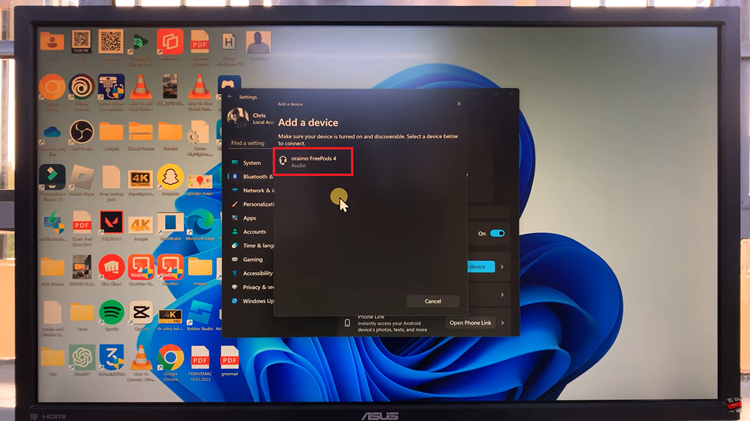
Within the Bluetooth settings menu, locate the option to add a new device. Click on this option to prompt your PC to begin searching for nearby Bluetooth-enabled devices. As your Windows PC scans for available devices, you should see “Oraimo FreePods 4” appear in the list of discoverable devices.

Click on the FreePods 4 entry to select it as the device you wish to pair with your PC. Once you’ve selected the Oraimo FreePods 4, your Windows PC will initiate the pairing process with the earbuds automatically. Now you can relish the freedom of wireless audio streaming.
Pairing your Oraimo FreePods 4 with your Windows PC is a straightforward process. By following these simple steps, you can unleash the full potential of your FreePods 4 and enjoy immersive audio. Whether it’s for listening to music, watching videos, or engaging in virtual meetings without the hassle of tangled cords.
Also Watch: How To Receive Incoming Phone Calls With Oraimo FreePods 4

