Unlock the potential of seamless control over your Roku TV by actively engaging in the remote pairing process. By initiating this connection, you ensure that your remote communicates flawlessly with your Roku TV, opening up a world of entertainment at your fingertips.
In this step-by-step guide, we will walk you through the dynamic steps required to put your Roku remote into pairing mode.
Let’s dive into the active measures needed for a swift and successful pairing experience.
Watch: How To Turn OFF Closed Captions On Roku TV
To Put Roku TV Remote In Pairing Mode
First, make sure the remote has fresh batteries. A weak or depleted battery can interfere with the pairing process. If needed, replace the batteries and try again. Next, ensure that your Roku TV is powered on and ready to receive signals. If the TV is turned off, turn it on using the power button on the TV or the Roku remote.
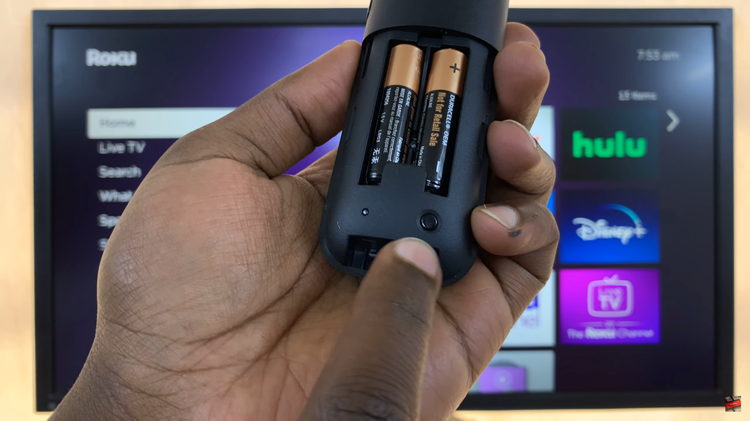
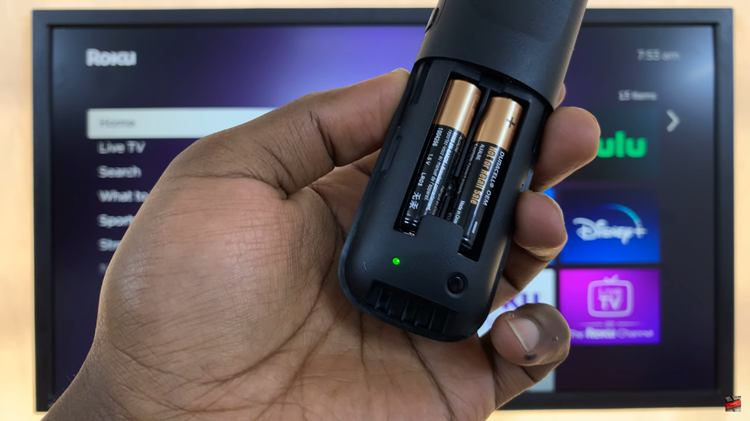
At this point, find the pairing mode button. The pairing button is located inside the battery compartment of the remote. Open the compartment and look for a small black button below the batteries.

At this time, to place the Roku remote into pairing mode, press and hold the pairing button on the remote until you see an LED light start to blink on the remote. This blinking light indicates that the remote is now in pairing mode and actively seeking a connection with the Roku TV.

By following these simple steps, you can successfully put your Roku TV remote in pairing mode. Let us know in the comment section below if you have any questions or suggestions.

