Maximizing the functionality of your Samsung Galaxy Fit 3 involves more than just strapping it on your wrist. This sleek fitness tracker offers a myriad of features tailored to your health and wellness needs. One of its customizable features, often overlooked yet incredibly useful, is the ability to rearrange tiles on its display.
Imagine having the power to tailor your Galaxy Fit 3’s screen to precisely fit your preferences, ensuring instant access to the information you care about most. Whether you’re a fitness enthusiast eager to monitor your progress at a glance or someone who values staying connected with notifications, rearranging tiles can revolutionize your Galaxy Fit 3 experience.
In this guide, we’ll dive deep into the steps required to rearrange tiles on your Samsung Galaxy Fit 3.
Watch: How To Turn OFF Store Mode On Samsung Smart TV
To Rearrange Tiles On Samsung Galaxy Fit 3
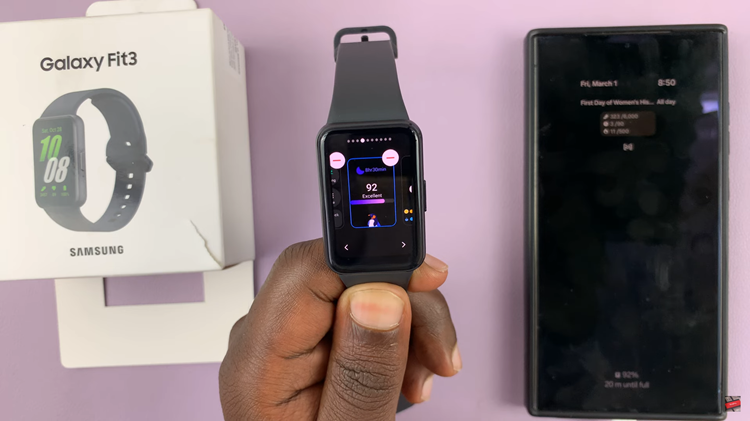
On your Samsung Galaxy Fit 3, navigate to the home screen by pressing the physical button or tapping on the screen. From the home screen, swipe left or right until you find the tile you’d like to move.
At this point, long press on the tile, and from here, you’ll see some directional arrows appear. Tap on the direction either left or right to move the tile to the desired location. Once you reach the desired location, tap on the icon, then tap on it again and the changes will be applied.

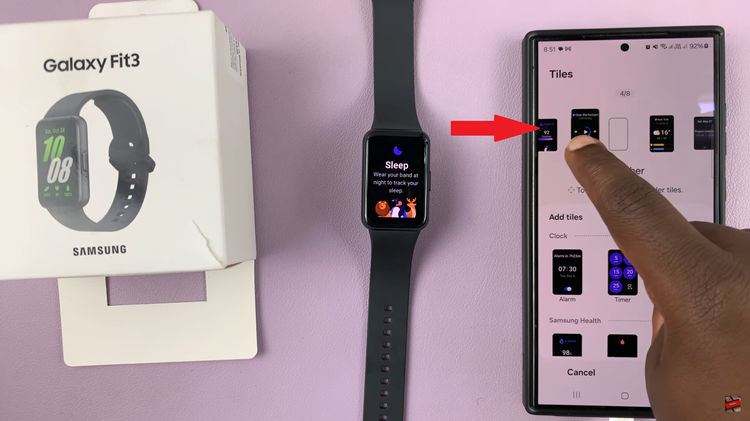
Alternatively, you can rearrange the tiles on Galaxy Fit 3 using the Galaxy Wearable app. Simply, launch the application, then select “Tiles” from the home screen. At this point, find the tile you’d like, touch and hold, then move it to the desired location. Once done, tap on “Save” and the changes will be applied.

By following these straightforward steps, you can easily rearrange tiles on your Samsung Galaxy Fit 3 to customize the device’s display and prioritize the information that matters most to you.
Read: How To Change Screen Brightness On Samsung Galaxy Fit 3

