The Samsung Galaxy S24 series, comprising the S24, S24+, and S24 Ultra, is equipped with advanced features and capabilities to enhance the user experience. One noteworthy feature that users often find useful is the ability to record their device’s screen.
Whether you want to capture a tutorial, showcase a gaming achievement, or simply save a memorable moment, screen recording can be a valuable tool.
In this guide, we will walk you through the steps to record your screen on the Samsung Galaxy S24 series.
Watch: How To Set Up Fingerprint On Samsung Galaxy S24
To Record Screen On Samsung Galaxy S24
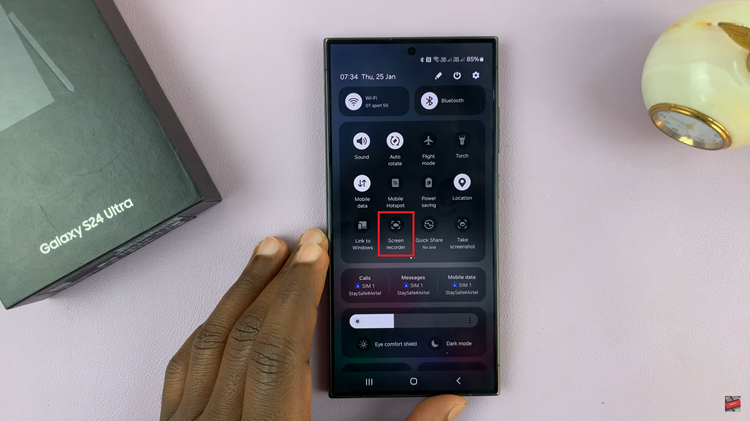
The first step to initiate screen recording on your Samsung Galaxy S24 device is to access the Quick Settings panel. Swipe down from the top of the screen to reveal the notification shade, and then swipe down again to reveal the Quick Settings panel.
At this point, look for the “Screen Recorder” icon in the Quick Settings panel. If you don’t see it immediately, you may need to swipe left or right to find it. Once you locate the Screen Recorder icon, tap on it to start the recording process.

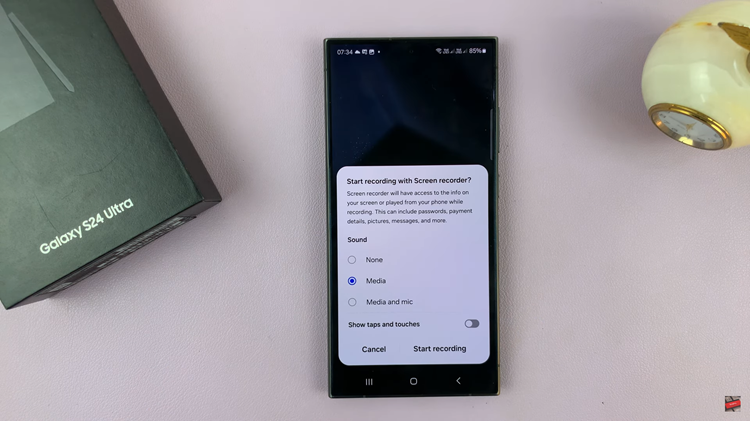
Before you begin recording, the device will prompt you to customize your recording settings. Once you’ve adjusted your settings, tap the “Start Recording” button to begin recording. The device will display a countdown, giving you a brief moment to prepare. Once the countdown reaches zero, the screen recording will commence.

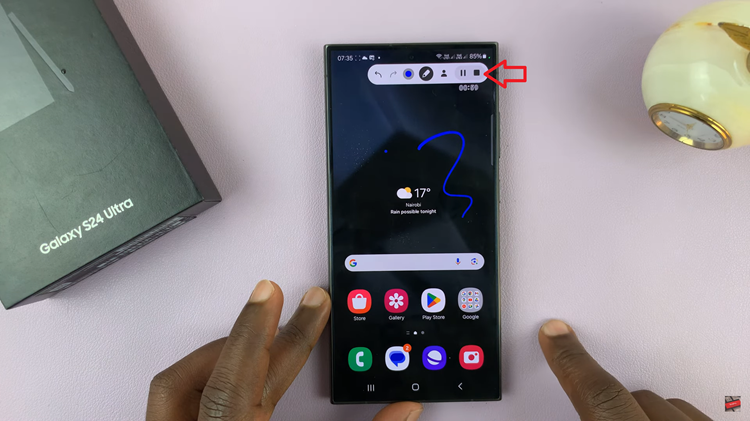
To stop the screen recording, tap the “Stop” button. Alternatively, you can swipe down the notification shade and find the ongoing screen recording notification. Tap on it and select “Stop” to end the recording. Your screen recording will then be saved to your device.

In conclusion, screen recording on the Samsung Galaxy S24 series is a straightforward process that allows users to capture and share their device’s display with ease. Whether you’re creating content for personal use or sharing tutorials with others, this feature adds versatility to your smartphone experience.

