Capturing precious moments on our iPhones has become an integral part of our lives. However, sometimes we find ourselves disappointed when a seemingly perfect shot turns out blurry.
Thankfully, with advancements in technology, it is now possible to salvage those blurry iPhone photos and restore their clarity.
In this article, we show you how to remove the blur from you iPhone photos allowing your images to have a beautiful background.
Also Read: How to Mute Dial Pad Sound on iPhone
How To Remove Blur From iPhone Photos
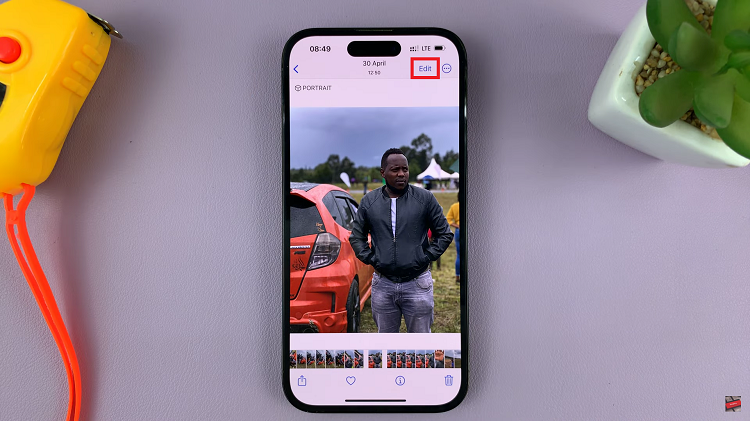
To get start, open the “Photos” app on your home screen and select the photo you wish to edit. Tap on the “Edit” button located at the top-right corner of the screen.

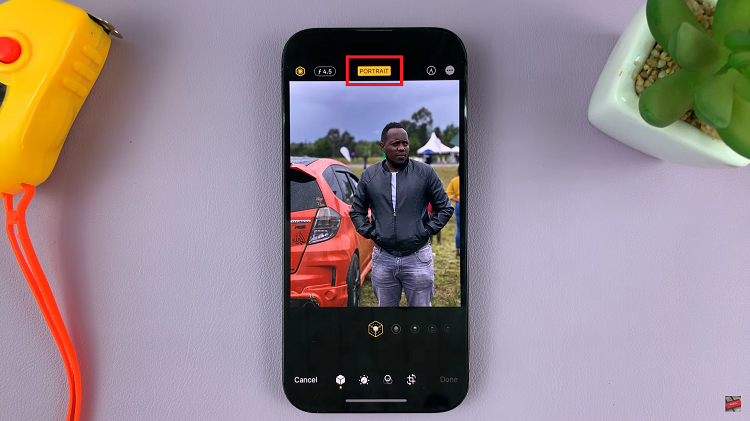
Next, locate and tap on the “Portrait” icon that is at the top with a yellow button to turn it off. This option allows you to remove or add the background blur in your portrait mode photo.

Once you’re satisfied, tap on the “Done” button at the bottom-right corner of the screen. This will save your edited photo, replacing the original version in your Photos library.
And thats how to go about it. Its an easy and straightforward process. Let us know in the comment section below if you have any questions or suggestions. If you found the article helpful, please share it with your friends.
Watch: How To Customise The Assistive Touch Button Menu On iPhone

