In this article, we’ll provide you with a comprehensive guide on how to safely remove/change the battery on your HP laptop.
The battery is the lifeblood of your laptop, providing the power needed to keep you productive and connected throughout the day. However, over time, batteries degrade, leading to diminished performance and reduced battery life.
When it’s time for a change, knowing how to remove or replace the battery on your HP laptop can save you time and money.
Read: How To Set Schedule For Always ON Display On Samsung Galaxy A55 5G
Remove Battery On HP Laptop
Before you begin, it’s essential to gather the necessary tools. You’ll typically need a small Phillips-head screwdriver, although the specific tools required may vary depending on your HP laptop model. Additionally, make sure to shut down your laptop and disconnect it from any power source to prevent accidents.
The next step is to locate the battery compartment on your HP laptop. In most models, the battery is located on the underside of the laptop, beneath a panel. Refer to your laptop’s user manual or search online for specific instructions tailored to your model.
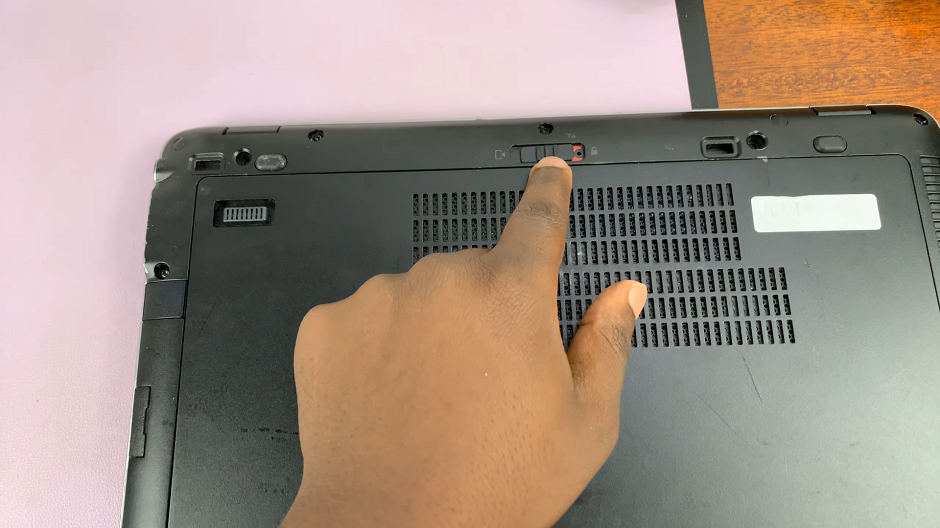
Once you’ve located the battery compartment, carefully remove the screws securing the battery cover using the Phillips-head screwdriver. Keep track of the screws to avoid misplacement.
If your laptop doesn’t have screws, then it likely works with latches. Push open the latches to release the back panel. Then slide the panel to remove it.
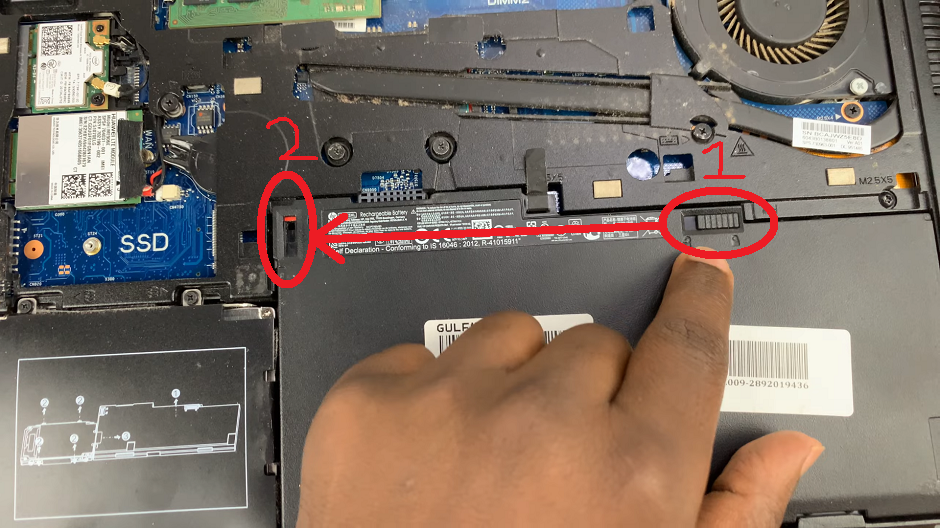
After removing the cover or panel, you should see the battery nestled inside its compartment.
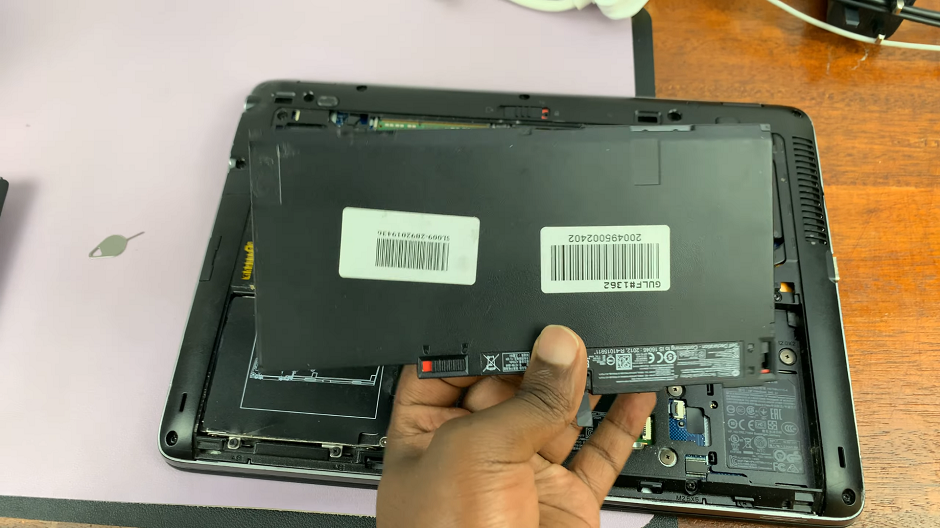
Before removing the battery, you may find that it i also secured by latches, screws or clips as well. Carefully loosen any securing mechanisms and lift the battery out of its compartment.
With the battery unlatched, you can now safely remove it from its compartment. You may have a little flap you can use to pull out the battery.
Change Battery On HP Laptop
If you’re replacing the old battery with a new one, simply reverse the steps outlined above. Insert the new battery into the compartment, ensuring that it aligns correctly. Secure the battery in place with any screws, latches or clips that were removed during the disassembly process. Finally, close the panel.
After installing the new battery or reattaching the old one, it’s time to test your laptop. Power on the laptop and ensure that it boots up correctly. Check the battery indicator to confirm that the new battery is recognized and charging properly.
Learning how to remove or change the battery on your HP laptop is a valuable skill that can prolong the lifespan of your device and ensure optimal performance. By following the steps outlined in this guide, you can safely and confidently replace your laptop battery whenever necessary.
