The M4 iPad Pro is a cutting-edge device packed with advanced features, one of which is the support for eSIM technology. eSIM (embedded SIM) allows users to activate a cellular plan without needing a physical SIM card, making it a convenient option for those who frequently switch carriers or travel internationally.
However, there might come a time when you need to remove or delete an eSIM from your M4 iPad Pro. This guide will walk you through the steps to do just that.
An eSIM is a digital SIM that allows you to activate a cellular plan without having to use a physical SIM card. This technology offers several advantages, including the ability to store multiple carrier profiles, switch between plans without needing a new SIM card, and reduce the clutter of carrying multiple physical SIM cards.
Reasons to Remove or Delete an eSIM
There are several reasons why you might want to remove or delete an eSIM from your M4 iPad Pro:
Switching to a new carrier.
Traveling to a region where your current eSIM plan doesn’t work.
Troubleshooting connectivity issues.
Resetting your device for a new user.
Read: How To Split Screen On M4 iPad Pro
Remove eSIM On M4 iPad Pro
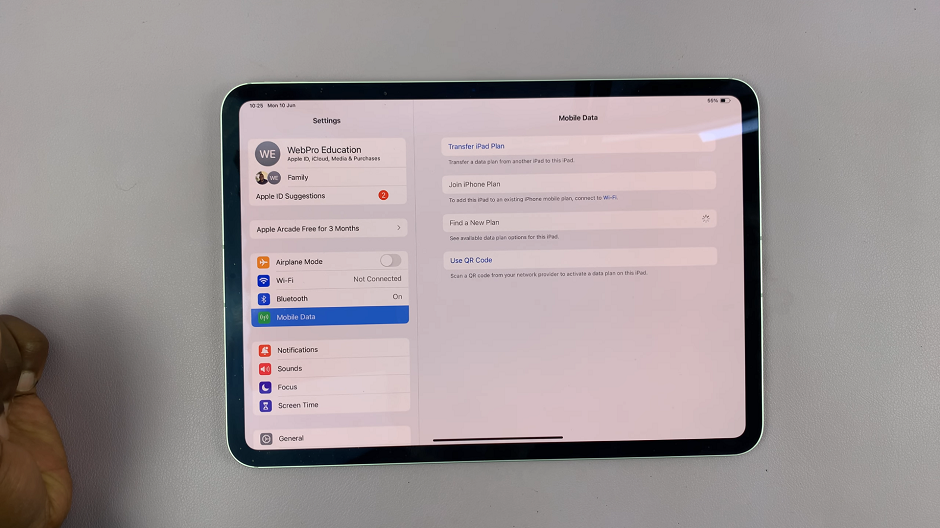
To begin, unlock your M4 iPad Pro and open the Settings app from the home screen. In the Settings menu, tap on Mobile Data.
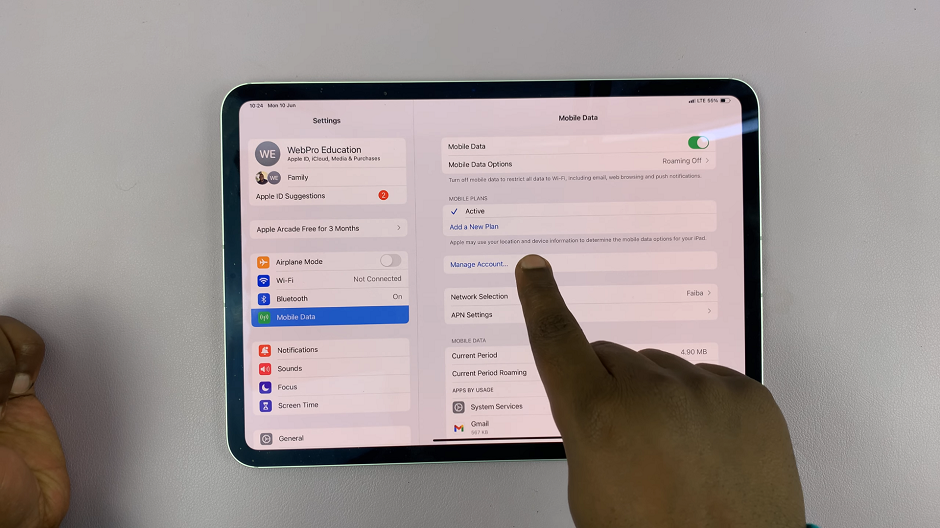
Under the Mobile Plans section, you will see a list of available cellular plans. Tap on the Manage Account option.
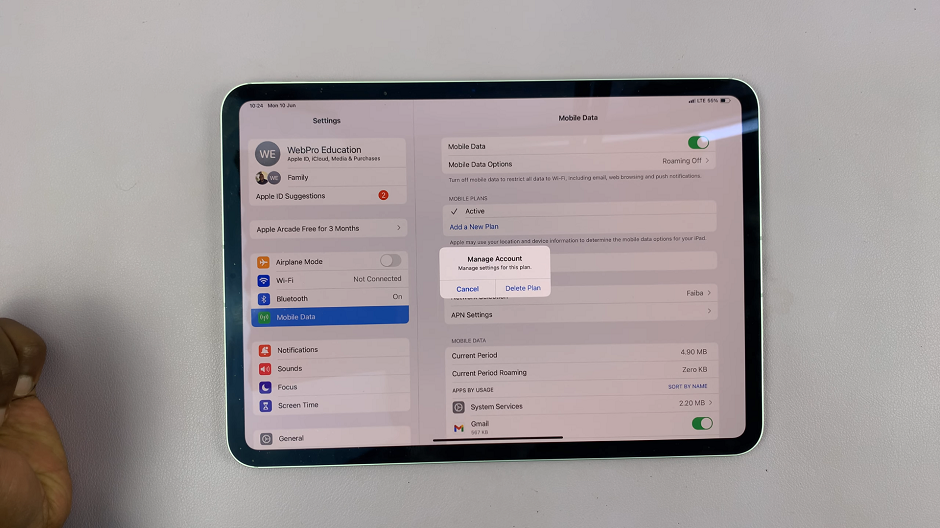
From the resulting pop up, select Delete Plan. If you have more than one plan, you will need to select the one you want to remove.
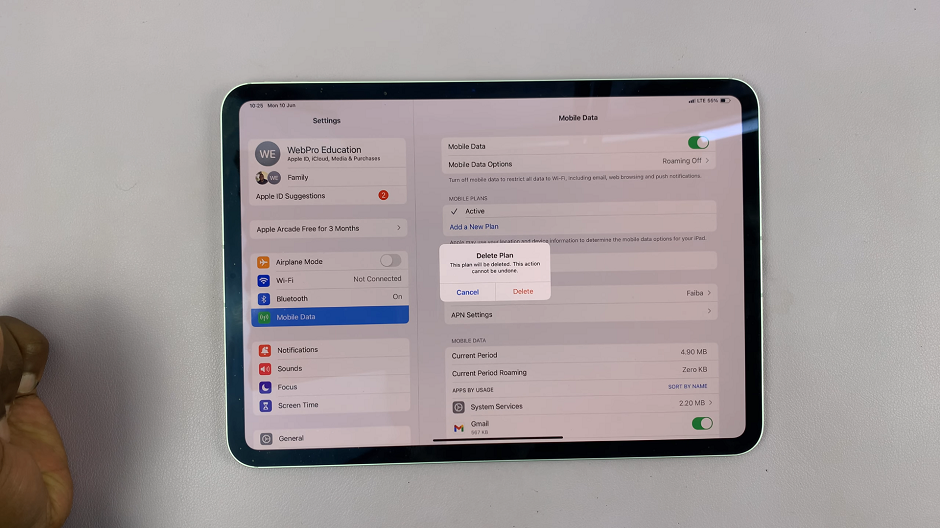
If you only have one plan, a confirmation pop-up will appear, asking if you are sure you want to remove the eSIM. Confirm by tapping Delete.
Finally, return to the Mobile Data section to ensure that the eSIM profile has been successfully removed. It’s a good practice to restart your iPad Pro after making changes to the cellular settings to ensure everything updates correctly.
Troubleshooting Tips
No Remove Option: If you do not see the option to remove or delete the eSIM, make sure your iPadOS is up to date. Go to Settings –> General –> Software Update to check for any available updates.
Stuck Deletion: If the eSIM profile is not deleting correctly, try turning off your device and turning it back on. Then repeat the removal process.
Contact Carrier: If you still face issues, contact your carrier for assistance. They might be able to remotely deactivate the eSIM profile.
Whether you’re switching carriers, troubleshooting, or simply managing your eSIM profiles, following the steps outlined in this guide will help you accomplish your task with ease. Always ensure your device software is up to date to avoid any potential issues, and don’t hesitate to reach out to your carrier if you encounter persistent problems.
By understanding how to manage your eSIM profiles, you can take full advantage of the flexibility and convenience that eSIM technology offers on your M4 iPad Pro.
