Have you ever taken a great photo on your Samsung Galaxy S24s, only to realize later that it has an annoying watermark? Don’t worry, you’re not alone.
Watermarks can sometimes distract from the beauty of a photo and make it difficult to share or use for professional purposes. While watermarks serve a purpose, they can sometimes be intrusive and interfere with the overall aesthetics of a photo.
In this guide, we’ll walk you through the comprehensive step-by-step process on how to remove watermark on photo already taken on Samsung Galaxy S24s.
Also Read: How To Disable Camera Watermarks On Samsung Galaxy S24s
How To Remove Watermark On Photo Already Taken On Samsung Galaxy S24s
Firstly, locate the photo containing the watermark that you wish to remove on your Galaxy S24. Once you’ve found the image, open it in editing mode by tapping on the editing icon. After opening the image in editing mode, look for the AI photo editing option within the editing toolbar.
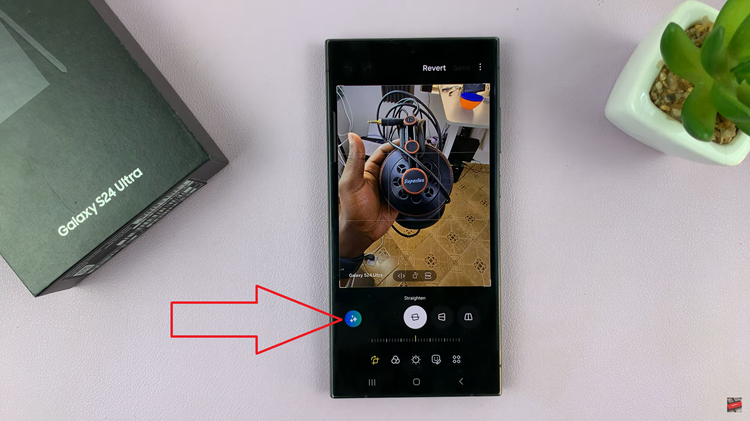
Using your finger or stylus, carefully draw over the watermark on the image. Ensure that you cover the entire watermark. Once you’ve drawn over the watermark, long-press on the drawing to reveal additional options. From the pop-up menu that appears, select the erase option. This action instructs the AI to remove the marked area, eliminating the watermark from the photo.
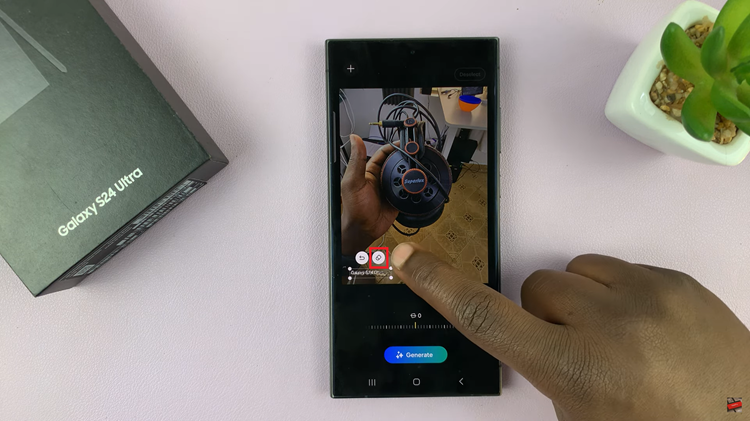
After selecting the erase option, tap on the “Generate” button. Once the AI has finished processing the edits, review the edited image to ensure that the watermark has been successfully removed. If you’re satisfied with the result, proceed to save the edited image to your device’s gallery or camera roll.
With the powerful AI photo editing capabilities of the Samsung Galaxy S24, removing watermarks from photos has never been easier. By following the simple steps outlined in this guide, you can quickly and effectively eliminate unwanted watermarks from your images.
Watch: Samsung Galaxy S24 / S24 Ultra – How To Enable & Disable Lift To Wake
