In today’s world, personalization is key. From customizing smartphone wallpapers to setting unique ringtones, people love to tailor their devices to reflect their individual style and preferences.
The Samsung Galaxy Fit 3, a versatile fitness tracker and smartwatch, offers users the opportunity to personalize their experience even further by allowing them to rename the device according to their liking.
In this guide, we’ll walk you through the comprehensive step-by-step process on how you can rename your Samsung Galaxy Fit 3.
Also Read: How To Measure Blood Oxygen During Sleep On Samsung Galaxy Fit 3
How To Rename Samsung Galaxy Fit 3
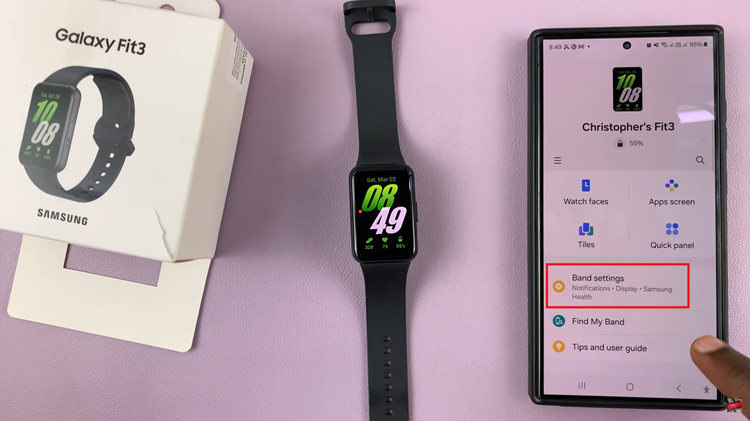
To begin, ensure that your Galaxy Fit 3 is paired with your smartphone. From there, open the Galaxy Wearable app. Once you’ve launched the Galaxy Wearable app, ensure that the Galaxy Fit 3 is selected, then tap on “Band Settings.”

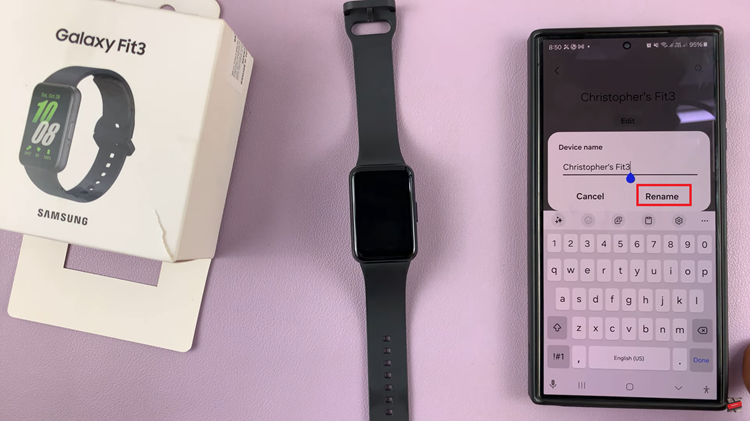
Within the Band Settings menu, scroll down to select the “About Band” option. Upon selecting “About Band,” you’ll see the current name of your Galaxy Fit 3 displayed on the screen. To rename the device, tap on the edit button. After entering the desired name for your Galaxy Fit 3, tap on the “Rename” option to confirm your choice.

Your device will now be updated with the new name. By following the steps outlined in this guide, you can effortlessly update the name of your device. Whether you opt for a creative name or stick to something more straightforward, the ability to customize your Galaxy Fit 3 adds an extra layer of enjoyment to your wearable experience.
Also Watch: How To Update Samsung Galaxy Fit 3 Manually & Automatically

