In this article, we’ll guide you through the process of reorganizing the Quick Settings tiles on your Google Pixel Tablet.
If you own a Google Pixel Tablet, you probably appreciate the device’s sleek design and powerful performance. One of the standout features that makes the Pixel Tablet user-friendly is the Quick Settings panel. The Quick Settings offer quick access to essential functions and controls, allowing you to adjust settings with just a few taps. However, did you know that you can customize and reorganize these Quick Settings tiles to better suit your needs and preferences?
The Quick Settings panel is a pull-down menu located at the top of the screen that provides shortcuts to commonly used features and settings. By default, it includes toggles for Wi-Fi, Bluetooth, screen brightness, sound, and more. However, Google allows you to modify this arrangement to tailor it to your specific requirements.
Watch: How To Remove Widgets On Google Pixel Tablet
Add and Remove Tiles To Panel
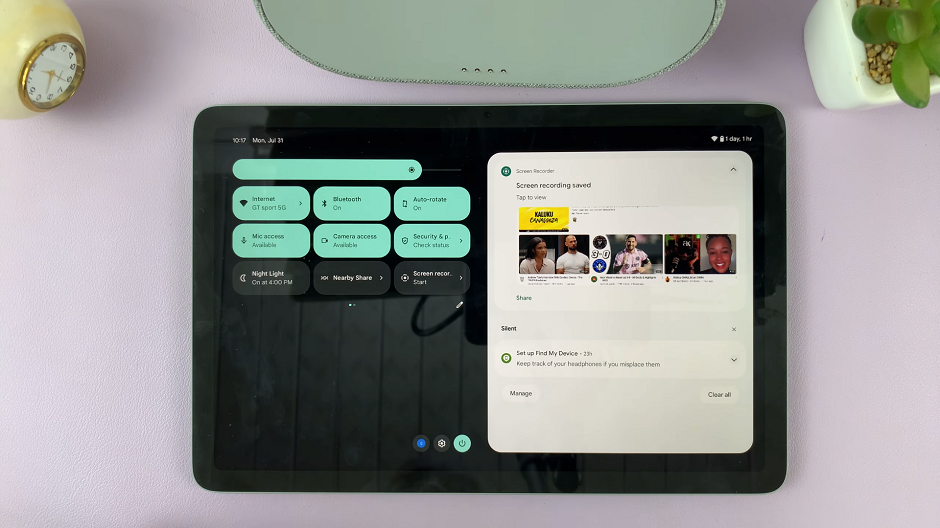
To get started, unlock your Google Pixel Tablet and swipe down from the top of the screen with two fingers, or swipe down once using a single finger. This action will reveal the Quick Settings panel, displaying the default tiles that Google has set up for you. In the middle of the panel, just below the tiles, you should see an icon that looks like a pencil. This is your ticket to reorganizing the tiles!
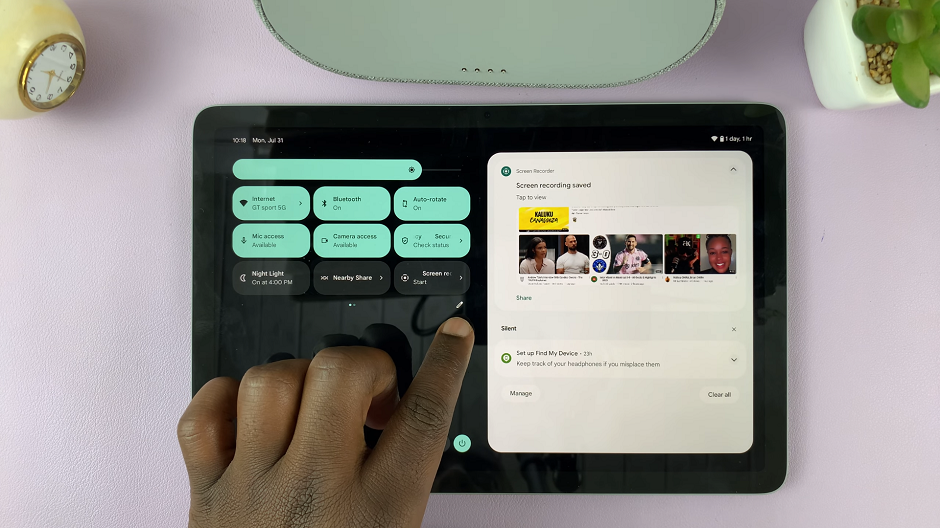
Next, tap the pencil button icon in the Quick Settings panel. This will enable edit mode and allow you to rearrange the tiles. You’ll notice that the tiles can now be moved around.
If there are certain tiles you rarely use or don’t need, you can remove them from the Quick Settings panel. In edit mode, locate the tile you want to remove, then drag it to the hidden list at the bottom of the screen.
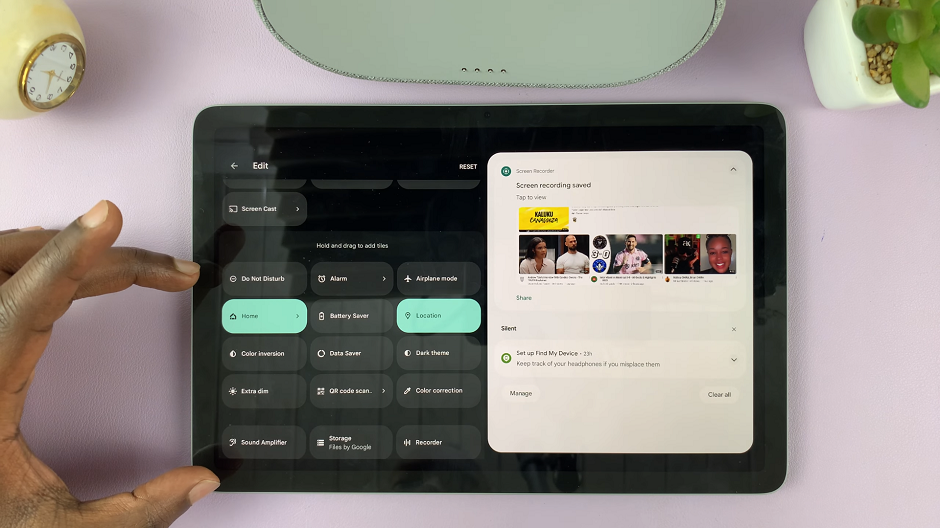
While in edit mode, scroll down to see the list of additional tiles available at the bottom of the screen. Look for the ones you’d like to add, and simply drag them into the Quick Settings panel to include them.
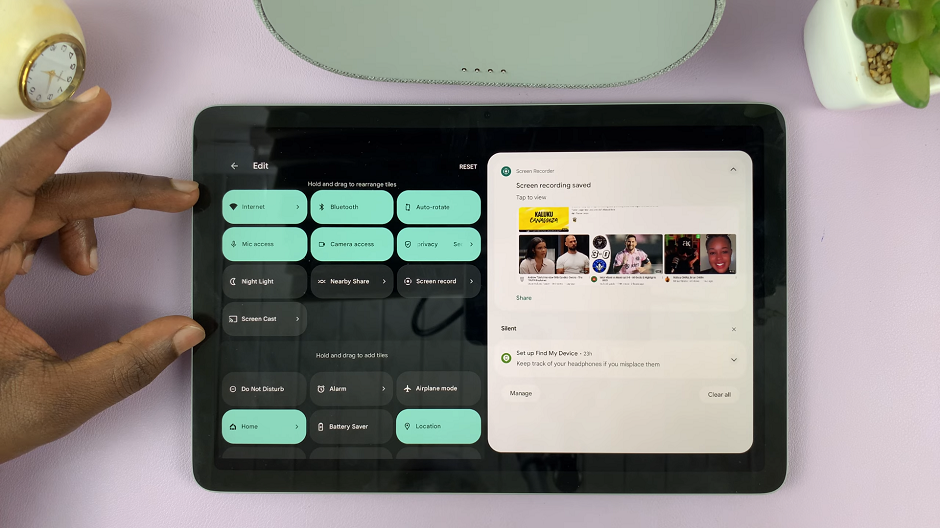
After making all the desired changes, tap the back button to save your new Quick Settings layout.
Reorganize Quick Settings Tiles
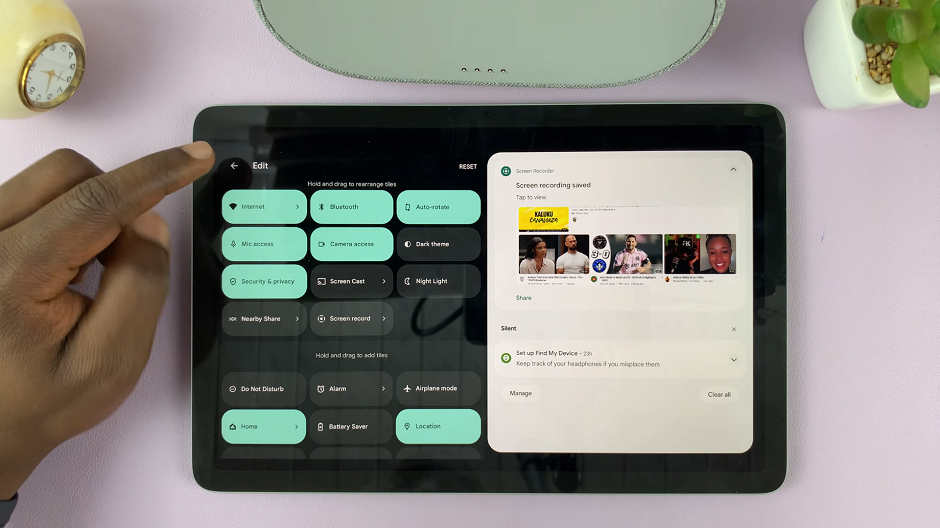
Once in edit mode, press and hold on a tile you want to move, then drag it to your preferred location in the list.
Consider your daily usage and organize the tiles based on your preferences. Arrange the most frequently used settings at the top for easier access.
After making all the desired changes, tap the back button to save your new Quick Settings layout.
Tips for Optimal Quick Settings Layout
Keep It Simple: While it might be tempting to add many tiles, focus on the most essential settings you use daily. Too many tiles can clutter the panel and defeat its purpose of quick access.
Group Related Tiles: Group related settings together to create a more organized layout. For example, keep all connectivity-related settings in one section and audio-related settings in another.
Consider Screen Orientation: If you use your Pixel Tablet in both portrait and landscape modes, ensure your Quick Settings layout remains intuitive and easy to use in both orientations.
Regularly Review Your Layout: As your usage patterns change, so might your preferred Quick Settings. Take a moment every so often to review and update your layout accordingly.
Read More: How To Rename Dock On Google Pixel Tablet
