In this guide, we’ll walk you through the step-by-step process to replace Xbox controller batteries, ensuring you’re equipped with the knowledge to maintain your gaming gear effortlessly.
Xbox controllers, renowned for their seamless gaming experience, rely on batteries for power. Whether you’re using standard AA batteries or rechargeable packs, knowing how to replace them is essential to keep your gaming sessions uninterrupted.
Before starting, gather the following materials: An Xbox controller (in need of battery replacement) and replacement batteries (AA batteries or rechargeable battery pack). Optionally, you can have a rechargeable battery charging station (if using rechargeable batteries)
Read: How To Change Hotspot Password On Android (Samsung Galaxy)
Replace Xbox Controller Batteries
First, ensure the controller is turned off before starting the battery replacement process. If the controller is on, turn it off to avoid any issues.
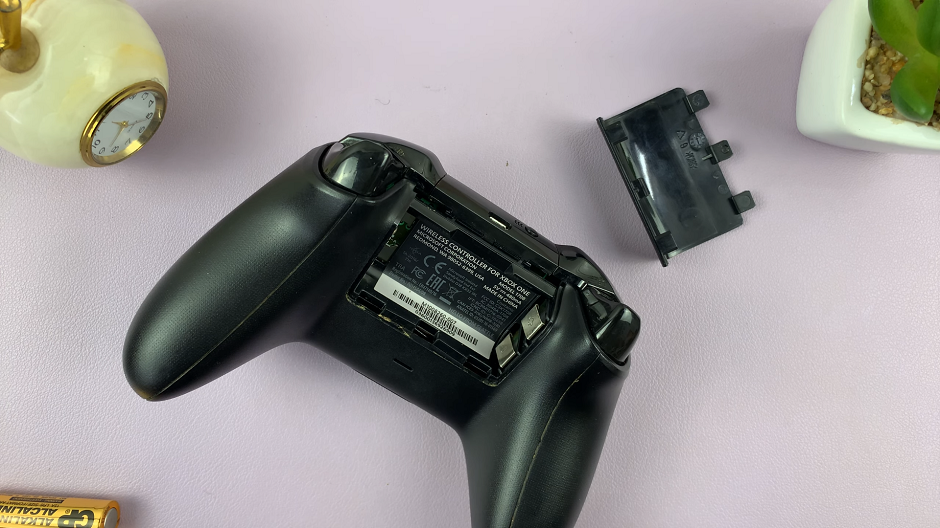
Next, depending on your Xbox controller model, the battery compartment can be found on the back. Some controllers have a battery cover that requires a screwdriver to open, while others have a latch or sliding mechanism.

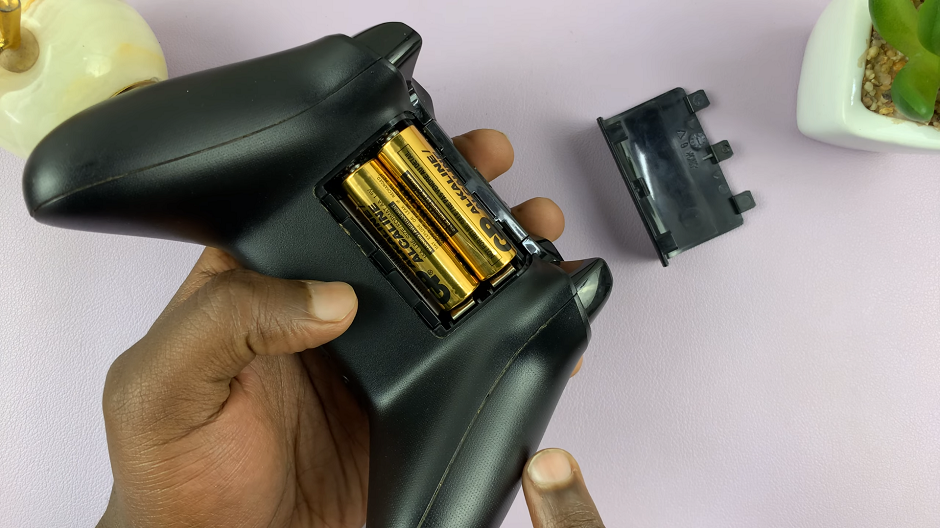
If your controller uses AA batteries, carefully remove the existing batteries from their slots. For rechargeable battery packs, gently detach the pack from the controller.
Place the new batteries into the slots following the correct polarity (+/-) as indicated. If using a rechargeable pack, carefully insert it into the controller, ensuring a secure fit.

If your controller has a cover, carefully reattach it using the screws or locking mechanism. Ensure it is firmly closed to secure the batteries in place.
Turn on your Xbox controller to confirm the new batteries or pack are working correctly. Check for any blinking lights or indicators to ensure proper connectivity.
Tips for Maximizing Battery Life
Consider using rechargeable batteries or packs to reduce waste and save money in the long run.
Turn off the controller when not in use to conserve battery power.
Use a charging station for rechargeable batteries to keep them ready for your gaming sessions.
Avoid mixing old and new batteries, as this can affect performance and lifespan.
Troubleshooting Battery Issues
If your controller doesn’t power on after replacing the batteries, ensure they are inserted correctly and securely.
Clean the battery contacts on both the controller and batteries to ensure a good connection.
If using rechargeable batteries, check if they need charging before use.
By following these simple steps, you can easily replace the batteries in your Xbox controller, keeping it powered up and ready for your gaming adventures. Regularly maintaining your controller’s batteries ensures a hassle-free gaming experience and avoids interruptions caused by power issues.
Remember, proper battery care and timely replacements can significantly enhance your overall gaming experience. Whether you opt for traditional AA batteries or rechargeable packs, a well-maintained controller ensures countless hours of gaming enjoyment.
Watch: How To Change Home Screen Grid Size On Android Samsung Phone

