In the ever-evolving world of mobile technology, smartphones have become indispensable tools, and their built-in cameras are no exception. From capturing breathtaking landscapes to preserving candid moments with loved ones, our Android phones play a pivotal role in our photographic journey.
However, like any sophisticated piece of technology, the camera settings on your Android device may encounter glitches or misconfigurations, leading to less-than-ideal photography experiences. If you find yourself grappling with blurry images, exposure issues, or any other camera-related hiccups, fear not.
This guide will walk you through the process of how to reset the camera settings on your Android.
Watch: How To Format SD Card On Android
To Reset Camera Settings On Android Phone
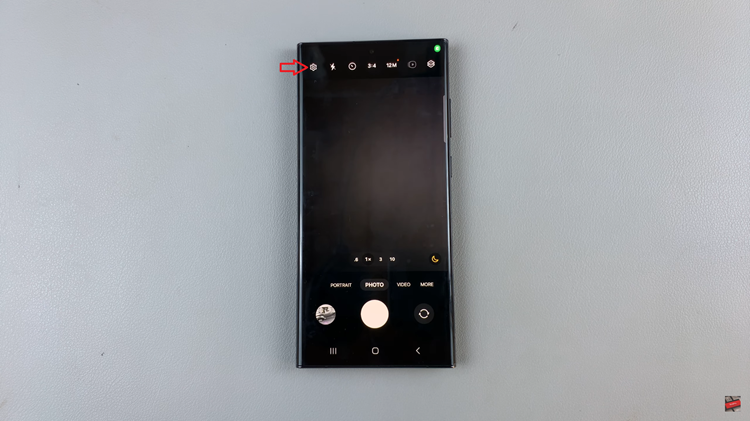
Firstly, unlock your Android phone and locate the camera app. Tap on the camera icon to open the application. Then, access the camera settings by tapping on the gear or settings icon, located in the top or bottom corners of the screen.
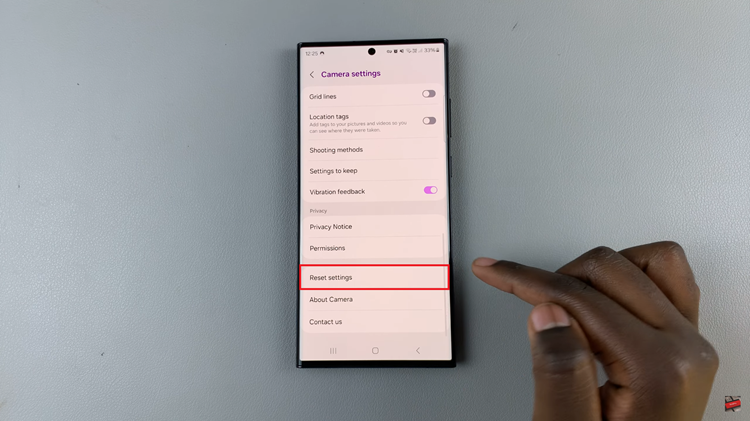
At this point, scroll down and find the “Reset Settings” option. After selecting the reset option, you will likely be prompted to confirm your decision. Confirm the action and your phone will initiate the process. Finally, exit the camera app and reboot your phone to apply the changes.
In conclusion, resetting your Android phone’s camera settings is a straightforward process that can help resolve various issues and improve overall performance. By following the steps outlined above, you can quickly reset your camera settings and get back to capturing memories with your mobile device.
Read: How To Connect & Transfer Data From SD Card To Android

