Unlocking the transformative potential of the M4 iPad Pro involves delving into its myriad features, each designed to enhance productivity and streamline everyday tasks. Among these features lies the ability to seamlessly scan documents directly from the device, revolutionizing the way users handle paperwork and digitize important information on the go.
In this guide, we’ll explore in detail how to leverage the device’s built-in functionality to scan documents effortlessly, empowering users to digitize, organize, and manage their documents with ease. From unlocking your iPad Pro to accessing the scanning feature within the Notes app and saving your scanned documents, each step will be dissected and elucidated to ensure a seamless and efficient scanning experience.
Embark on this journey with us as we unravel the intricacies of document scanning on the M4 iPad Pro, unlocking its full potential as a versatile tool for modern-day productivity.
Watch: How To Connect Bluetooth Headphones On M4 iPad Pro
Scan Documents On M4 iPad Pro
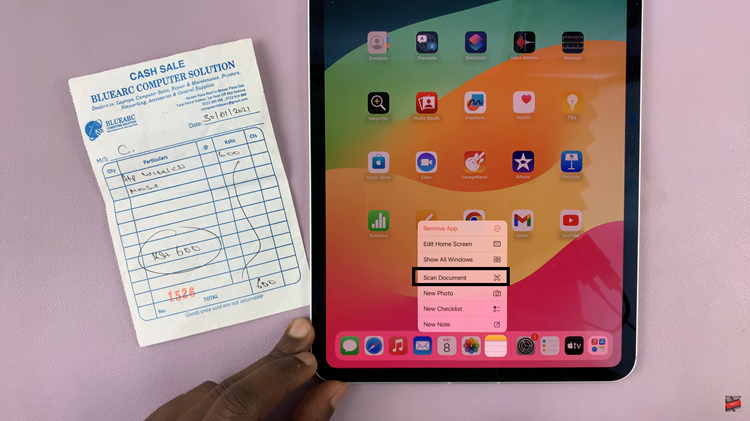
To begin, start by unlocking your device and accessing the home screen. After unlocking, navigate to the “Notes” app, which serves as your gateway to document scanning capabilities. Then, long-press on the “Notes” app icon to prompt a contextual menu to appear. From this menu, smoothly transition to the next step by tapping on the option labeled “Scan Document.”
At this point, ensure a seamless transition by holding your iPad Pro steadily over the document you intend to scan. It’s imperative to ensure optimal conditions for scanning, including adequate lighting and proper alignment within the camera frame displayed on your screen.
Following this, the Notes app takes charge, automatically identifying the document within the camera’s viewfinder and initiating capture. Should adjustments be necessary, seamlessly segue by taking control and delicately adjusting the corners of the scan area to ensure a perfect fit for the document.
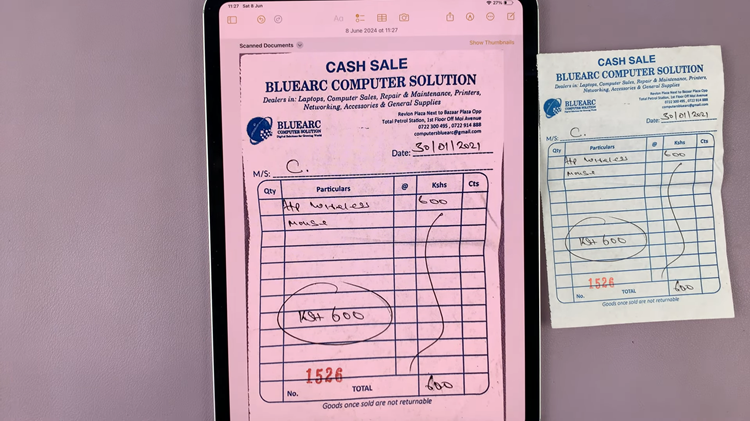
Upon achieving satisfaction with the scan quality, transition smoothly to the next step by tapping the “Save” button to preserve the scanned document. This marks a pivotal moment in the process, where you must decide whether to continue scanning additional documents to append to the same note or transition to the final step of saving the note containing the scanned document.
By following these steps, you can easily scan documents using the Notes app on your M4 iPad Pro, making it a convenient tool for capturing and managing paperwork on the go.
Read: How To Connect Xbox Wireless Controller To M4 iPad Pro

