With the release of iOS 18, Apple has introduced a plethora of new features aimed at enhancing user experience.
One of the most anticipated and useful additions is the ability to schedule messages on your iPhone. This feature allows you to compose messages in advance and schedule them to be sent at a later time, ensuring you never miss sending an important message.
In this article, we will walk you through the steps to schedule messages on your iPhone using iOS 18.
Why Schedule Messages?
Scheduling messages can be incredibly useful for various reasons:
Timely Greetings: Ensure that birthday wishes, anniversary greetings, and other time-sensitive messages are sent right on time.
Professional Communication: Schedule work-related messages to be sent during business hours, even if you’re preparing them outside of work hours.
Reminders: Send reminders to yourself or others at specific times to keep everyone on track.
Watch: How To Adjust Alarm Volume On Redmi Watch 4
Schedule Messages In iOS 18
Start by opening the Messages app on your iPhone. This is where you’ll compose and schedule your message.
Select the contact you want to send to and type your message as you normally would. You can include text, emojis, images, and even links.
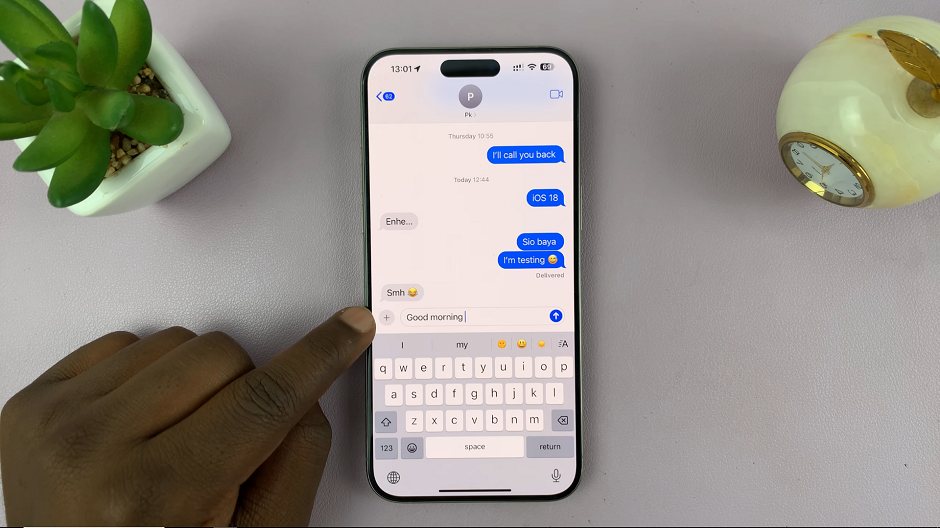
Once your message is ready, tap on the + to the left of the message text box. From the resulting options, select More.
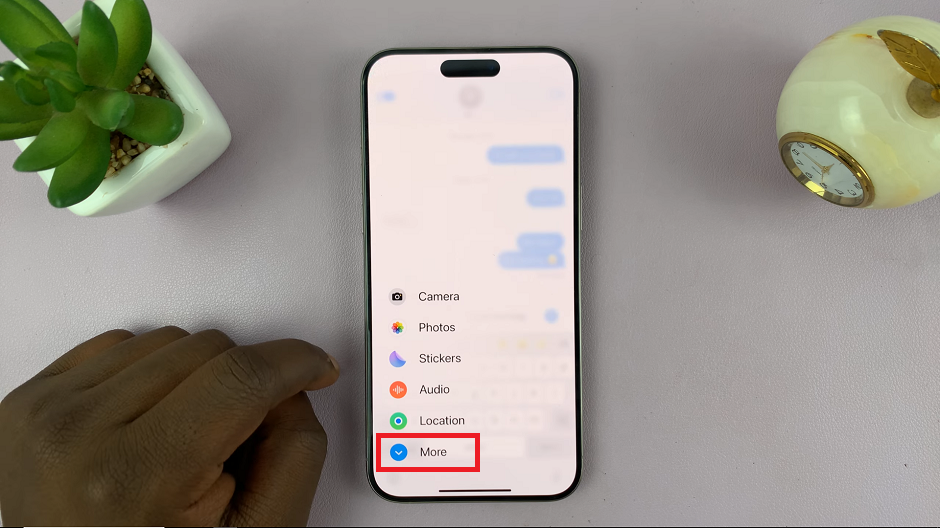
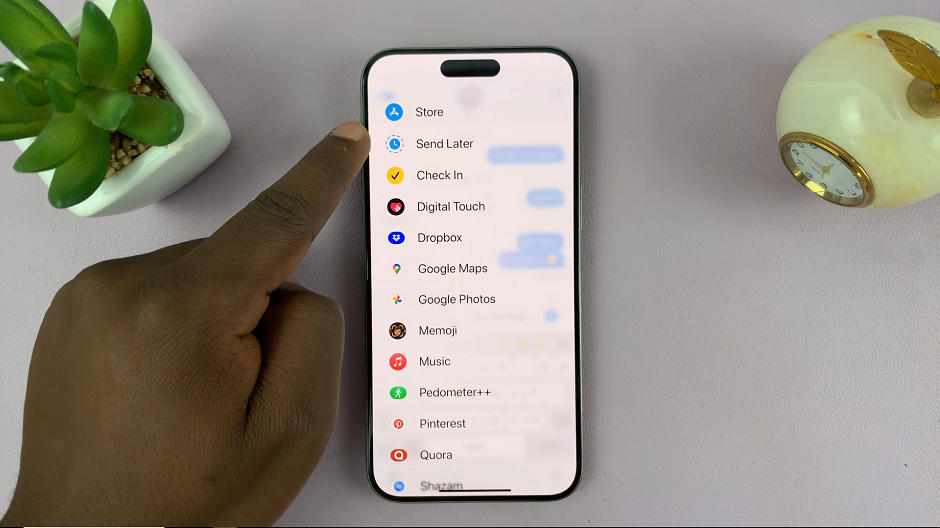
From the menu that appears, tap on Send Later. Tap on it to customize.
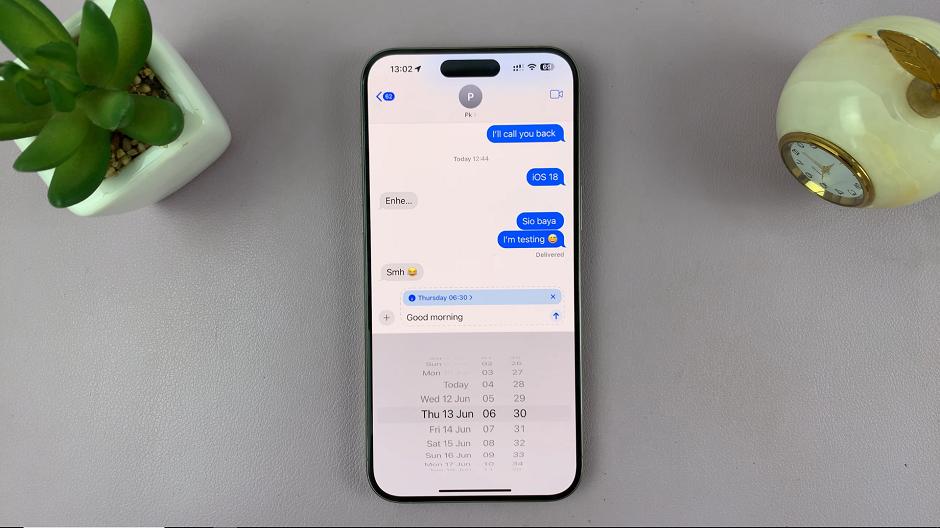
A date and time picker will appear. Select the desired date and time for your message to be sent. After selecting the date and time, tap on the Send button to confirm your scheduled message.
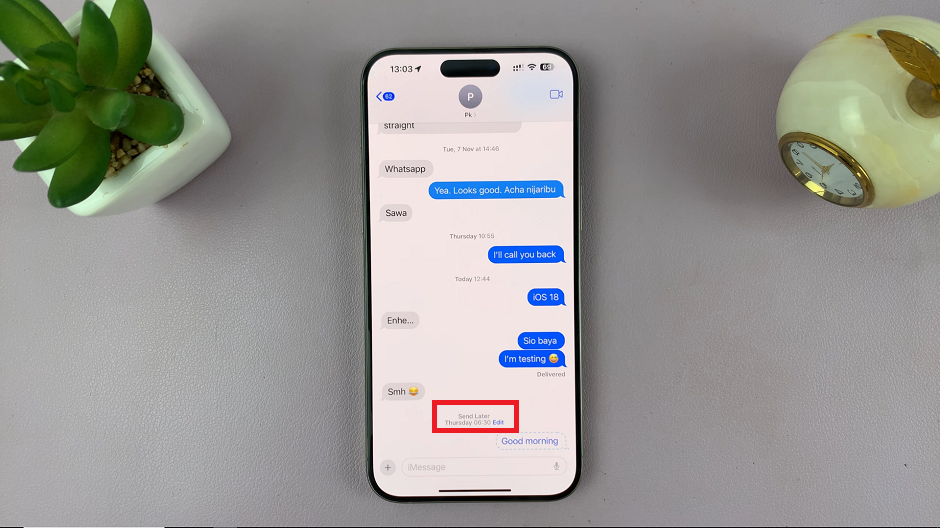
You can now tap on the x button to close the editor. Your message will now be enshrined within a dotted bubble. This indicates that it’s a scheduled message.
To change the date and time, or edit the scheduled message, tap on the Edit option. It should be just above the scheduled message.
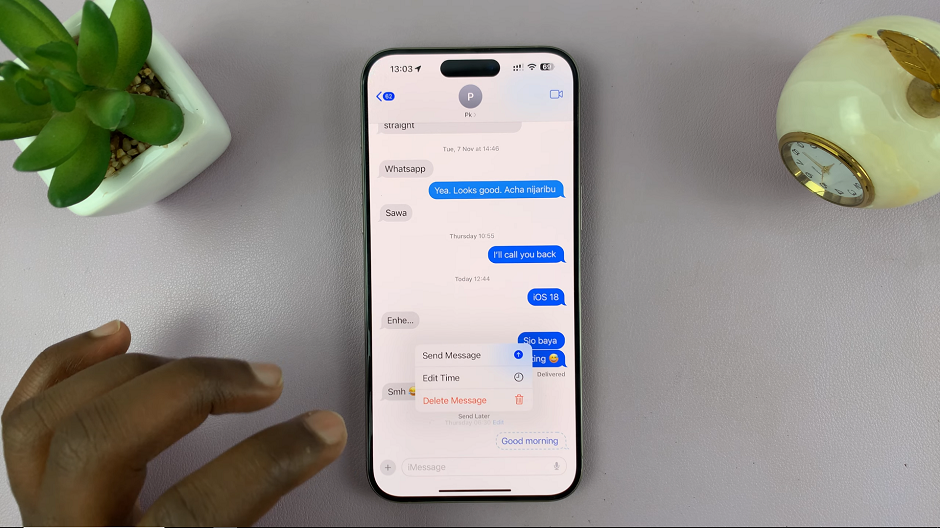
From the options, choose one of Send Message, Edit Time or Delete Message. Follow the instructions based on the option you chose.
Tips and Tricks for Effective Scheduling
Time Zones: Be mindful of time zones when scheduling messages, especially if the recipient is in a different time zone.
Recurring Messages: For regular reminders or greetings, consider using third-party apps that integrate with iMessage and offer advanced scheduling options.
Professional Use: When scheduling professional messages, aim for appropriate business hours. This will ensure your messages are received at a convenient time.
The message scheduling feature in iOS 18 is a game-changer for both personal and professional communication. It adds a level of convenience and efficiency that helps ensure your messages are timely and relevant. Whether you’re sending birthday wishes, business reminders, or just staying organized, iOS 18 makes it easier than ever.
Read: How To Disable ‘Swipe Finger From Corner’ Shortcuts On M4 iPad Pro
