In this comprehensive guide, we’ll walk you through the steps to screen record on the Samsung Galaxy Tab S9, S9+, and S9 Ultra.
The Samsung Galaxy Tab S9 series is a powerhouse of productivity and entertainment. Whether you’re a content creator, a gamer, or someone who simply wants to share their screen with others, the ability to record your screen can be incredibly valuable.
The Samsung Galaxy Tab S9 Series come with a built-in screen recorder, so there will be no need of a third-party recording app.
Watch: How To Take Screenshots On Samsung Galaxy Tab S9, S9+ and S9 Ultra
Screen Record Samsung Galaxy Tab S9 Series
Navigate to the screen or app that you want to capture. Pull down the notification bar from the top of the screen to access quick settings.
Find the Screen recorder icon in the quick settings (it looks like a video camera). If it is not there, find the + icon an tap on it. Look for the screen recorder button and drag it to the quick settings panel.

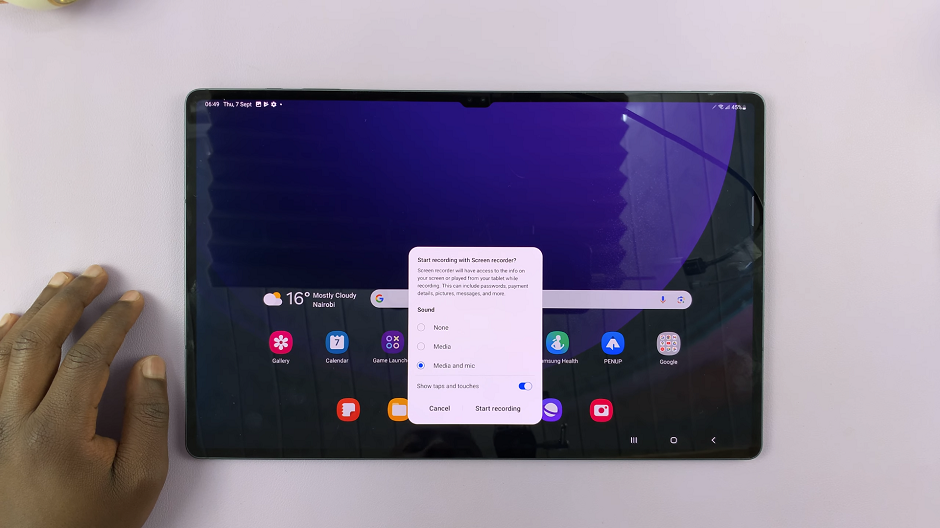
Next, tap on Screen recorder. This will bring up a 3 second countdown. Here, you can adjust a few quick settings like show taps and touches, and sound. To start the recording, tap on Start recording.
Navigate through your device and perform the actions you want to capture. A recording menu is also available on the recording screen. you can hide it, and use it for various actions.
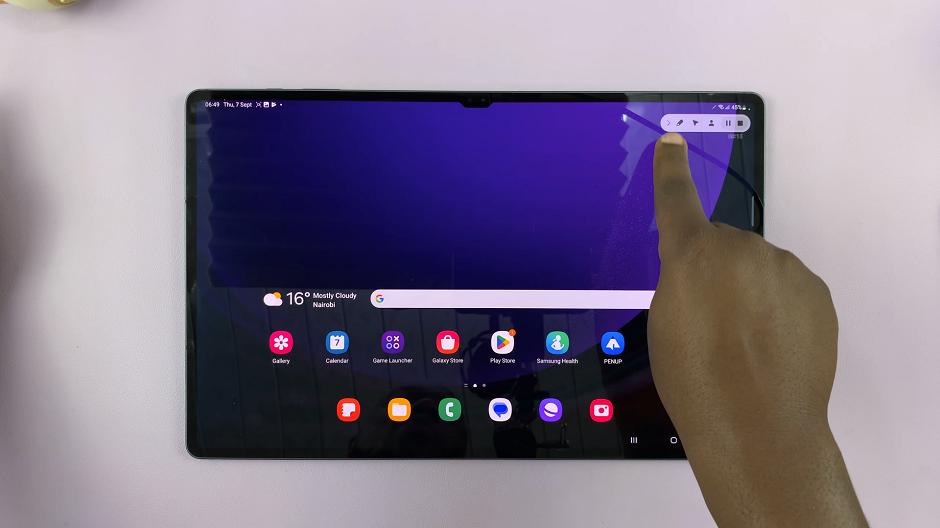
The actions include: Pen tool to draw on the screen, S Pen pointer, front-facing camera, Pause and Stop.
To stop recording, tap on the Stop button from the recording menu.
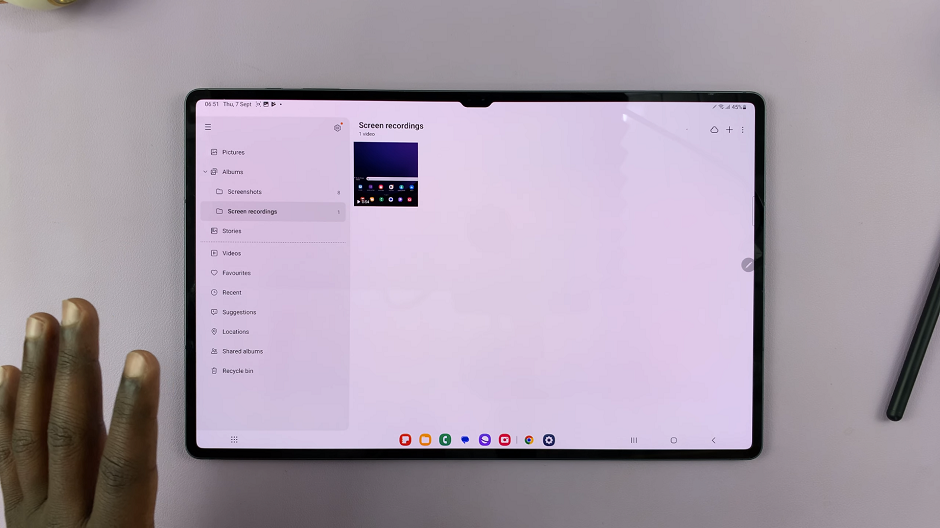
Open the Gallery app on your Galaxy Tab to access the recording. Screen recordings are typically stored in a folder labeled Screen recordings within the Gallery. You can edit your recordings or share them directly from the Gallery app.
Additional Screen Recording Settings
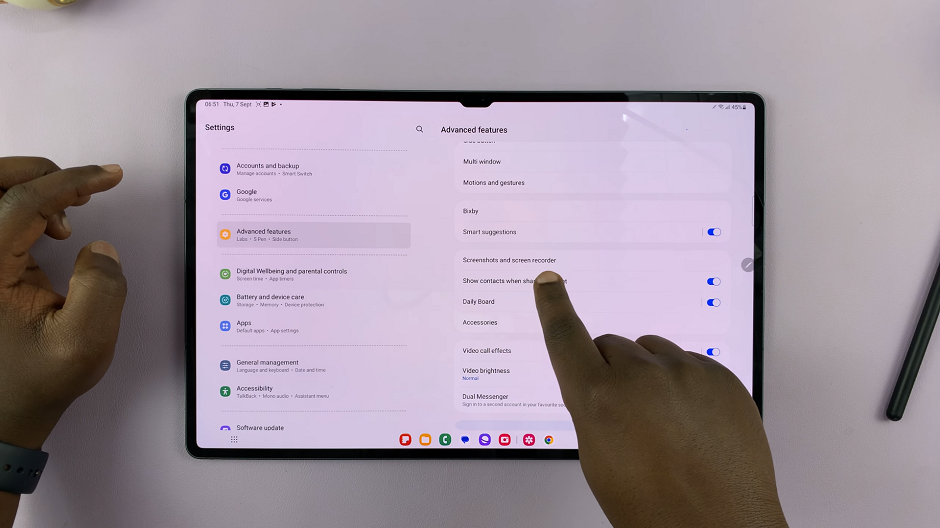
For additional screen recording settings, open the Settings app on your Galaxy Tab. Scroll down to find Advanced Features in the list and tap it.
Look for Screenshots and screen recorder and tap on it.
While in the Screenshots and screen recorder menu, you have the ability to customize some settings. These include Sound, Video Quality, Selfie camera size, enable taps and touches and recordings storage location.
Adjust Video Quality: You can select the video resolution and frame rate that suits your needs. Higher resolutions and frame rates result in higher quality videos, but they also consume more storage space.
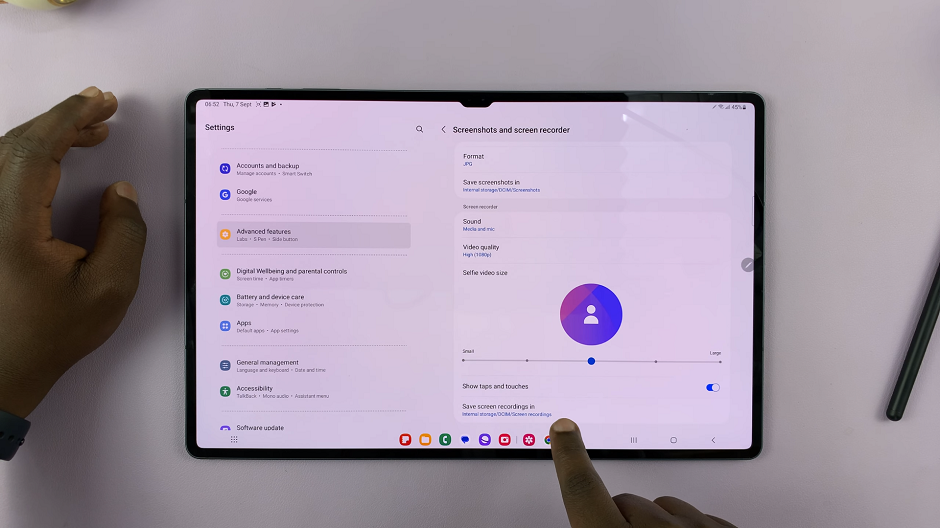
Sound: Choose whether you want to record audio from the microphone, system sounds, or both.
Selfie Camera Size: You can use the slider to make the selfie camera bigger or smaller.
Recordings Storage Location: You can customize where you want the screen recordings saved.
Show taps and Touches: Tap on the toggle button to enable or disable taps and touches while recording.
Troubleshooting Tips
Low Storage Space: If you run out of storage space, consider lowering the video resolution or frame rate.
No Sound in Recordings: Double-check the audio source settings in the Screen Recorder settings. Ensure the microphone and system sounds are enabled if you want both.
Glitches or Lag in Recordings: Close unnecessary apps running in the background to free up system resources.
Bonus Tips and Tricks
Use a Stylus for Precision: If you have a stylus, it can be incredibly useful for precise interactions during screen recording.
Explore Third-Party Apps: There are several third-party screen recording apps available on the Google Play Store that offer additional features and customization options.
By following these steps, you’ll be able to screen record on your Samsung Galaxy Tab S9, S9+, and S9 Ultra effortlessly. Whether you’re creating content or sharing information, this feature opens up a world of possibilities on your powerful Galaxy Tab device. Happy recording!
Read: How To Use Photo as Watch Face On Samsung Galaxy Watch 6/6 Classic

