Screen recording with microphone audio on your M4 iPad Pro opens up a world of possibilities for content creation, whether you’re making tutorials, recording gameplay, or delivering presentations with voiceovers. This feature allows you to capture both what’s happening on your screen and your voice simultaneously, making it an invaluable tool for educators, professionals, and creative individuals alike.
In this guide, we’ll walk you through the steps to seamlessly screen record with microphone audio on the M4 iPad Pro. Whether you’re a seasoned user or new to the process, you’ll find this tutorial straightforward and essential for leveraging your device’s capabilities to their fullest.
Let’s dive in and explore how you can harness the power of screen recording with microphone audio on your M4 iPad Pro.
Watch: How To Change Screen Timeout Period On M4 iPad Pro
Screen Record With Microphone Audio On M4 iPad Pro
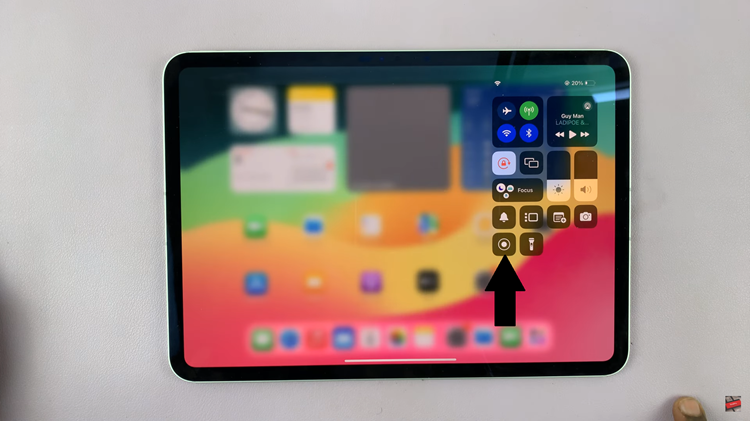
To start screen recording with microphone audio on your iPad Pro, begin by swiping down from the top-right corner of your screen to access the Control Center. Locate the screen recording button, recognizable as a solid circle inside another circle.

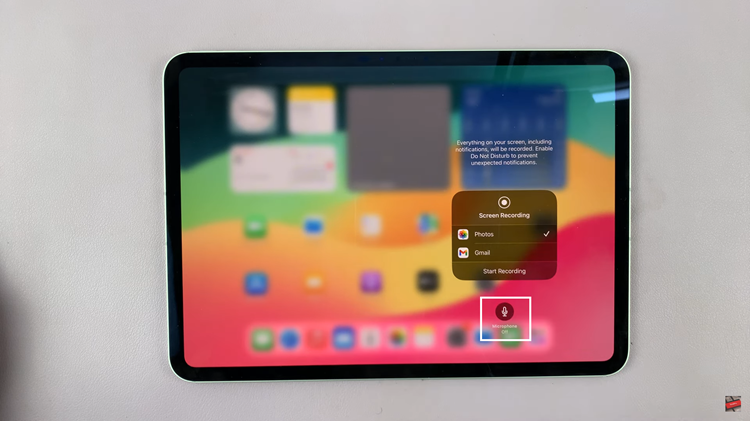
Next, press and hold the screen recording button within the Control Center. This action will unveil additional options. Tap on the microphone icon to activate the audio recording. Ensure the microphone icon turns red, confirming that both screen and microphone audio will be captured throughout your recording session.

Once your settings are configured, proceed by tapping “Start Recording.” A countdown timer will appear, allowing you a moment to prepare. Keep an eye on the red status bar at the top of your screen, indicating that the recording is now underway. This ensures you are capturing both visual content and microphone audio seamlessly.
By following these steps, you can easily capture high-quality screen recordings with microphone audio on your M1 iPad Pro. Experiment with different settings to find the setup that works best for your needs, and enjoy sharing your creations effortlessly.
Read: How To Add & Remove App Icons On Control Center On iOS 18

