Whether you’re a seasoned Mac user or a newcomer to the world of Apple computers, knowing how to take a screenshot on your Mac or MacBook is an essential skill.
Screenshots are incredibly useful for capturing moments, saving important information, or troubleshooting technical issues.
In this comprehensive guide, we’ll explore the various methods and shortcuts available for taking screenshots on your Mac, empowering you to become a screenshot pro in no time.
Read: How To Disable Ethernet Without Unplugging Ethernet Cable On Windows 7/10/11
Screenshot On Mac & MacBook
There are a couple of methods you can use to take a screenshot on your Mac or MacBook. There are various methods to capture the entire screen, a portion of the screen and specific windows.
Capture the Entire Screen
Taking a screenshot of the entire screen on your Mac is straightforward and requires just a few simple steps:
Press Command + Shift + 3. This keyboard shortcut captures the entire screen and saves the screenshot as a file on your desktop by default.
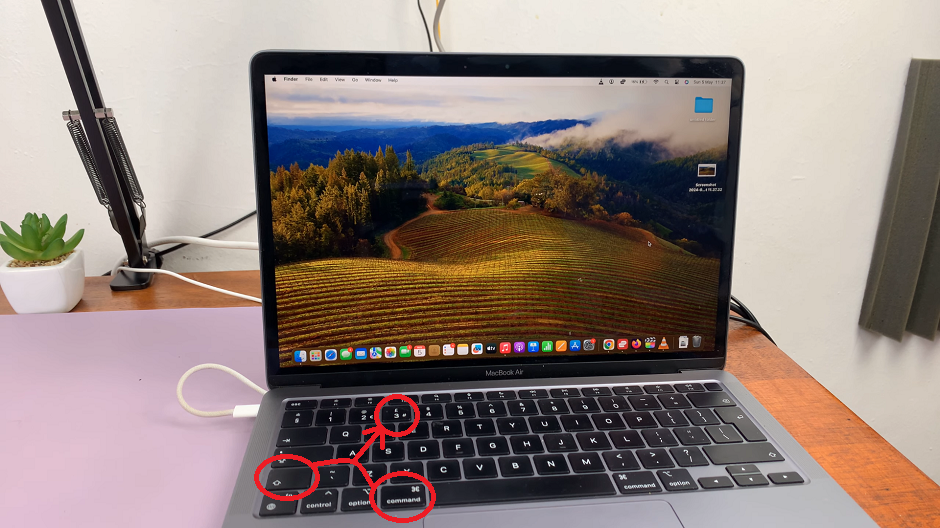
Once you’ve taken the screenshot, you’ll find the image saved as a .png file on your desktop, labeled with the date and time of capture.
Capture a Selected Portion of the Screen
If you only need to capture a specific portion of your screen, macOS offers a built-in tool for selecting the area you want to screenshot:
Press Command + Shift + 4. This keyboard shortcut turns your cursor into a crosshair.
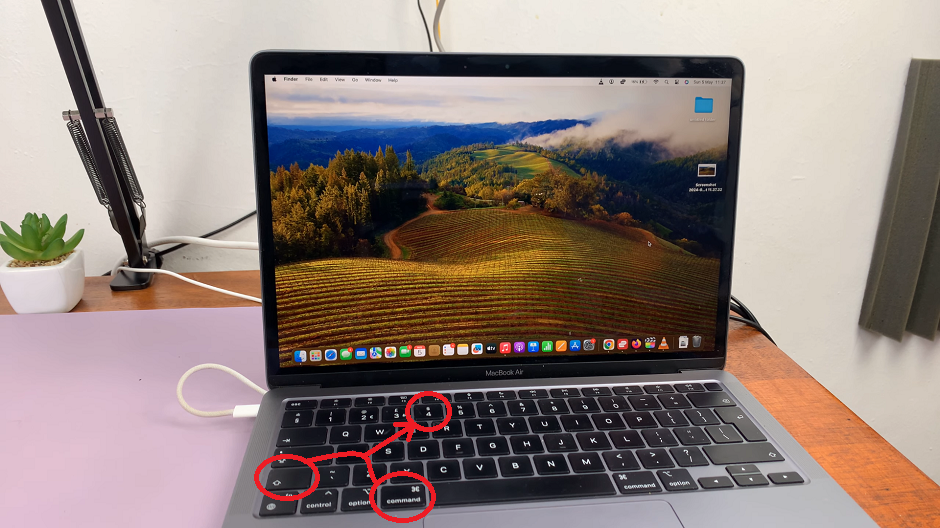
Select the Screenshot area. Click and drag to select the portion of the screen you want to capture. Release the mouse button to take the screenshot.
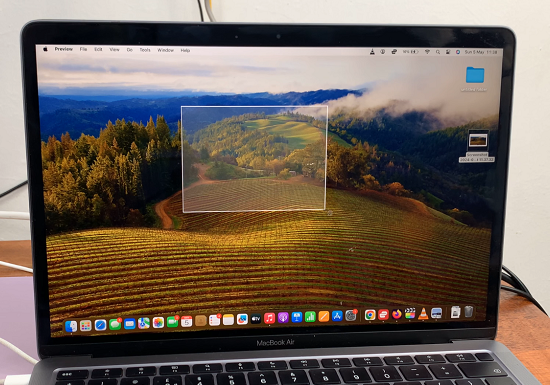
Similar to capturing the entire screen, the selected portion will be saved as a .png file on your desktop.
Screenshot Specific Windows On Mac & MacBook
Sometimes, you may want to capture a screenshot of a specific window or application without including the entire screen. macOS provides a convenient way to do this:
Press Command + Shift + 4, then press Spacebar. This keyboard shortcut changes the crosshair cursor into a camera icon.
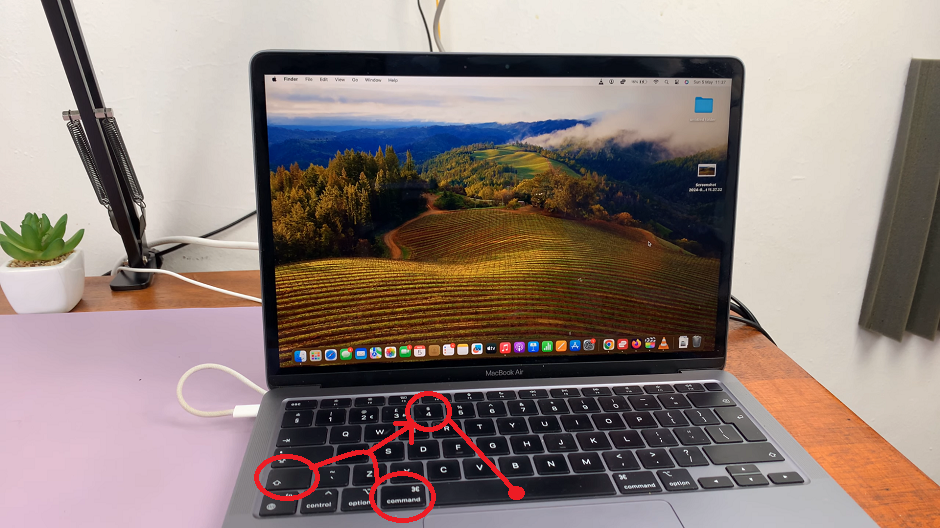
Move the camera icon over the window or application you want to capture and click once. The screenshot will include only the selected window or application.
Like the previous methods, the screenshot will be saved as a .png file on your desktop.

Additional Tips and Tricks
Customizing Screenshot Settings: You can customize various screenshot settings, such as the file format (PNG, JPG, PDF, etc.), where the screenshots are saved, and more. To adjust these settings, open the Screenshot preferences in the Options menu of the Screenshot app.
Using Third-Party Apps: While macOS offers robust built-in screenshot tools, there are also many third-party apps available on the App Store that offer additional features and customization options for screenshotting.
Keyboard Shortcuts for Efficiency: Memorizing keyboard shortcuts can significantly speed up your screenshotting workflow and make capturing screens even more efficient.
Mastering the art of screenshotting on your Mac or MacBook opens up a world of possibilities for capturing and sharing moments, saving important information, and enhancing your productivity. Whether you’re a student, professional, or casual user, knowing how to take screenshots is a skill that will serve you well in various situations.
So, next time you need to capture something on your Mac screen, remember these methods and shortcuts, and become a screenshot pro in no time!
Watch: Samsung Galaxy A35 5G: How To Enable ‘Tap To Show’ Always ON Display
