Our smartphones have become indispensable companions. Among the various features that facilitate this seamless connection, the Wi-Fi capability of our devices is paramount.
Understanding the specifics of your Wi-Fi network, such as the SSID (Service Set Identifier), can prove invaluable for troubleshooting, device management, and even sharing access with others.
In this guide, we’ll walk you through the comprehensive step-by-step process on how to see Wi-Fi network SSID on your Android phone (Google Pixel).
Also Read: How To Edit Quick Settings Panel On Android (Google Pixel)
How To See Wi-Fi Network SSID On Android (Google Pixel)
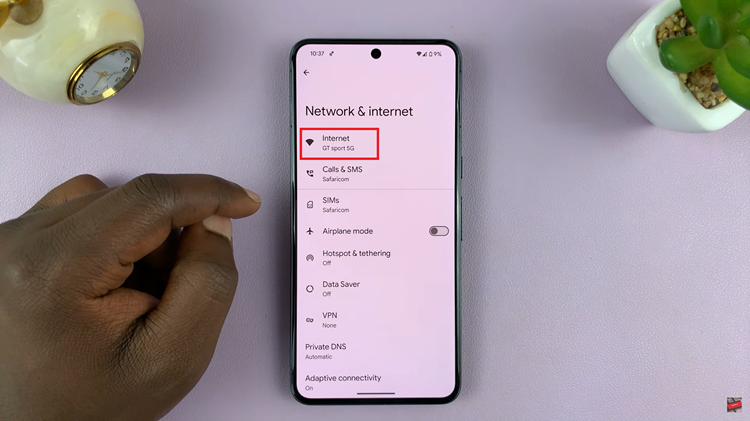
Navigate to the Settings app. Once you’re in the Settings menu, scroll down and find the “Network & Internet” section. Tap on it. Locate and select the “Internet” option. Look for the Wi-Fi section.

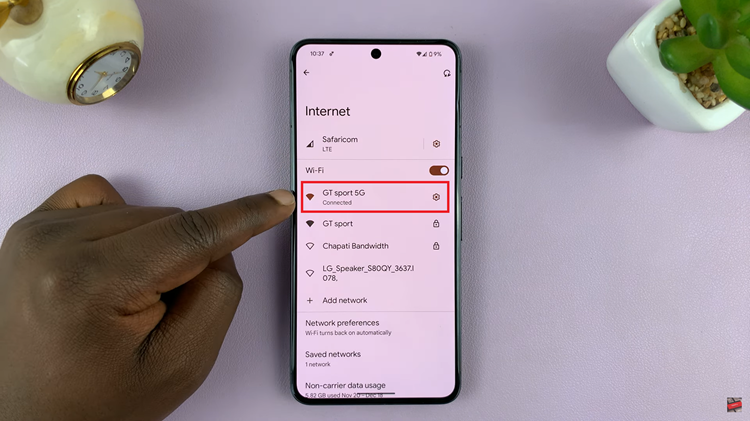
On the Wi-Fi settings screen, you’ll see a list of available Wi-Fi networks. Identify the network you are currently connected to. Now, tap on the Wi-Fi network your device is connected to. This will open a detailed view of the selected network, showing various information, including the SSID.

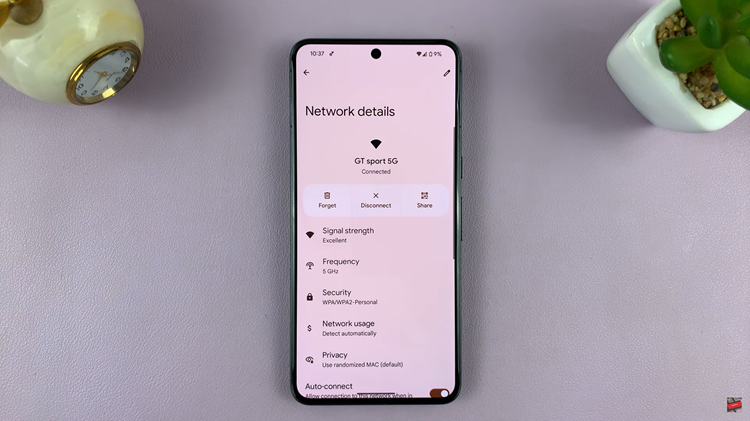
In the detailed view, you’ll find information about the selected Wi-Fi network. Look for the SSID, which is the name of the network.

In just a few simple steps, you can access and view the SSID of your Wi-Fi network on a Google Pixel device running the Android operating system. Knowing your SSID is valuable for troubleshooting network issues, connecting new devices, or sharing your Wi-Fi credentials with friends and guests.
Watch: How To Unmount USB Accessories On Android (Google Pixel)

