In the realm of personalization and customization, Android devices, particularly the Google Pixel series, stand out for their user-friendly interfaces and adaptability.
One aspect of customization that often goes overlooked is setting the preferred time format – whether it’s the familiar 12-hour clock or the more internationally embraced 24-hour clock.
In this guide, we’ll walk you through the comprehensive step-by-step process on how to set a 12Hr or 24Hr clock system on your Android phone (Google Pixel).
Also Read: How To Rotate Video On Android Phone (Google Pixel)
How To Set 12HR / 24HR Clock System On Android (Google Pixel)
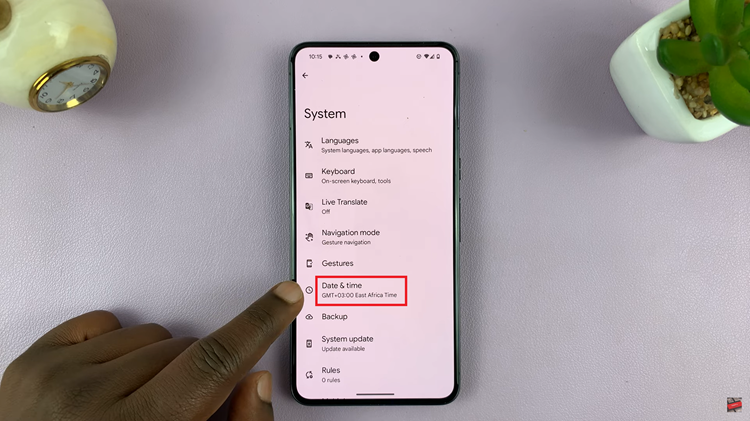
Open the Settings app, usually represented by a gear-shaped icon. Within the Settings menu, scroll down and find the “System” option. Tap on it to reveal additional settings. Look for “Date & Time” and select it.

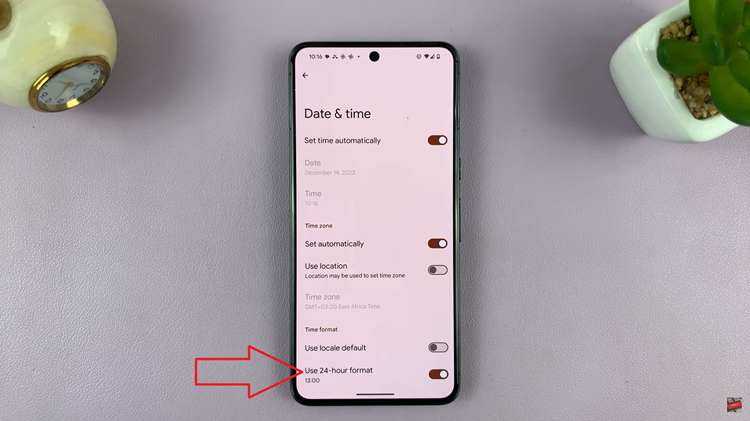
In the Date & Time settings, you’ll find various options related to time and date. Look for the section specifically labelled “Time Format.” Under the Time Format section, you’ll likely see an option named “Use Locale Default.” Disable it.
Directly underneath the “Use Locale Default” option, you’ll find “Use 24Hr Format.” To switch to the 24-hour clock, enable this option. Conversely, if you prefer the 12-hour clock, leave this option disabled.

Customizing the time format on your Google Pixel device is a straightforward process that allows you to tailor your device to your preferences. Whether you prefer the traditional 12-hour clock or the more concise 24-hour format, following these steps ensures that your device displays the time in a manner that suits your lifestyle.
Watch: How To Unmount SD Card From Android Phone (Samsung Galaxy)

