MacOS Ventura, the latest operating system from Apple, brings a host of new features and improvements to Mac and MacBook users. Among these features is the ability to set timers directly on your device.
Whether you need a reminder for a quick break, an alarm for a specific task, or a countdown for an upcoming event, setting a timer on your Mac or MacBook is a breeze.
In this article, we’ll guide you through the simple steps to set a timer on a MacBook running macOS Ventura.
Also watch: How To Enable Low Power Mode On iPhone
How To Set A Timer On MacBook
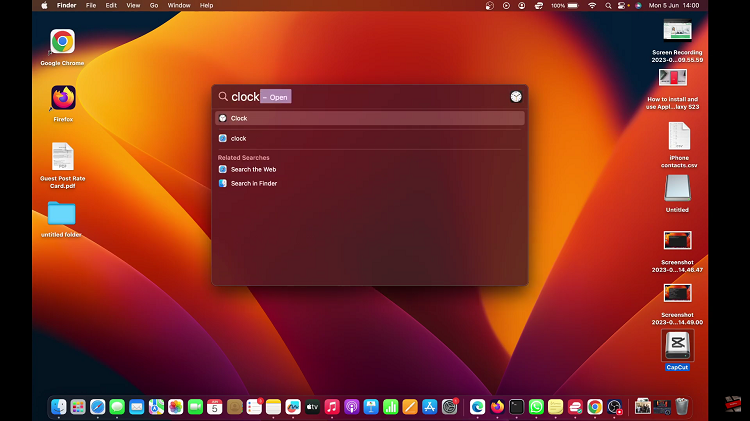
Firstly, access the timer feature on your Mac or MacBook. You can simply use “Spotlight search” by pressing Command + Space and typing “Clock“.
Next, once you have opened the Clock app, click on the “Timer” tab located at the top of the window. This will take you to the timer settings.
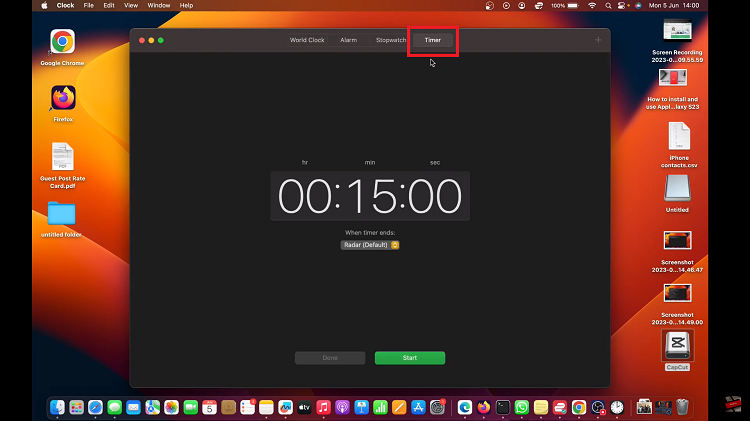
In the timer tab, set your desired countdown time by clicking the “Time” field and entering the desired hours, minutes, and seconds.
Afterward, you have the option to customize your timer. For instance, you can click on the “Alarm” dropdown menu to choose a sound that will play when the timer completes.
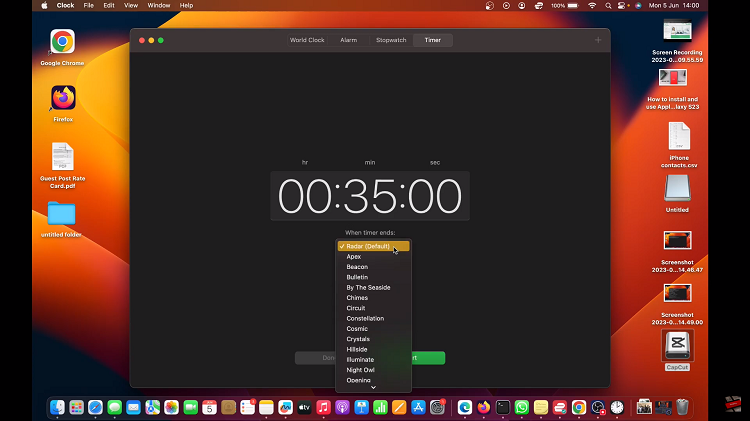
Next, to start the timer, click on the “Start” button or press Enter on your keyboard. During the countdown, you can pause the timer by clicking on the “Pause” button. To stop the timer completely, click on the “Done” button next to the pause button.
That’s it! You’ve successfully set a timer on your Mac or MacBook using macOS Ventura. You can repeat these steps whenever you need to set a timer for various tasks, reminders, or breaks.
