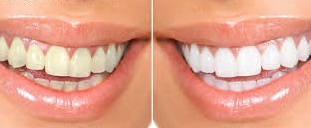
You’ve taken a portrait with the most beautiful and genuine smile you have ever had. But there is one problem. Your teeth don’t seem to be as bright as your smile. Sometimes when the portrait is bright, your teeth might appear to be not as white as you would like them.

This might jeopardize your portrait especially if you wanted to use it in a modelling contest or in your social media profile pictures. Fortunately, you can use a photo editing software to alter the appearance of your teeth and make them appear brighter.
GIMP is one of the most popular picture editor software. It’s available for free on Windows, Mac and Linux. Simply download and install it in your computer. While Gimp will not physically whiten your teeth, it can make the teeth in your photos appear brighter which eventually makes them look whiter than they really are.
How To Whiten Teeth In GIMP:
Open the photo in GIMP. Use the selection tool ( ) to select the teeth area in the photo. Be careful when selecting so as not to select any part that is not tooth enamel. Don’t select the gums, tongue or any other part. If there is a tongue in between the set of teeth, you can select and work on the different rows of teeth separately.
Make the selection soft by clicking on Selection——>Feather. This helps to avoid sharp contrast on the edges of the selected parts which will make it obvious that the picture was edited. Soften the selection to 5px.
Now it’s time to brighten the teeth selected. Click on Tools—->Colors —-> Hue —–> Saturation. Adjust the variables of color, Hue and Saturation. Don’t over do any of the variables in a way that will make the photo unnatural. Different photos will use different variables.
Source: Gimp tutorials for pictures

