In the age of digital connectivity, Apple has made it effortless to seamlessly share photos across all your devices using your Apple ID.
While this feature is undoubtedly convenient for many users, it might not be suitable for everyone. If you value your privacy and want to stop sharing your iPhone photos with other Apple devices linked to your Apple ID, we’ve got you covered.
In this article, we will walk you through the steps to regain control over your photo library and prevent automatic photo syncing across devices.
Watch: How To Remove Someone as Admin In WhatsApp Group
Stop Sharing iPhone Photos With Devices Using Your Apple ID
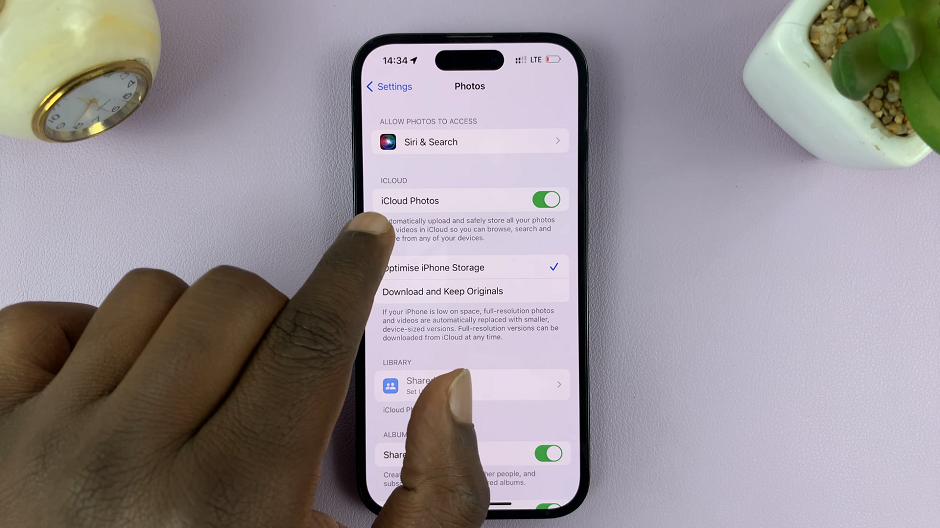
To make sure your photos stop syncing across all your devices with your Apple ID, you need to disable iCloud Photos. To disable iCloud Photos, simply go to Settings on your iPhone.
Scroll through the list and find Photos and tap on it. Locate the iCloud Photos option and toggle off the switch.

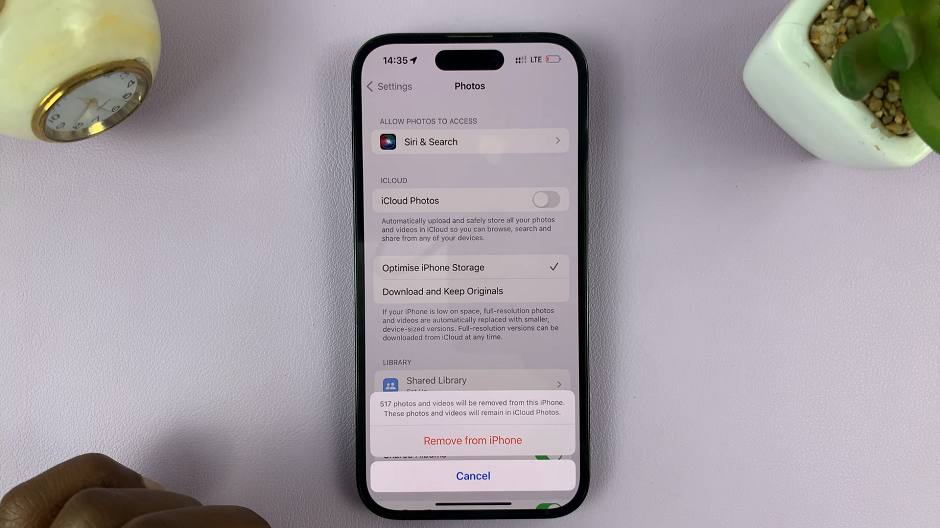
Select the Remove from iPhone option and confirm your choice by tapping on Remove from iPhone.

With the iCloud sync feature off, every new photo you take henceforth, will be stored on your device back up. But, these photos will not be synced across all other devices with which you have logged into your Apple ID.
Photo Backup On Your iPhone
You shouldn’t worry about losing your photos and videos. So, to confirm that your photos are still on your device backup:
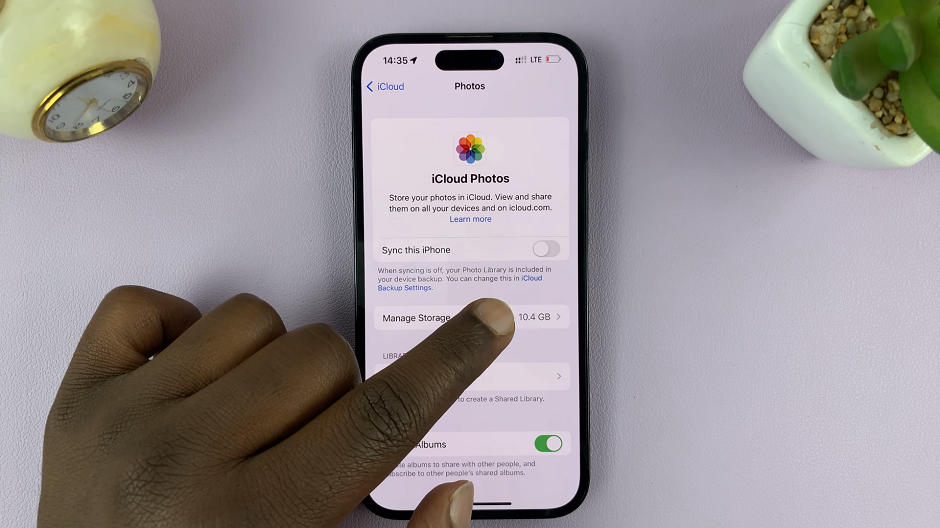
On your iPhone, go to Settings. Tap on your Apple ID at the top of the Settings screen and then select iCloud.
In the iCloud settings, select Photos. There will be a statement that reads When syncing is off, your Photo Library is included in your device backup, right beneath the Sync this iPhone option.

You can make sure that your photo library is included in your device backup in the iCloud Backup Settings.
Remember that stopping photo sharing across your Apple devices might affect the convenience of accessing your photos on multiple devices. However, for those who prioritize privacy and wish to manage their photo library separately on each device, following the above steps will give you the control you desire.
Read On: How To Send High Quality Photos via WhatsApp On iPhone

