The Samsung Galaxy Tab S9 and S9 Ultra have set the bar high when it comes to premium Android tablets. These sleek devices are powerhouses of technology, designed to cater to the needs of both productivity enthusiasts and creative minds.
Central to their utility is the S Pen, a versatile stylus that goes beyond note-taking and drawing. With the S Pen, you can effortlessly capture screenshots of your tablet’s screen.
In this guide, we will walk you through the process of how to take partial screenshots with S Pen on Samsung Galaxy Tab S9 or S9 Ultra, allowing you to capture precisely what you need without the hassle of post-editing.
Watch: How To Merge Photos On Samsung Galaxy Tab S9
Take Partial Screenshots With S Pen On Samsung Galaxy Tab S9
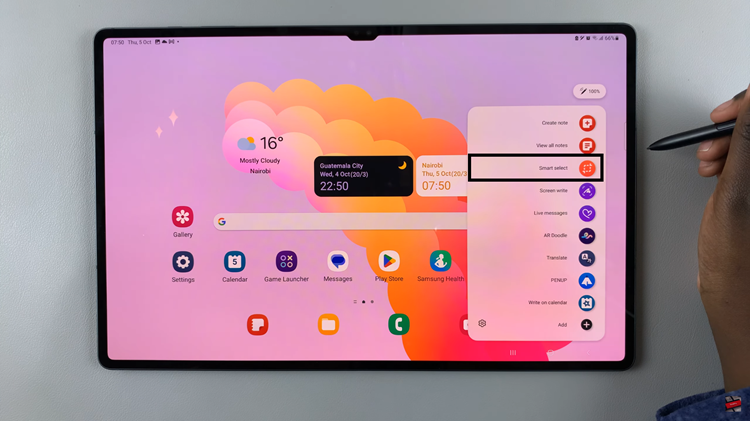
First, make sure your S Pen’s Air Command feature is activated. To do this, remove the S Pen from its slot, and you should see a menu appear on the screen. If it doesn’t appear, you can enable it by going to Settings > Advanced features > S Pen > Air Command, and toggle it on.
Now, find the Air Command icon on the home screen, usually located on the right-hand side of the screen. Tap on it. In the Air Command menu, tap on the “Smart Select” option. This feature allows you to capture specific areas of the screen.

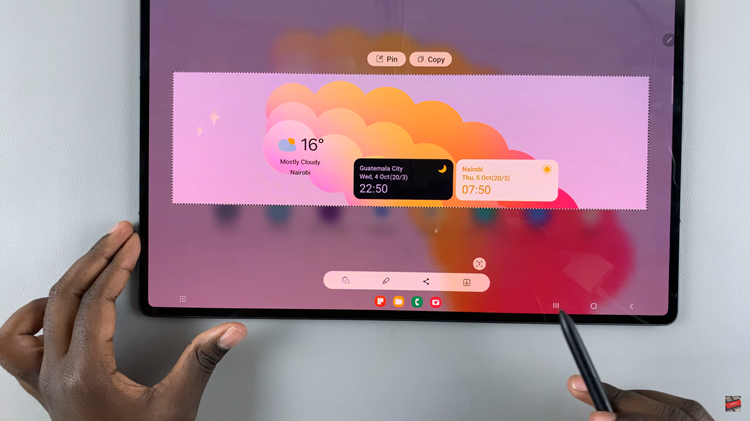
After selecting “Smart select,” you can choose between different shapes for your partial screenshot, such as a rectangle, oval, or even a freeform shape. Pick the one that suits your needs. Use the S Pen to draw the shape around the portion of the screen you want to capture.

Once you’ve drawn the shape, you’ll see the selected portion of the screen. From here, you can save the screenshot to your gallery, share it with others, or annotate it using the S Pen. After you’re done, make sure to save the screenshot to your desired location.
By following the steps outlined in this guide, you’ll be able to capture specific parts of your tablet’s screen with precision, whether it’s for work, personal use, or simply to share interesting content with others.

