Capturing memorable moments from your gaming adventures on the Nintendo Switch is made simple with its built-in screenshot feature. Whether you’re celebrating a hard-fought victory, capturing stunning visuals, or preserving hilarious in-game antics, knowing how to take screenshots ensures you can cherish and share these experiences with ease.
The Nintendo Switch offers ways for capturing screenshots; for example, using the dedicated Capture Button on the Joy-Con controllers or Pro Controller. This is a straightforward way to immortalize your gaming highlights, allowing you to revisit and share them whenever you want.
Here’s a simple guide on how to take and manage screenshots on your Nintendo Switch.
Watch: How To Transfer Screenshots From Nintendo Switch To Smartphone
Take Screenshots On Nintendo Switch
The Capture Button, positioned conveniently below the direction buttons on the left Joy-Con controller (for the original model) or on the Pro Controller, serves the specific function of capturing screenshots. This dedicated button ensures quick and easy access to preserving memorable moments during gameplay.
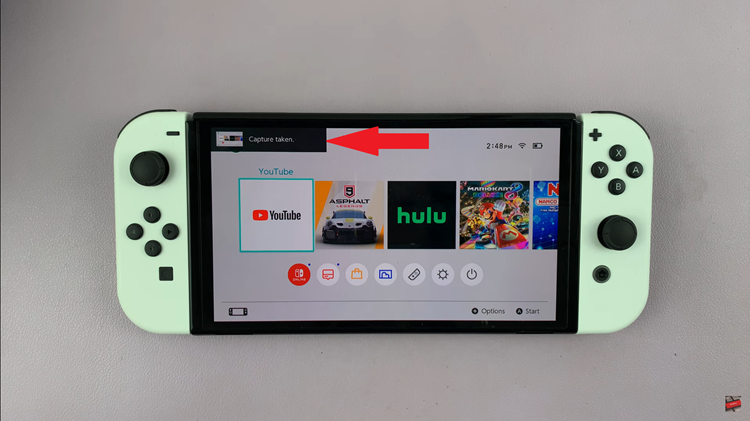
When you encounter a scene worth capturing, simply press the Capture Button once. This action triggers a distinctive sound effect and prompts a brief notification on the screen.

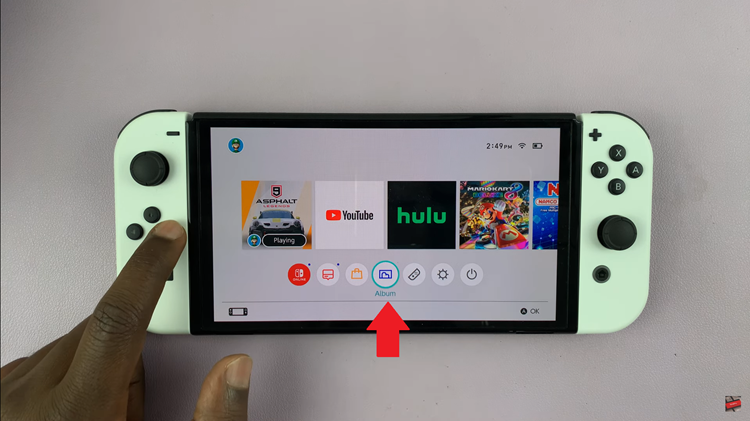
To review your captured screenshots and video clips, begin by navigating to the Switch’s Home Menu. From there, scroll down until you locate the “Album” icon, represented by a square smiley face. Opening the Album grants you access to all the screenshots and clips you’ve saved, allowing you to relive and share your favorite gaming moments effortlessly.

By following these simple steps, you can easily capture and cherish your favorite gaming moments on your Nintendo Switch. Whether you’re documenting achievements, funny incidents, or stunning visuals, taking screenshots enhances your gaming experience and allows you to share your adventures with others.

