The Nintendo Switch is a fantastic gaming console, but with the growing size of game files, you may find yourself running out of system memory space.
Fortunately, transferring your games from the system memory to an SD card is a straightforward process.
In this guide, we’ll walk you through the steps to help you free up space and manage your storage efficiently.
Why Transfer Games to an SD Card?
Before we dive into the steps, let’s quickly discuss why you might want to transfer games to an SD card:
Free Up System Memory: With limited built-in storage, transferring games to an SD card can help free up space for new downloads and updates.
Organize Your Games: Keeping games on an SD card can make it easier to manage and organize your game library.
Portability: SD cards can be easily swapped between different Nintendo Switch consoles, making it convenient if you own multiple devices.
Read: How To Connect Wireless Keyboard To Nintendo Switch
Transfer Nintendo Switch Games From System Memory To SD Card
First, ensure you have a compatible microSD card with enough capacity. The Nintendo Switch supports microSD, microSDHC, and microSDXC cards up to 2TB.
Next, turn off your Nintendo Switch and insert the microSD card into the slot at the back of the console, beneath the kickstand.
If this is the first time you’re using the SD card, you may need to format it. Go to System Settings —> System —> Formatting Options —> Format microSD Card. Remember, formatting will erase all data on the SD card, so ensure it’s backed up if necessary.
Turn on your console and ensure it’s connected to the internet. From the Home menu, navigate to System Settings (the gear icon).
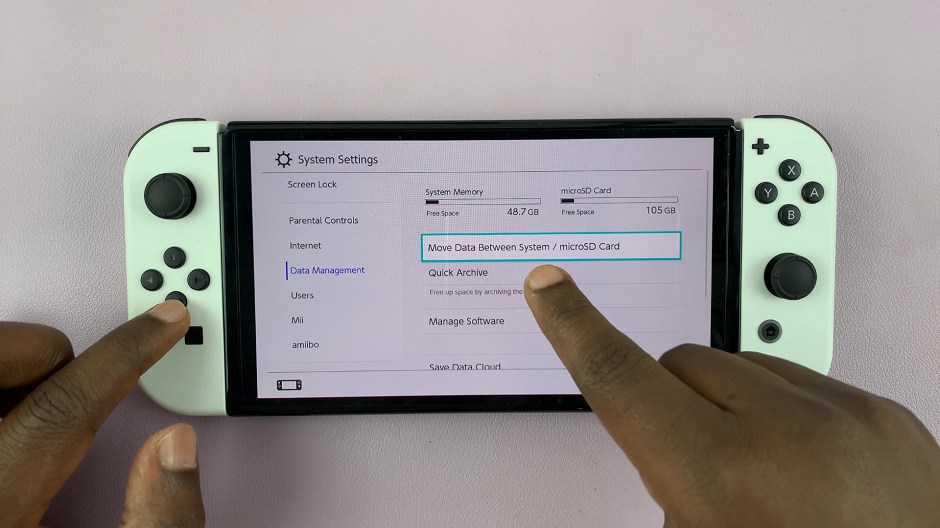
Scroll down through the left-hand side panel and select Data Management from the list of options. Choose Move Data Between System / microSD Card.
Select Move to microSD Card. This will display a list of games and applications currently stored in the system memory.
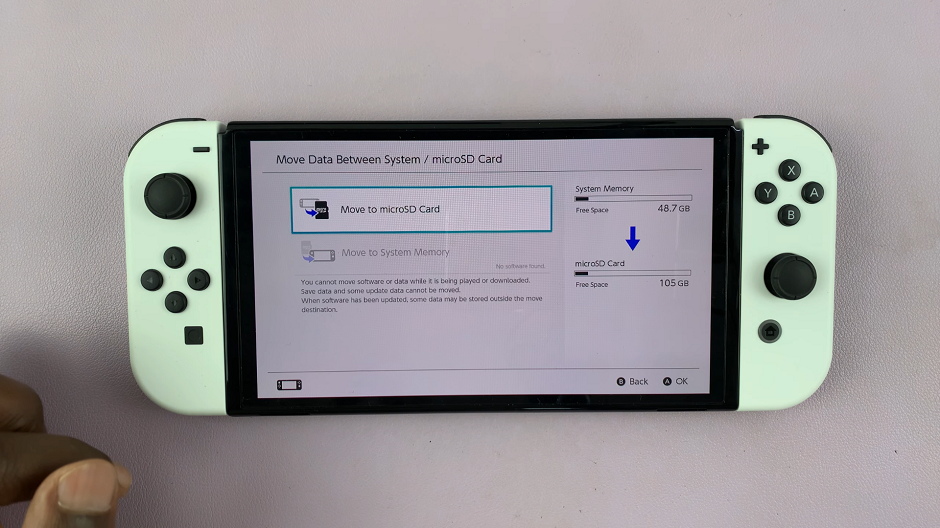
Select the games you want to move to the SD card. You can select multiple games at once. Once you’ve selected the games, tap or select Move Data.
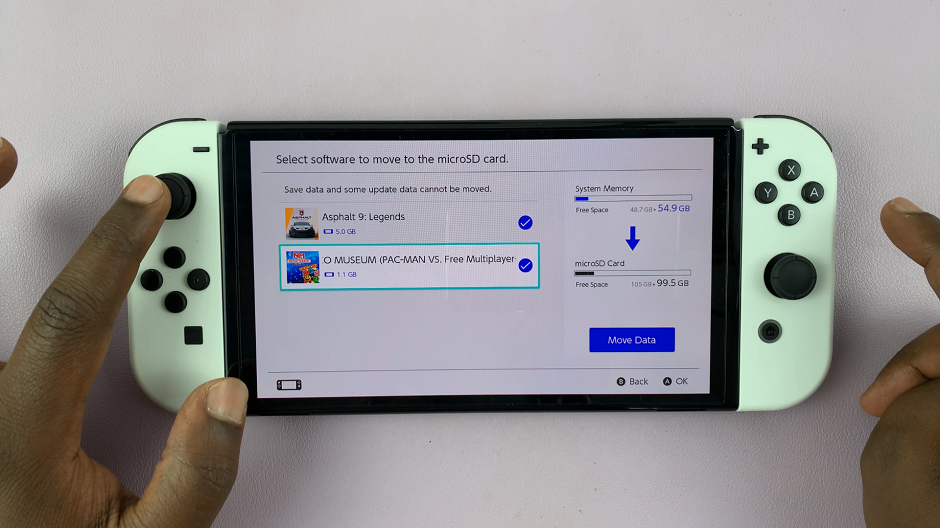
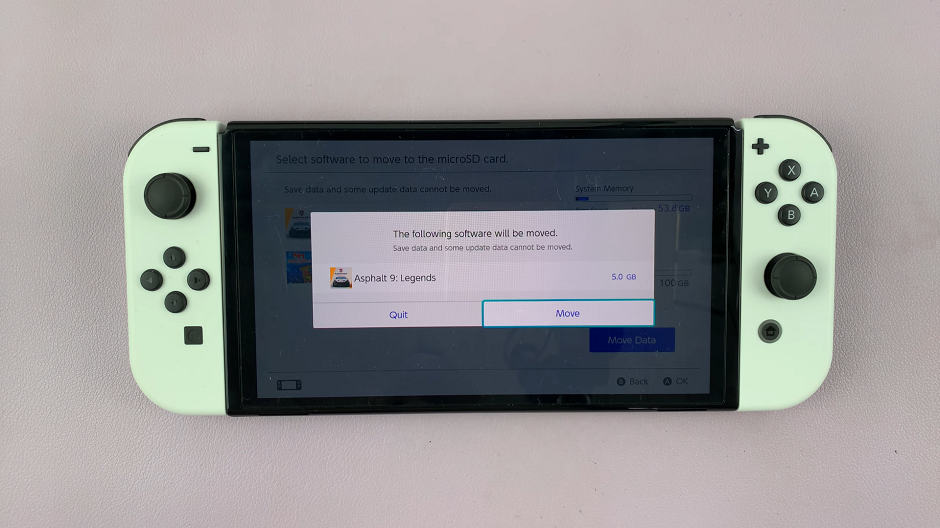
Confirm your choice by selecting Move to start the transfer. The process may take a few minutes, depending on the size of the games.
Managing Your Storage
After transferring your games, here are a few tips to help you manage your storage effectively:
Regularly Check Storage Space: Keep an eye on your system memory and SD card space by going to System Settings –> Data Management. This will help you plan and avoid running out of space.
Delete Unused Games: If you have games that you no longer play, consider deleting them from your system to free up space. You can always re-download them later from the Nintendo eShop.
Back Up Save Data: Nintendo Switch Online members can back up game save data to the cloud. This ensures that your progress is safe even if you need to delete and re-download games.
Transferring games from your Nintendo Switch’s system memory to an SD card is a simple yet effective way to manage your storage space. By following the steps outlined in this guide, you can ensure your console remains organized and ready for new adventures. Enjoy your gaming experience without worrying about running out of space!
Watch: How To Lock Private Browsing In Safari With Face ID On iPad
