The Nintendo Switch has revolutionized gaming with its blend of versatility and portability, allowing players to capture and preserve their favorite gaming moments effortlessly. Whether it’s capturing stunning screenshots or recording exhilarating gameplay, sharing these memories with friends or saving them for personal keepsakes is a key part of the Switch experience.
However, transferring these screenshots and screen recordings from your Nintendo Switch to your smartphone can initially seem daunting. Fortunately, there’s a to accomplish this task, each offering convenience and efficiency tailored to different preferences and needs.
In this guide, we’ll walk through the steps to transfer your screenshots or screen recordings from Nintendo Switch to your smartphone.
Watch: How To Turn OFF Dark Mode On Nintendo Switch
Transfer Screenshots & Recordings From Nintendo Switch To Smartphone
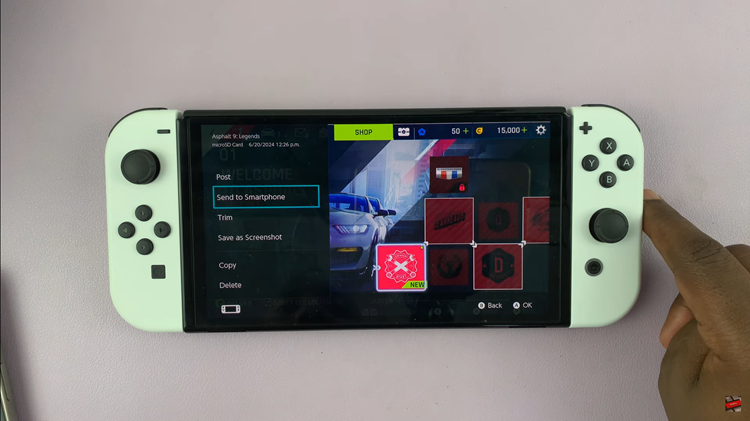
To access these files, start by navigating to the “Album” section located on the Switch’s home screen. Once there, select the specific screenshot or recording you wish to transfer.
At this point, press the “Sharing & Editing” button within the Album interface to reveal sharing options. Among these options, choose “Send To Smartphone,” which initiates the generation of a QR Code corresponding to the selected media file.

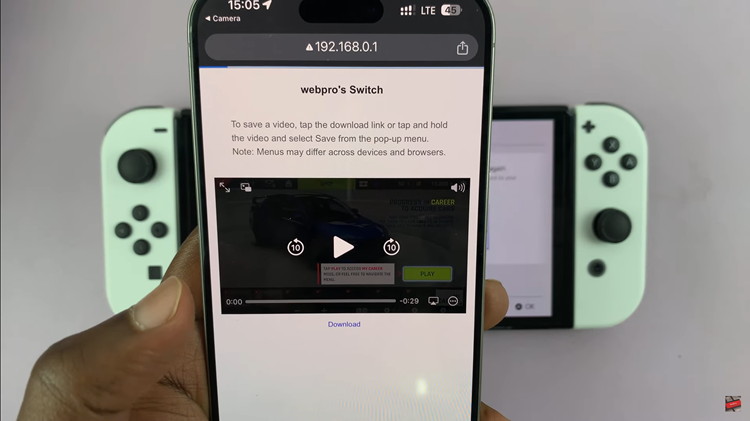
Subsequently, use a QR Code scanner app to scan the QR Code displayed on the Nintendo Switch screen. Follow the on-screen prompts that guide you through the process until you can see your media file on your smartphone.

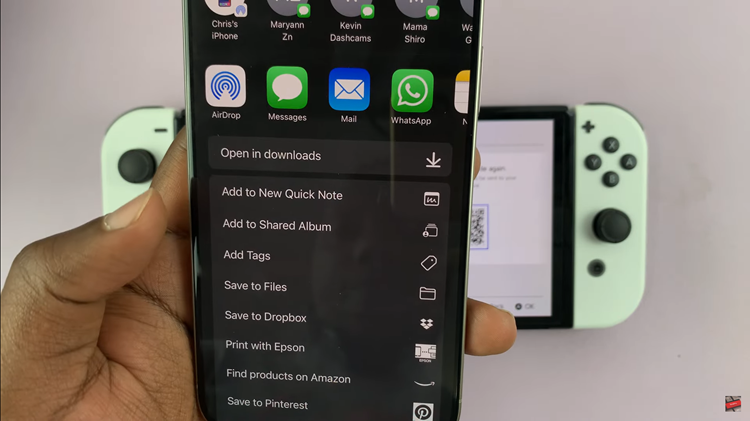
Once scanned, tap on the “Download” button to begin downloading the media file directly to your device. For iOS users, further actions like “Save To Files” or “Open In Downloads” can be performed by tapping on the downloaded media, allowing you to manage and view your files accordingly.

By following the steps above, you can seamlessly transfer media from your Nintendo Switch to your smartphone.

