Whether you’re an aspiring content creator, a social media enthusiast, or simply someone who wants to tidy up their videos before sharing them with friends and family, this article is for you.
With the convenience of editing videos directly on your iPhone, you can save time and effort by avoiding the need for complex software or transferring files to your computer.
In this article, we guide you on how to trim videos on your iPhone so that you can add your own creative twists to your videos.
Also Read: How To Enable Assistive Touch On Screen Button On iPhone
How To Trim Videos On iPhone
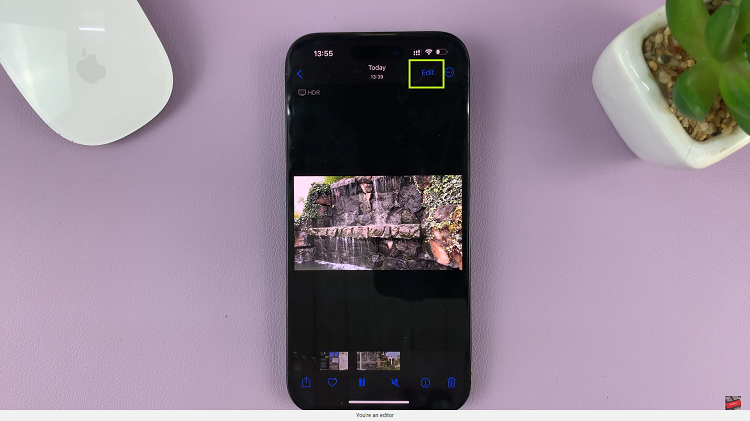
To start, open the “Photos” app on your iPhone and locate the video you want to edit. Tap on the “Edit” and you’ll be presented with a range of editing options.

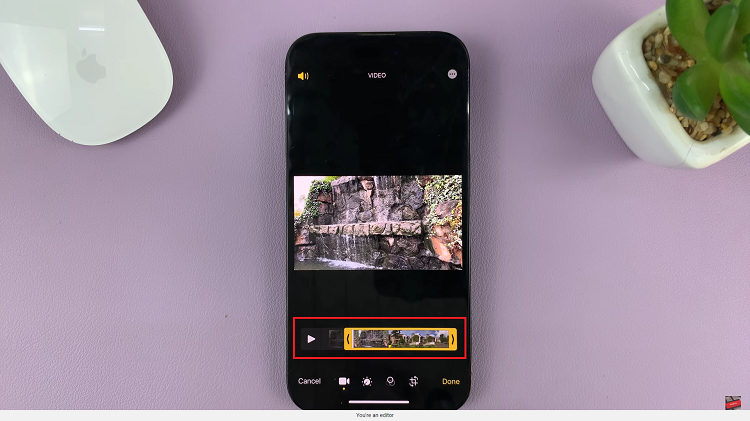
Using the slider at the bottom of the screen, drag the arrows that appear at the beginning and end of the timeline. The slider will help you trim away any unwanted footage, ensuring your final video is concise and impactful. At this point, choose the desired start and end point on the video.

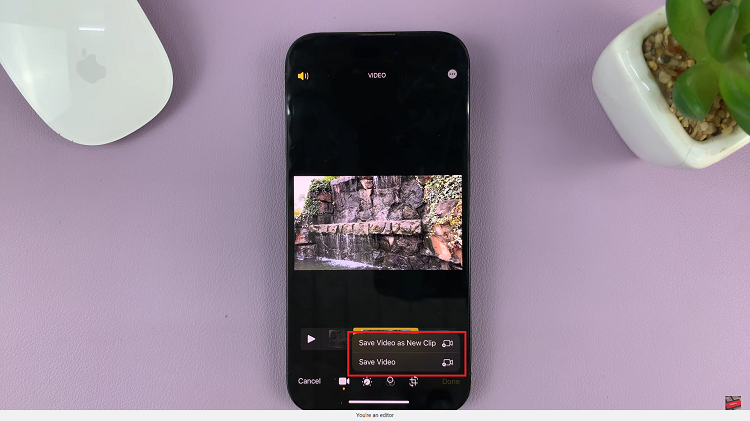
Once you’re satisfied with the changes made, tap on “Done” in the bottom right corner to save your trimmed video.
Finally, you can choose to either overwrite the original file by selecting the “Save Video” option or save it as a new video, by tapping on “Save Video as New Clip“.

And thats how to go about it. Its an easy and straightforward process. Let us know in the comment section below if you have any questions or suggestions. If you found the article helpful, please share it with your friends.

