AssistiveTouch on the iPad provides a virtual on-screen button and shortcuts for various functions, enhancing accessibility for users. While this feature is incredibly useful for many, there are times when you might want to disable it.
Whether you’re no longer in need of its assistance or simply prefer a cleaner interface, turning off AssistiveTouch is a straightforward process that allows you to customize your iPad experience to suit your preferences.
Here’s a step-by-step guide to turn off Assistive Touch on your iPad, ensuring you can effortlessly manage your device’s accessibility settings.
Watch: How To Change Notification Appearance On iPad
Turn OFF Assistive Touch On iPad
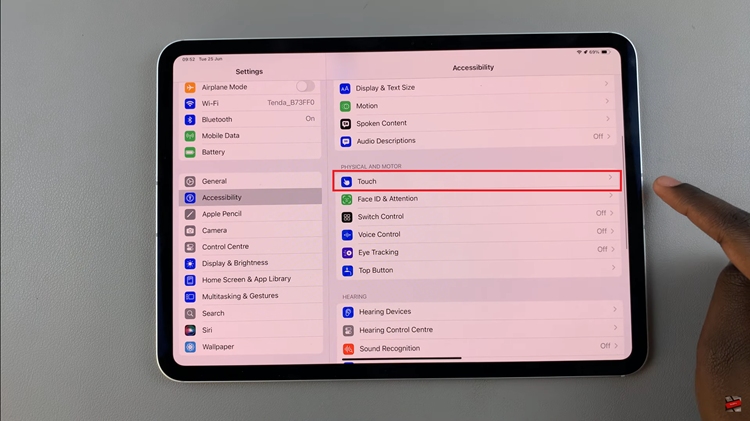
To disable AssistiveTouch on your iPad, start by locating and tapping on the “Settings” app, typically found on your home screen. From there, navigate through the Settings menu by scrolling down until you reach and select “Accessibility.” This section houses various accessibility features tailored to your iPad’s usability.
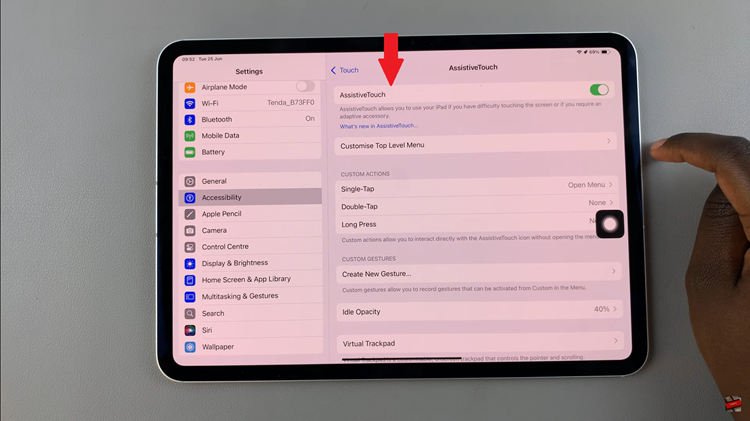
Once inside the Accessibility menu, locate and tap on the “Touch” option. This will grant you access to settings related to touch functionality. Within the Touch menu, you’ll find the “AssistiveTouch” option listed prominently at the top. Tap on it to open the AssistiveTouch settings.

Inside the AssistiveTouch settings, you’ll encounter a toggle switch adjacent to the feature’s name. To disable AssistiveTouch, simply tap this switch. Upon deactivation, the switch’s color will transition from green to grey, signaling that AssistiveTouch has been successfully turned off.

In conclusion, turning off AssistiveTouch on your iPad is a simple process that can be done through the Settings app or by using Siri. If you ever need to enable AssistiveTouch again, you can follow the same steps and toggle the switch back on.

