In today’s tech-driven world, staying connected is essential, but there are times when you may want to take control of your Android device’s Wi-Fi connections, especially when it comes to auto-connect features.
Whether you’re concerned about privacy, data usage, or simply want more control over your device, disabling Wi-Fi auto-connect is a straightforward process.
In this guide, we’ll walk you through the comprehensive step-by-step process on how to turn off Wi-Fi auto connect on your Android phone.
Also Read: How To Allow Calls From Unknown Numbers On Android
How To Turn OFF Wi-Fi Auto Connect On Android
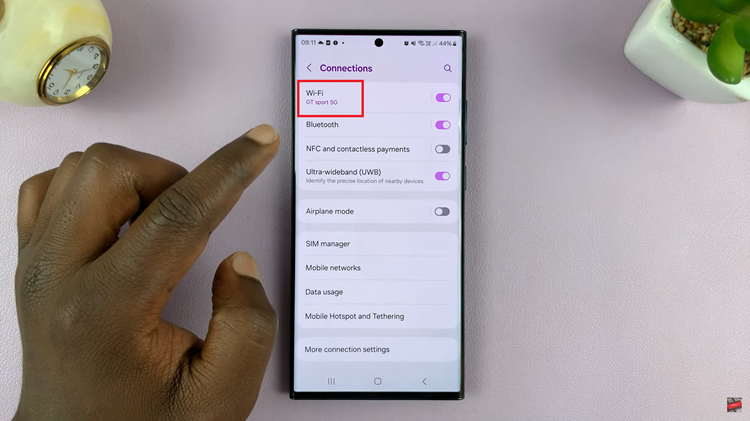
Begin by navigating to the Settings app. Look for either “Connections” or “Network & Internet” and select it to proceed. Once you are in the Connections or Network & Internet section, find and tap on the “Wi-Fi” option. This will take you to the Wi-Fi settings page, where you can manage your wireless network connections.
Now, you’ll want to identify the Wi-Fi network for which you want to disable auto connect. Locate the network name in the list of available networks and tap on it. This will open the settings for that specific Wi-Fi connection.
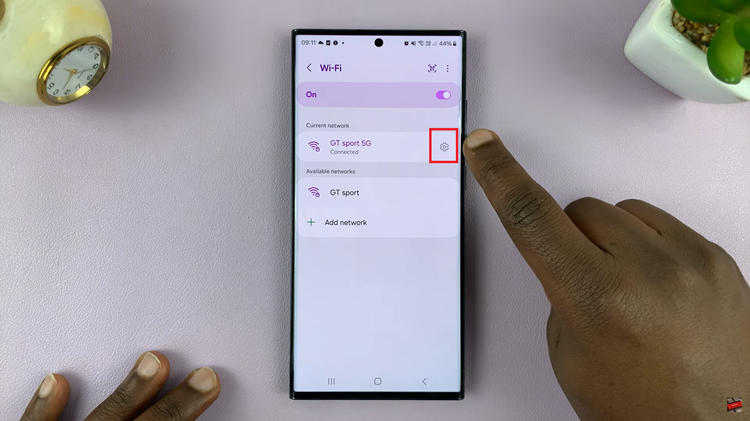
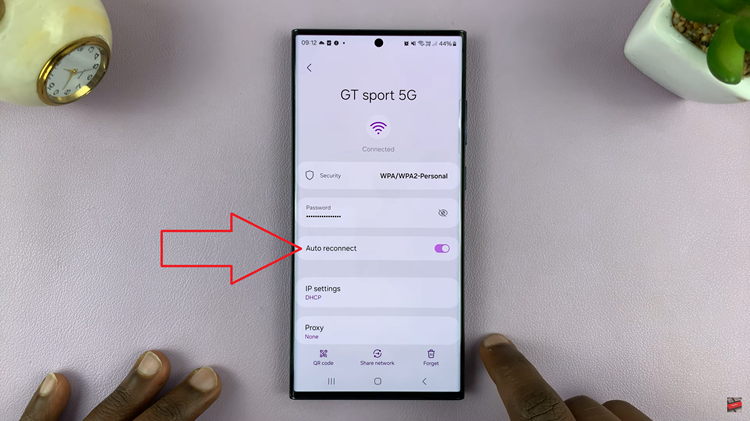
Within the Wi-Fi settings for the selected network, you should see various options related to that connection. Look for the option labeled “Auto reconnect” and tap on the toggle switch next to it. By toggling this option off, you are disabling the Wi-Fi auto connect feature for this particular network.
Whether you want to avoid connecting to public networks automatically or simply prefer a more manual approach to Wi-Fi connections, these steps empower you to customize your device’s network behavior. By following this guide, you can easily disable Wi-Fi auto connect on your Android device.
