In today’s digital age, location-based services are integral to the functionality of many apps and devices. Whether you’re navigating a new city, tracking your fitness activities, or finding nearby restaurants, your device’s ability to accurately determine your location enhances your overall experience.
Enabling Location Services on your M4 iPad Pro not only enhances the performance of navigation apps like Apple Maps and Google Maps but also improves the accuracy of weather forecasts, helps you locate your device if it’s lost, and allows various apps to provide more relevant content and services based on your location. For instance, social media apps can tag your posts with your current location, and photo apps can organize your images by where they were taken.
In this detailed guide, we will walk you through the steps to enable Location Services on your iPad.
Watch: How To Delete YouTube Downloads On iPad
Turn ON Location Services On iPad
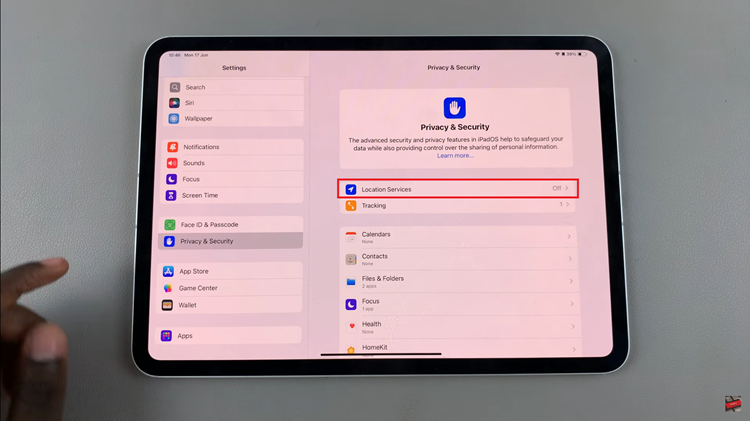
To begin, locate the Settings app on your M4 iPad Pro. Once you’ve opened the Settings app, scroll down through the menu until you reach the section labeled “Privacy & Security.” Tapping on this section will take you to the next step in the process.

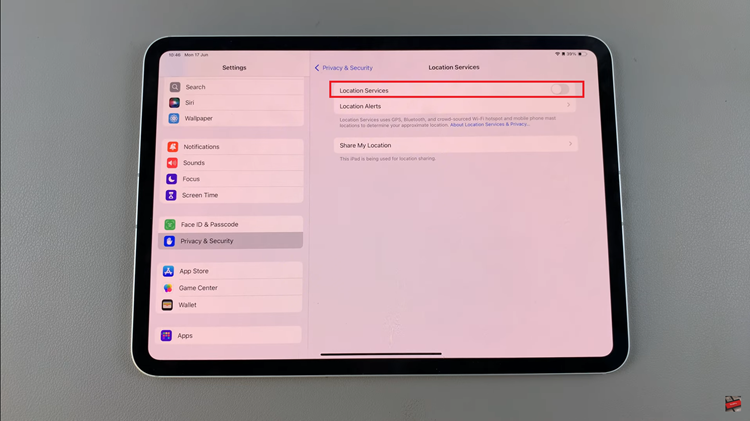
At this point, you’ll be presented with various options related to the privacy settings on your iPad Pro. Near the top of this list, you’ll find an option labeled “Location Services.” Tap on it to proceed. Now, you will see a switch at the top of the screen labeled “Location Services.”

To turn on Location Services for all apps on your device, simply toggle this switch to the ON position. This action will enable location tracking across your device, allowing apps and services to access your location as needed. Once you’ve made your desired changes, you can exit the Settings app.
By following these steps, you can easily turn on and manage Location Services on your M4 iPad Pro, ensuring that your apps and services function seamlessly and provide the best user experience.

