In an era dominated by the need for constant connectivity, our smartphones have become indispensable tools for staying in touch, both socially and professionally.
However, there are moments when accessing a Wi-Fi network is not an option, leading us to explore alternative ways to stay connected. One such solution is the Mobile Hotspot feature.
In this guide, we’ll walk you through the comprehensive step-by-step process on how to turn on mobile hotspot on your Android (Google Pixel).
Also Read: How To Change Screen Timeout Period On Android (Google Pixel)
How To Turn ON Mobile Hotspot On Android (Google Pixel)
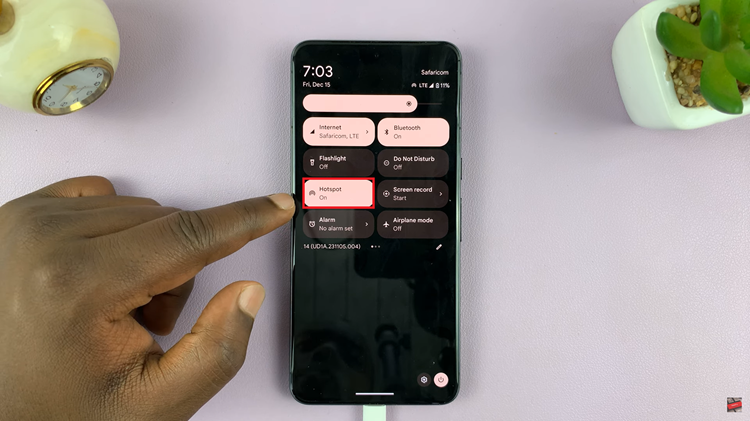
The quickest way to enable your Mobile Hotspot on a Google Pixel is through the Quick Settings menu. To access Quick Settings, swipe down from the top of your screen. Look for the “Mobile Hotspot” icon – it typically resembles a phone with signal waves. Tap on it to turn on the Mobile Hotspot feature.
Alternatively, you can activate Mobile Hotspot through the Settings app. Open the Settings app on your Google Pixel. Scroll down and select “Network and Internet.” Once you are in the “Network and Internet” section, locate and tap on “Mobile Hotspot and Tethering.” Here, you’ll find various options related to sharing your phone’s internet connection.
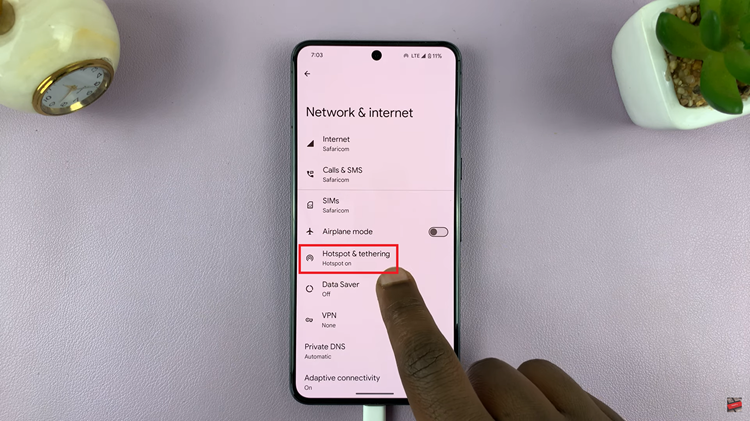
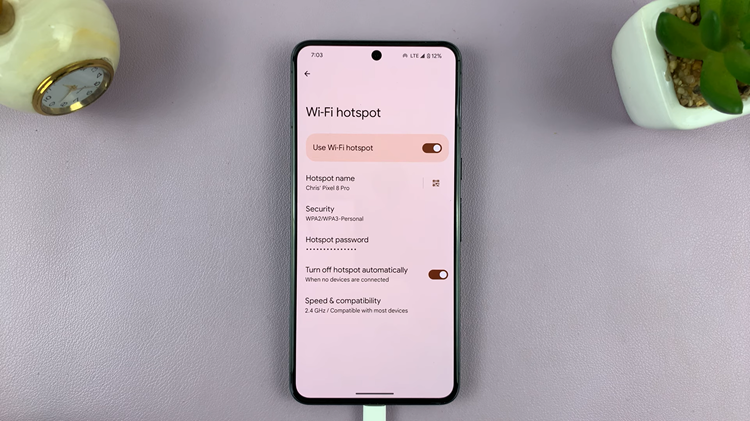
Under the “Mobile Hotspot and Tethering” menu, tap on “Hotspot.” You’ll then see a toggle button – tap on it to turn on your Mobile Hotspot.
For added security and personalization, you can customize your Mobile Hotspot. After turning it on, you’ll see options to edit the name and password of your hotspot. Tap on these options to set a unique name and password that suit your preferences.
Enabling Mobile Hotspot on your Google Pixel is a straightforward process, offering you the flexibility to share your device’s internet connection with other devices. Whether you’re in a coffee shop, on a road trip, or simply need an internet connection on the fly, these simple steps will have your Mobile Hotspot up and running in no time.
