In today’s interconnected world, communication is not just about sending messages but also knowing when they have been received and read. Apple’s iPad offers a convenient feature known as read receipts, which allows users to acknowledge when their messages have been seen by recipients.
Whether you’re using iMessage or SMS, enabling read receipts can provide transparency and improve communication efficiency. Here’s a guide on how to activate read receipts for messages on your iPad, ensuring you stay informed and enhance your messaging experience.
Let’s explore how you can set this up step-by-step to make the most of your messaging capabilities on iPad.
Watch: How To Remove Location From Photos On iPad
Turn ON Read Receipts For Messages On iPad
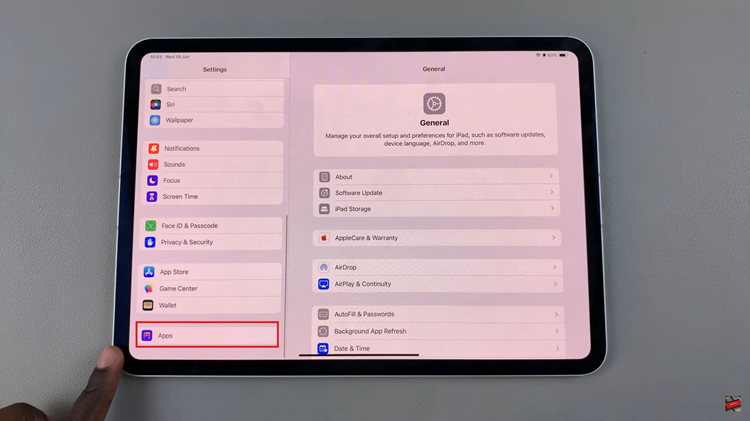
To begin configuring your iPad to send read receipts, start by accessing the Settings app icon on your iPad’s home screen. Once you’ve tapped on Settings, proceed by scrolling down to locate and select “Apps“.

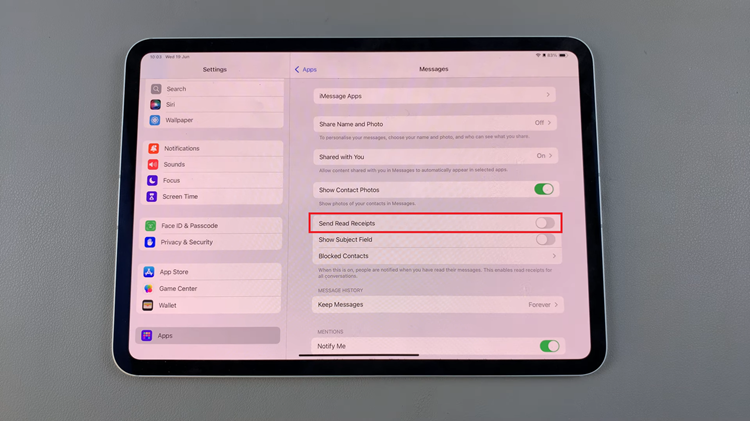
At this point, continue scrolling until you find and tap on “Messages” among the listed applications installed on your device. At this point, navigate through the options until you locate the “Send Read Receipts” feature. To activate this feature, simply toggle the switch to the ON position.

By following these straightforward steps, you can enable read receipts on your iPad. This feature enhances communication by providing clarity on message delivery and acknowledgment, ensuring smoother interactions with friends, family, and colleagues.

