If you’ve ever accidentally archived important emails in Gmail, you’re not alone. Fortunately, unarchiving these messages is a straightforward process that can help you quickly restore them to your inbox. To begin with, you’ll need to navigate through Gmail’s interface, where you’ll locate the archived emails using a specific search function. Once you’ve identified the emails you wish to recover, the next step involves moving them back to your inbox, making them readily accessible again.
Moreover, this process not only helps in retrieving individual emails but also ensures that your workflow remains uninterrupted. By following these steps, you can effortlessly manage your email organization and ensure that no important messages are left behind. Therefore, understanding how to unarchive emails is a valuable skill for maintaining an efficient and well-organized inbox.
Watch:How To Change App Icons On iPad
Unarchive Emails On Gmail
Open Gmail: Start by opening your Gmail account.
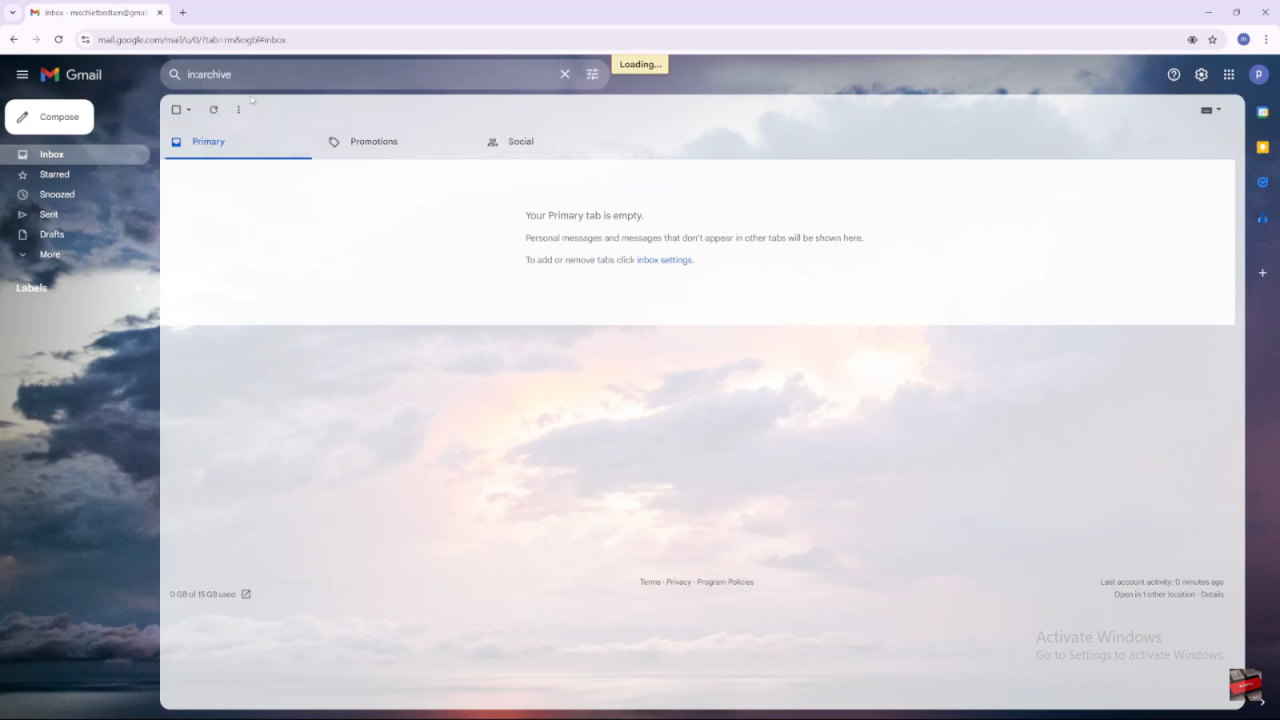
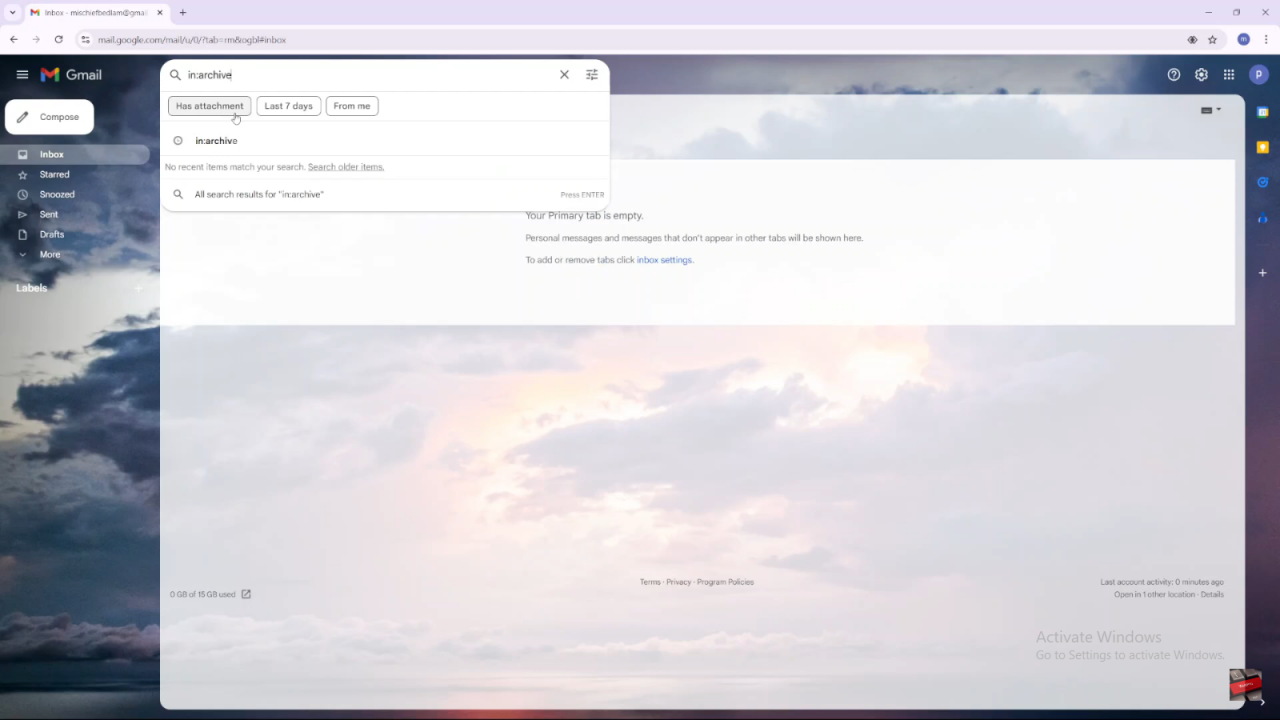
Search for Archived Emails:
- Use the search bar at the top of Gmail.
- Type
in:archiveand press Enter. This will display all your archived emails.
Select Emails to Unarchive:
- Choose the emails you want to unarchive.
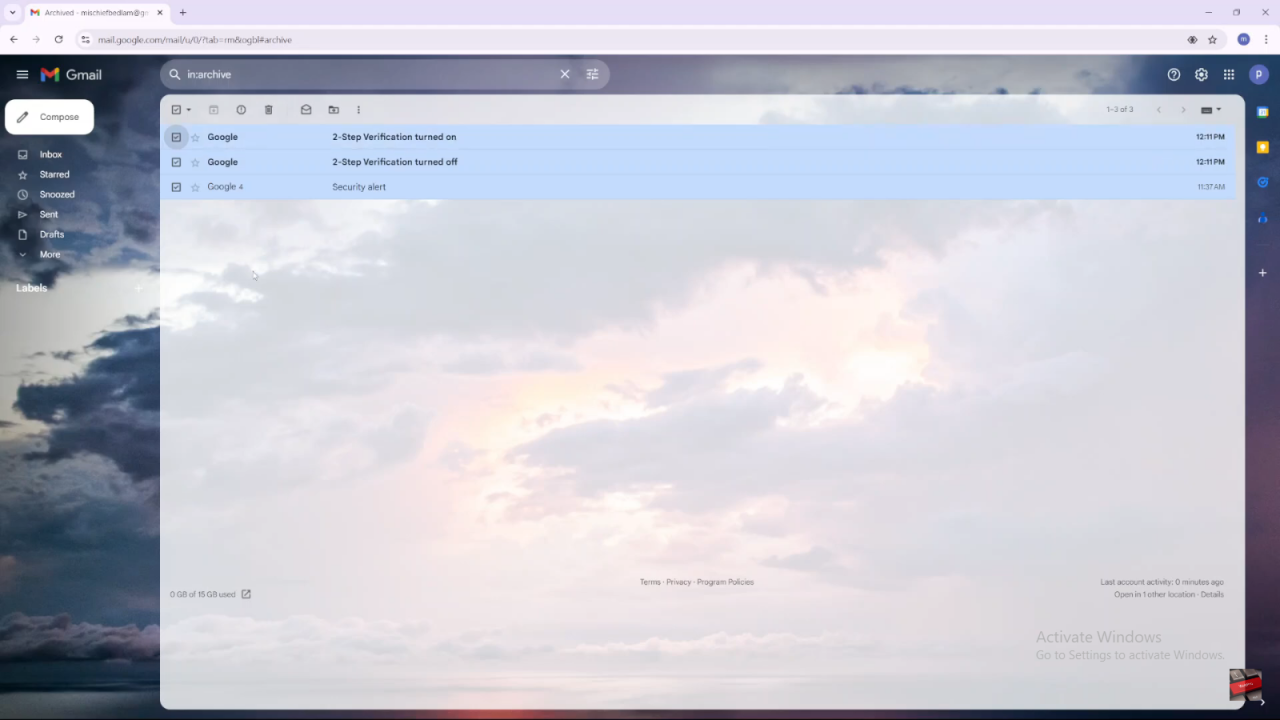
- If you want to select multiple emails at once, click the checkbox at the top to select all emails in the list.
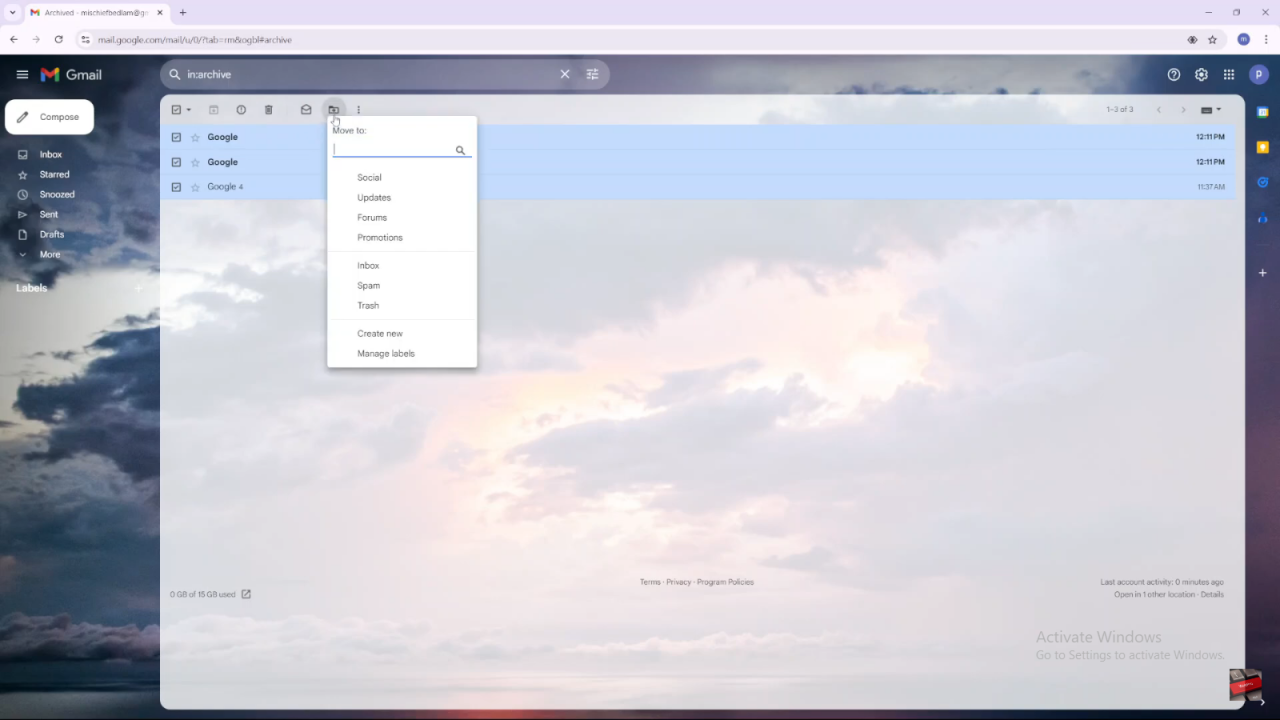
Move Emails to Inbox:
- Click on the Move to option (usually represented by a folder icon).
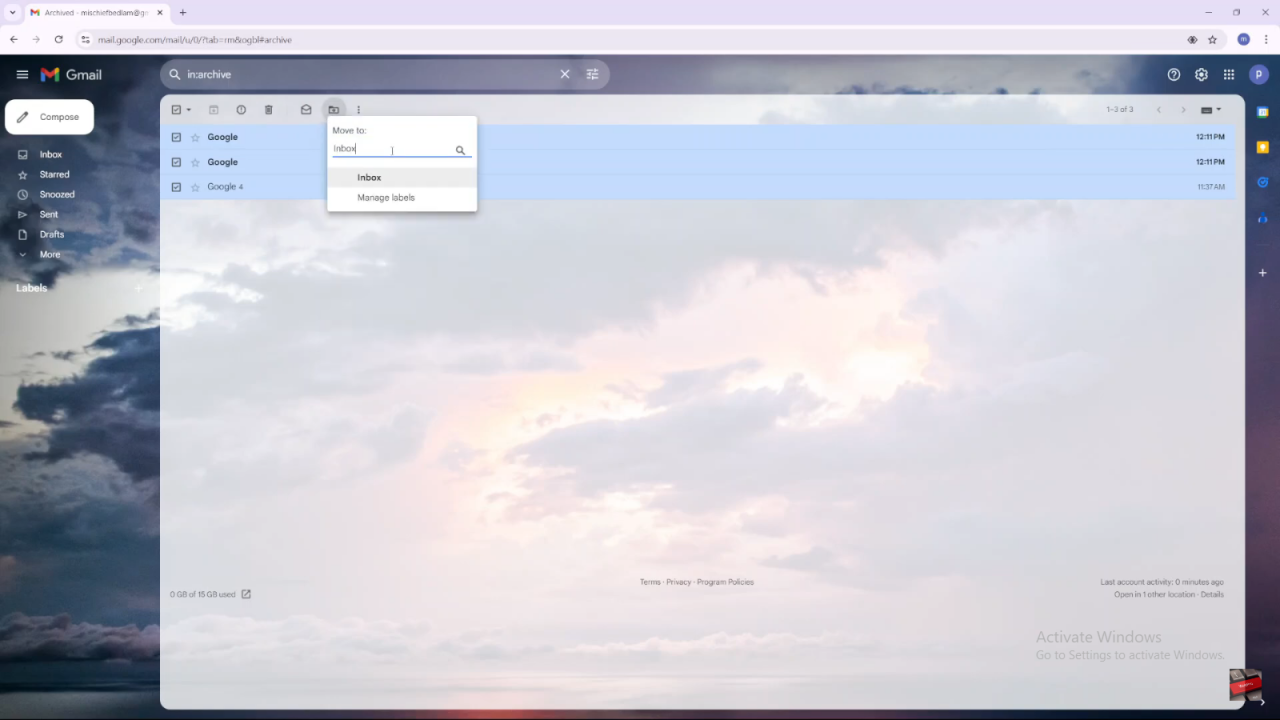
- Type
Inboxinto the search box and select Inbox from the dropdown menu.
Check Your Inbox:
- Go to your inbox to see that the selected emails have been unarchived and restored to your main email list.
