Keeping any browser up-to-date is essential for the latest features, security patches, functionality improvement, addressing vulnerabilities and optimal performance.
It is no different for Google Chrome. An update can greatly improve your interaction with the Chrome browser on your Mac or MacBook.
In this article, we’ll show you exactly how to update Google Chrome on your Mac / MacBook. Ensure you have the best browsing experience possible.
Watch: How To Connect JBL Tune 770 NC Headphones To Another Device
Update Google Chrome On Mac / MacBook
By default, Google Chrome automatically downloads available updates in the background, whenever you’re using the browser. This however, doesn’t necessarily mean that the update takes effect.
Every time you see the New Chrome Available option in the top-right corner of the browser, then it means that the update has been downloaded. To install the update, you need to restart your browser. Simply close the browser and open it again. You should no longer see the option in the top-right corner.
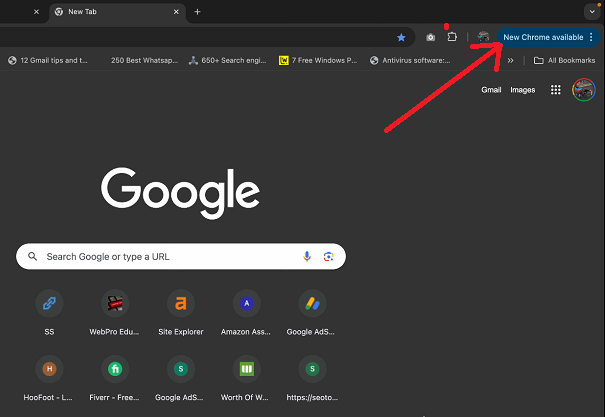
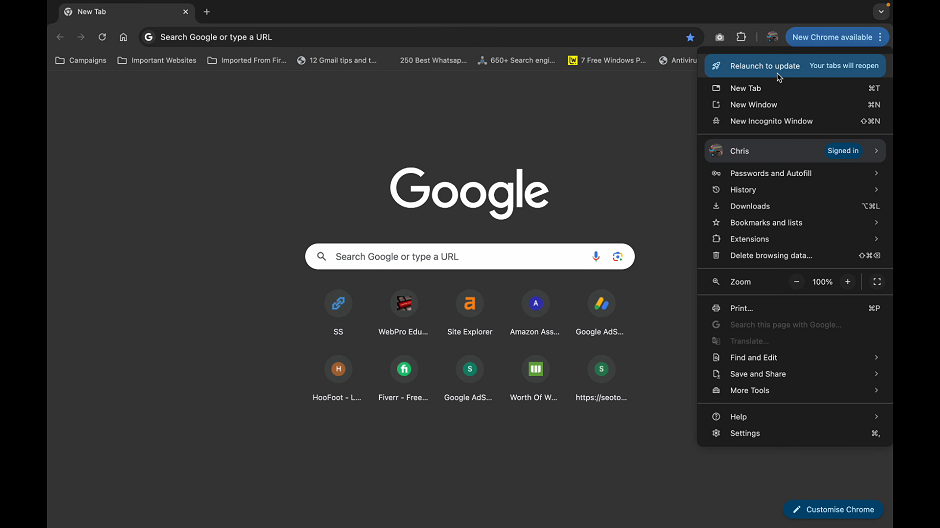
However, if upon the restart you still see the option, then you can simply click on it and select the Relaunch to Update option.
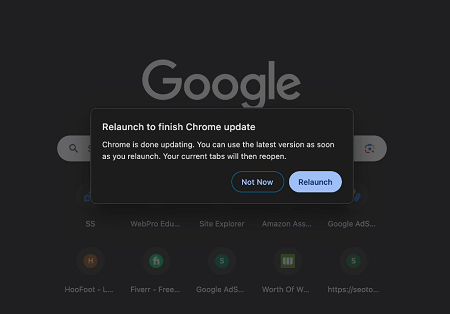
From the pop-up window, click on Relaunch to confirm. Chrome will close, then relaunch on it’s own, installing the update in the process. The New Chrome Available will no longer be available.
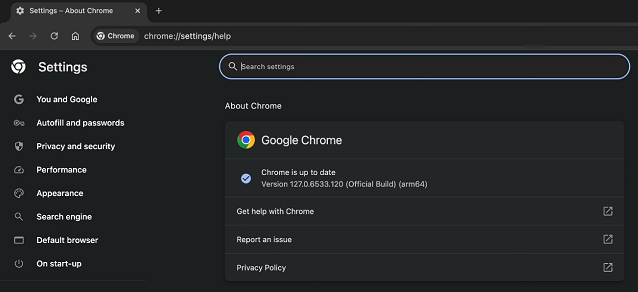
Afterwards, you can verify that the update has installed and that you’re running the latest Chrome version. Simply click on the three dots in the top-right corner and hover your mouse pointer over the Help option.
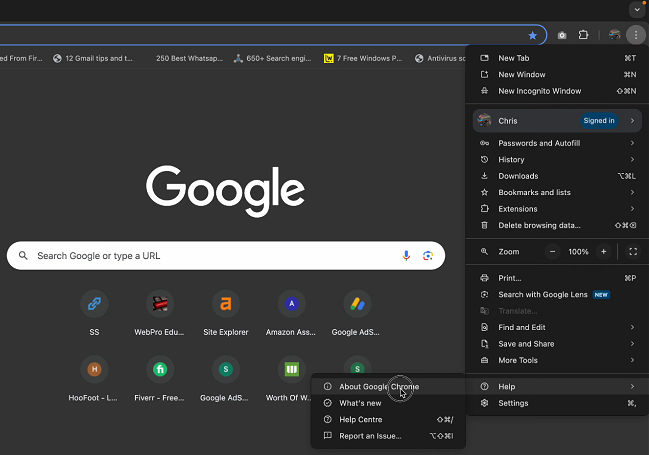
From the resulting options, select About Google Chrome. In this page, you should see Chrome Is Up to Date, if the installation was successful.
Read: How To Back Up Photos & Videos To Google Drive On Galaxy Z Fold 6

