Staying current with software updates is paramount to ensuring your Google Pixel tablet continues to deliver optimal performance, security, and the latest features.
Just as you wouldn’t skip a tune-up for your car, neglecting software updates for your tablet could lead to missed opportunities and potential vulnerabilities.
This article serves as your comprehensive guide, walking you through the process on how to update your Google Pixel tablet.
Also Read: How To Enable ‘Ask Every Time’ When Casting To Google Pixel Tablet
How To Update Google Pixel Tablet
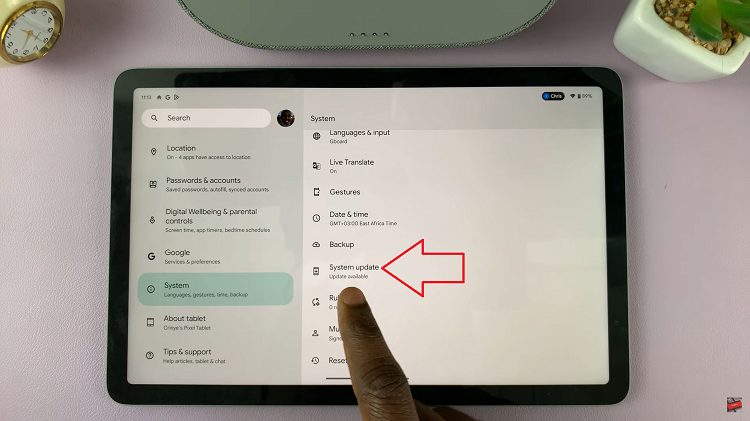
To start. open the “Settings” app on your Google Pixel tablet’s home screen. Once you’re in the Settings app, locate and tap on the “System” option from the list. Within the System settings, scroll down until you find the “System Updates” option.

Tapping on System Updates will take you to a new screen. Here, select the “Check for Updates” option. This action prompts your tablet to connect to Google’s servers and fetch any available updates for your device.
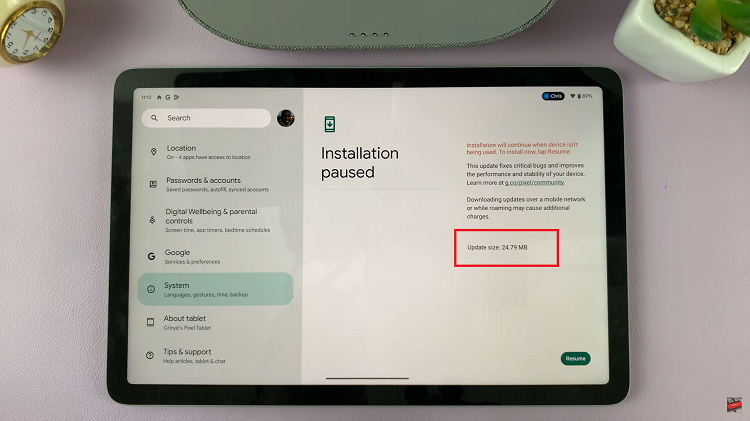
After you’ve initiated the check for updates, your tablet will display the available updates along with their sizes. This information helps you understand the scope of the update and the amount of data it will require to download.

Once you’ve reviewed the available updates, it’s time to begin the installation process. Tap on the “Install” button to start the update installation. Keep in mind that the installation process might take some time, so exercise patience while your tablet applies the changes.
During the installation process, your Google Pixel tablet will reboot and apply the updates. This can take several minutes, depending on the size and complexity of the update. It’s crucial not to interrupt the process to prevent any potential issues with your tablet’s software.

