In the dynamic world of technology, where innovation is a constant, keeping your devices up-to-date is pivotal to unlocking their full potential. Roku TV, renowned for its user-friendly interface and diverse streaming capabilities, thrives on regular software updates.
These updates not only enhance the overall performance of your Roku TV but also introduce new features and improvements that contribute to a richer viewing experience.
In this guide, we’ll walk you through the comprehensive step-by-step process on how to update Roku TV.
Also Read: How To Restart Roku TV
How To Update Roku TV
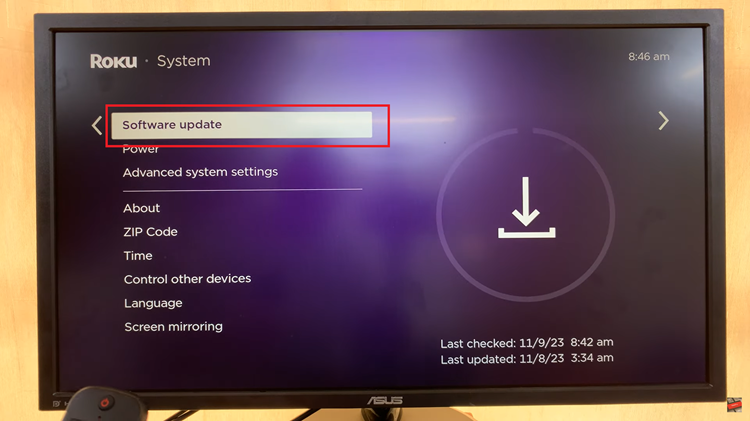
The first step in updating your Roku TV is to access the Settings menu. Within the Settings menu, scroll down and locate the “System” option. Highlight and select to proceed. Under the System settings, you will find various options. Look for “Software Update” and select it.

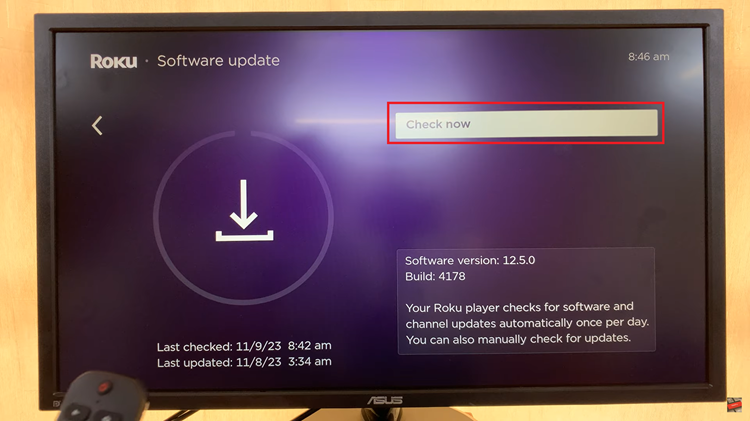
Once you are in the Software Update menu, you will find the option to “Check Now.” Select this option to prompt your Roku TV to search for the latest software updates.

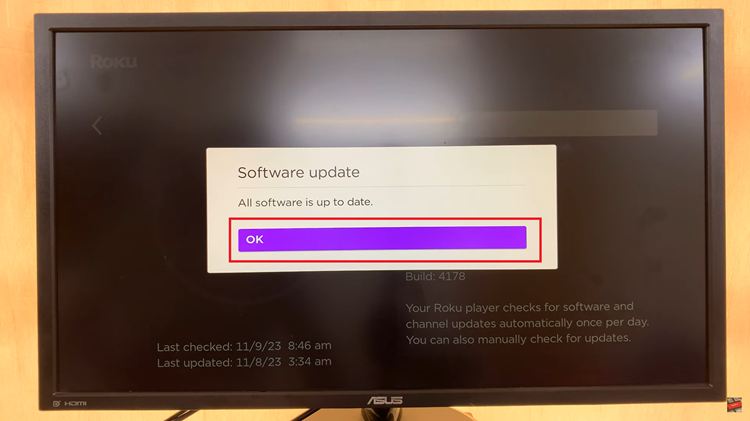
After selecting “Check Now,” your Roku TV will begin scanning for updates. If a new version is available, a prompt will appear on the screen, asking if you want to install the latest version. Highlight and select “OK” to initiate the download and installation process.

Once you’ve confirmed the installation, your Roku TV will start downloading and installing the latest software version. The time required for this process may vary depending on your internet connection speed and the size of the update. Be patient and allow the update to complete.

