Spotify, the world’s leading music streaming service, offers an array of features designed to enhance your listening pleasure. One such tool is the Equalizer, a powerful feature that enables users to personalize and fine-tune their audio experience.
The Equalizer enables users to modify the intensity of specific frequency ranges, such as bass, midrange, and treble, allowing for customization based on individual preferences or the characteristics of the audio output device.
Understanding and effectively using the Equalizer can significantly elevate the quality of sound, ensuring that your favorite tracks are heard exactly as you desire. Here’s a guide on how to make the most of the Equalizer on Spotify.
Watch: How To Force Stop Apps On Android
To Use Equalizer On Spotify
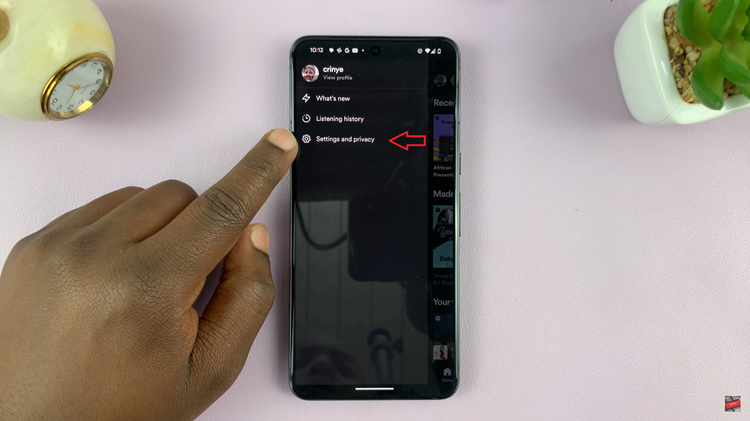
First, launch the Spotify mobile app on your device. Next, tap on the “Home” tab to access the main screen. Then, tap on the profile icon at the top left of the screen. From the menu that appears, select the “Settings & Privacy” option.
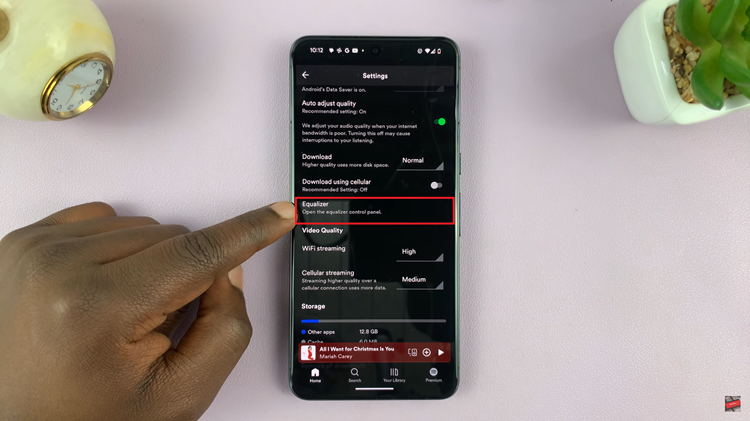
Within the settings menu, scroll down and find the “Equalizer” option. Tap on it. At this point, select ‘OK‘ from the prompt menu that appears.
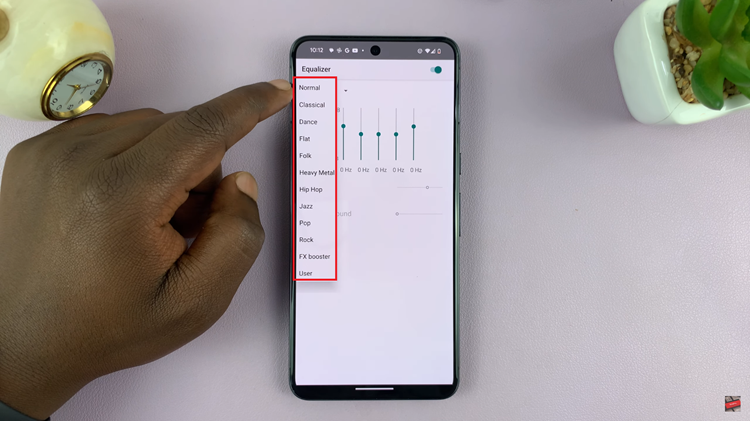
Now, tap the toggle next to Equalizer to enable it. Afterward, Spotify offers various presets like “Bass Booster,” “Vocal Booster,” and more. Experiment with these presets by selecting one that suits your music taste or genre preference. Finally, once you’ve set your preferred Equalizer settings, they will be saved within the app for all your future listening sessions.
In conclusion, the equalizer on Spotify is a valuable tool that enables users to customize their listening experience. Whether you prefer a booming bass, crisp vocals, or a balanced sound, the Equalizer empowers you to tailor the audio output to your liking.
