The Samsung Galaxy A24 is a popular and feature-rich smartphone known for its impressive performance and capabilities. However, like any electronic device, it may encounter occasional issues or slow down over time.
When you notice your Galaxy A24 isn’t running as smoothly as it used to, one effective troubleshooting method you can employ is wiping the cache partition. Clearing the cache partition can help improve the device’s speed and resolve performance-related problems without losing any of your personal data.
In this guide, we’ll walk you through the step-by-step process on how to wipe the cache partition on your Samsung Galaxy A24.
Also Read: How To Enable ‘Tap To Show’ AOD On Samsung Galaxy A24
How To Wipe Cache Partition On Samsung Galaxy A24
To begin the cache partition wiping process, you’ll need to put your Samsung Galaxy A24 into Recovery Mode. Turn off your Galaxy A24. Connect your device to a computer via a data cable. Press and hold the Volume Up button and the Power button simultaneously until you see the Samsung logo on the screen. Release both buttons, and your phone will boot into Recovery Mode.
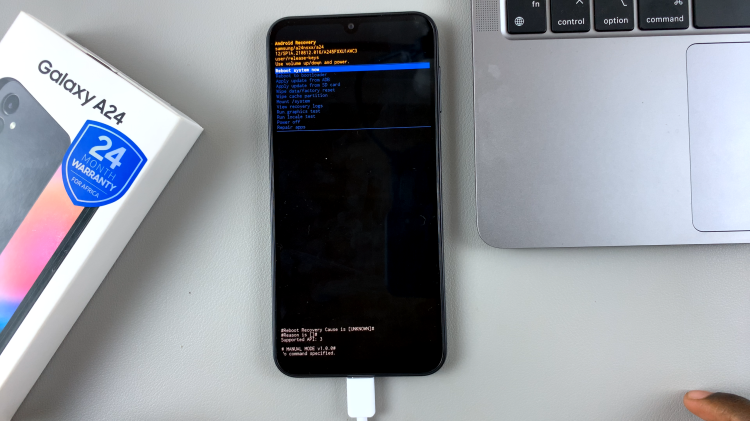
Once you’re in Recovery Mode, you’ll see a menu with several options. To navigate to the ‘Wipe Cache Partition‘ option, use the volume buttons on your device. Scroll down to it to highlight the option. With ‘Wipe Cache Partition‘ highlighted, press the Power button to select this option. You’ll then be prompted to confirm the action.
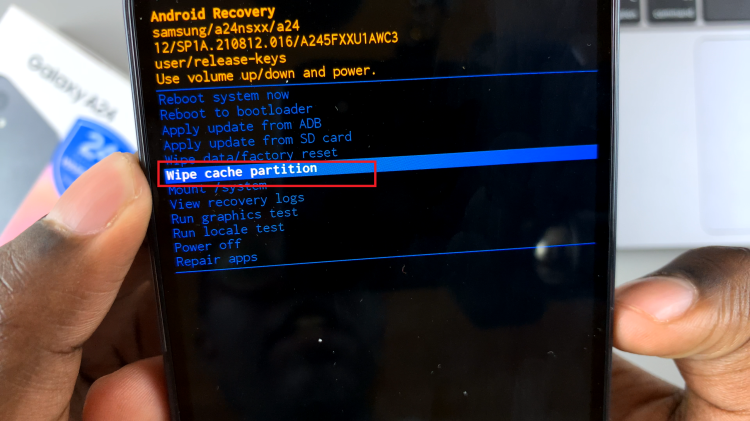
Confirming the cache partition wipe is the next crucial step. You’ll see a confirmation message, and you can use the volume buttons to highlight ‘Yes‘ and the Power button to select it. This action will initiate the cache partition wiping process.
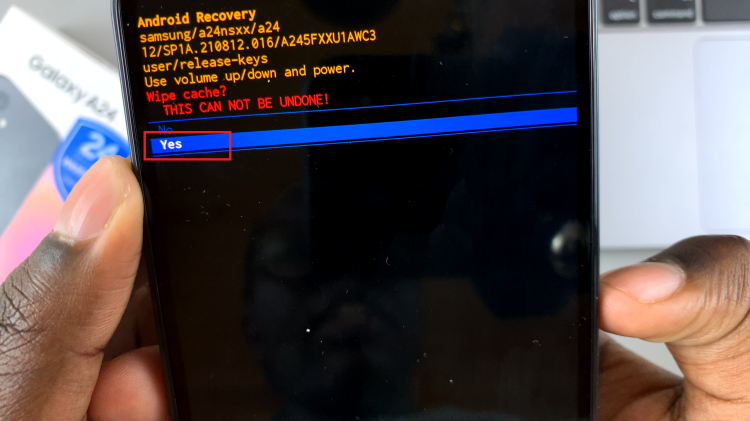
After the cache partition is wiped, you’ll be taken back to the main menu in Recovery Mode. Make sure ‘Reboot System Now‘ is highlighted, and then press the Power button to reboot your Samsung Galaxy A24.
